

In the previous article, I built a Tinderbox/Storyspace document containing the full text of Tennyson’s three poems about, and thirteen paintings depicting scenes from, two Arthurian legends: Elaine of Astolat, and the Lady of Shalott.
This article describes two options for producing a composite or ‘parallel’ text version of Tennyson’s The Lady of Shalott, and how to add a timeline. It takes that early document through to a test version for its final release.
Composite text
The two shorter poems, versions of The Lady of Shalott, would most easily be set in a two-column format so that you can compare them line by line. At present, that isn’t an option in Storyspace or Tinderbox; this may seem restrictive, but multi-column text would be very difficult to accommodate in resizeable windows on a wide range of display resolutions. It is bad enough in tightly-prescribed layouts such as PDF files.
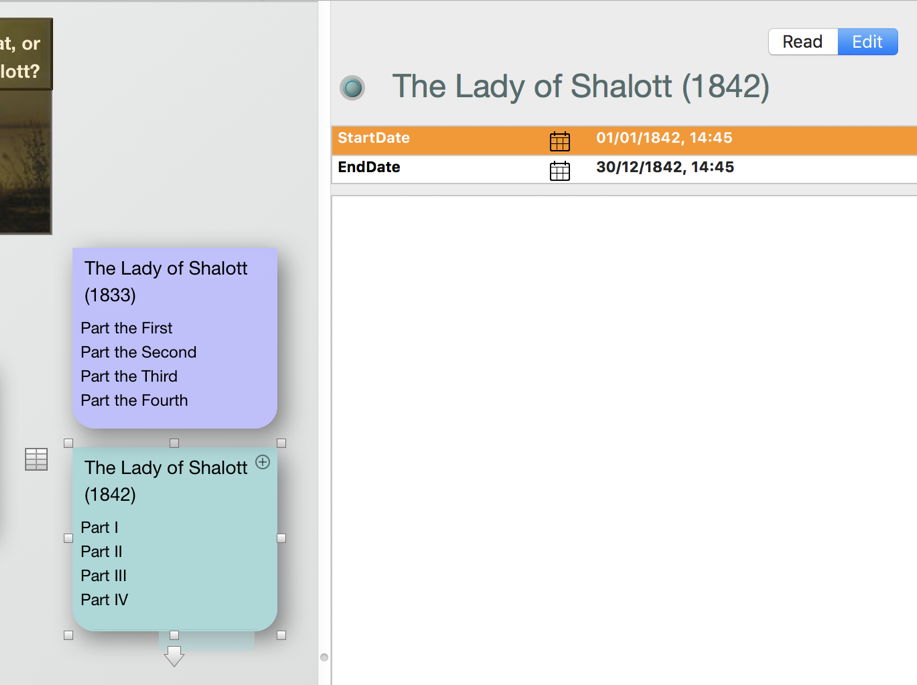
My plan is therefore to append the later (1842) version of each of the four sections of the poem after its earlier (1833) version.
There are two straightforward ways of doing this: using Composite Notes, which work better with Tinderbox, or using included text, which works better with Storyspace.
Recent versions of Storyspace will display composite notes properly, but cannot yet create them. I therefore open my document in Tinderbox, and the first step is to create aliases to each of the notes (writing spaces) which are to form the composites. This is easily done by selecting them, and using the Make Alias command in the contextual menu.
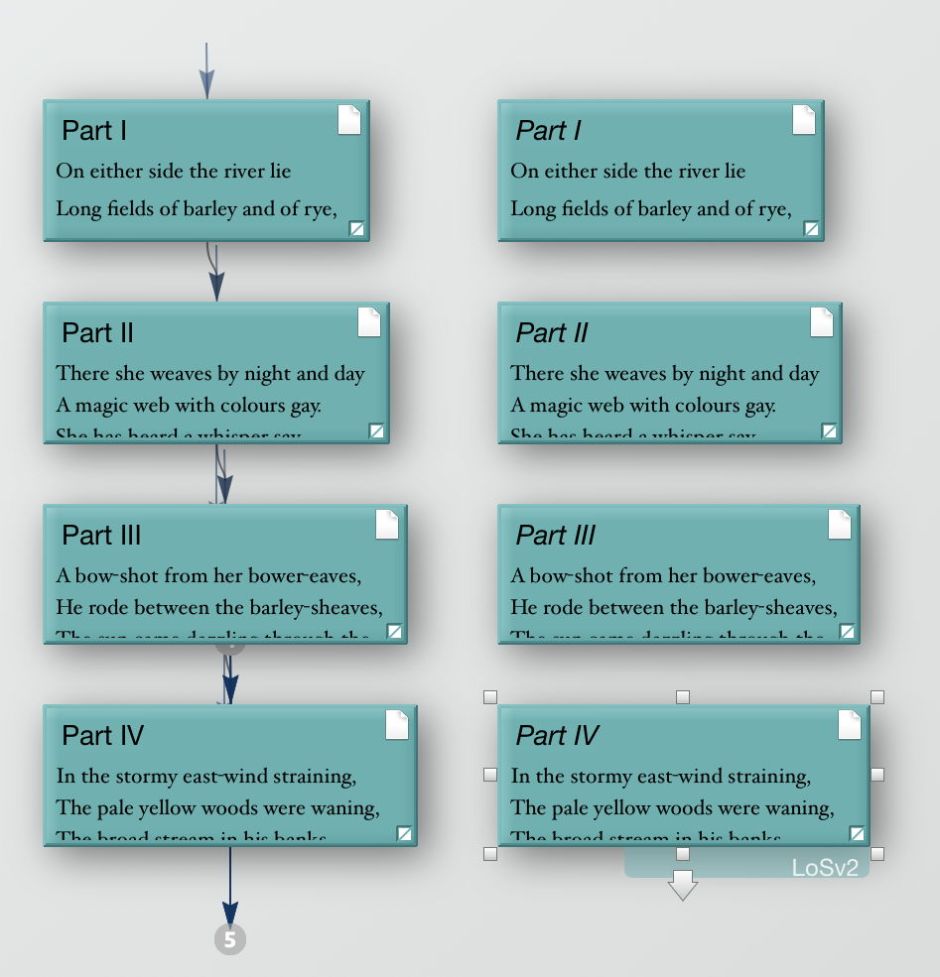
Aliases are shown with their Map view text in italics, and lose their links on creation. I then cut them from their current single-poem container, and paste them into a new container for the parallel text version.

There it is just a matter of dragging each until they touch, in the correct pairs, and form composite notes. Note that selecting a composite now shows the two versions, one after the other.

A common problem is that the order of one or more composites is reversed. To fix that, open the Outline view, and drag the aliases (inside their new container) into the correct order. This will then be reflected in the text content.
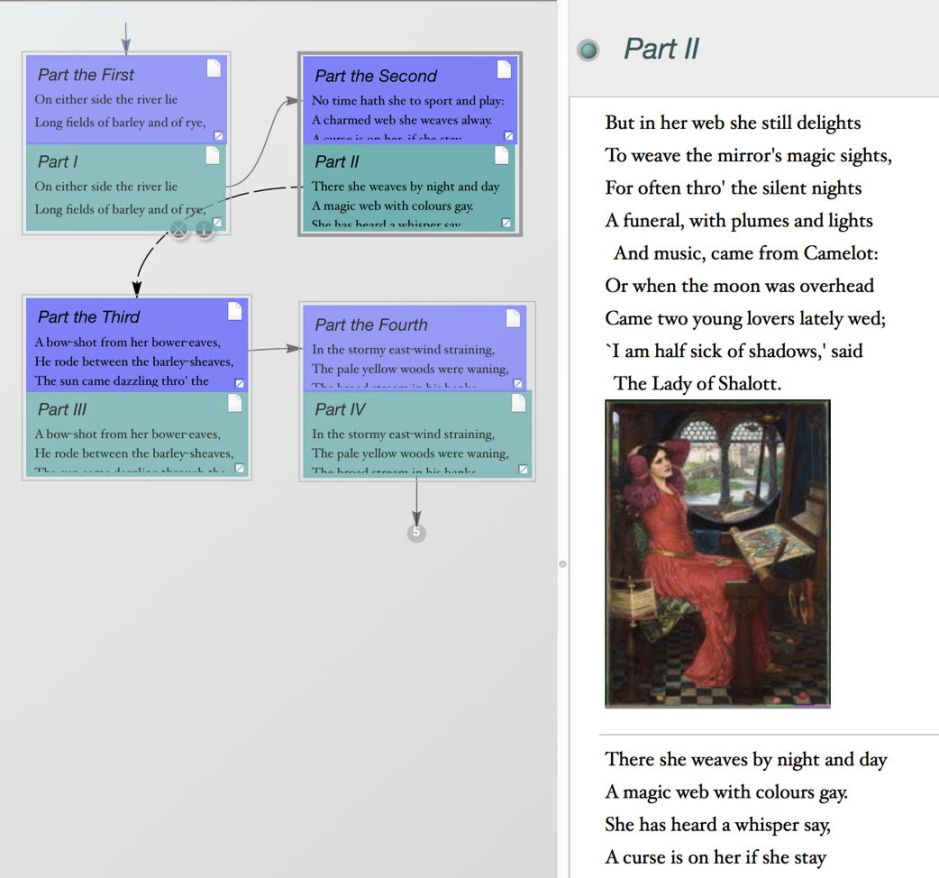
I then link them together using plain links. One of the advantages of using this approach is that the thumbnail image links still work perfectly correctly, although this then poses the task of adding another text link to the bottom of each of those painting notes to return the reader to this composite version of the text.
The snag with using composite notes is that, while Storyspace displays them properly, it can have problems moving to a composite using a link: instead of seeing the composite, this may take the reader to just one of the notes, which is kludgy. After testing this, I decided to use the alternative system, based on included text. I saved the document from Tinderbox, and opened it again in Storyspace.
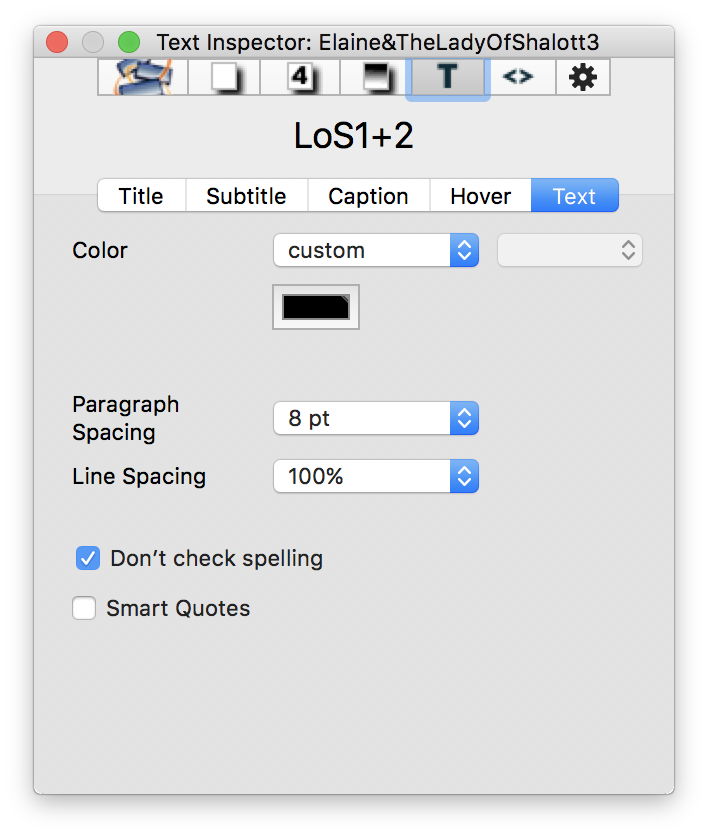
I had already, presciently, created a prototype ready for my composite texts. What I had not done was the important step of turning off Smart Quotes for that prototype. Because I am going to need plain double-quote characters in the include code, this will save me having to manually correct every one from its ‘smart’ form.
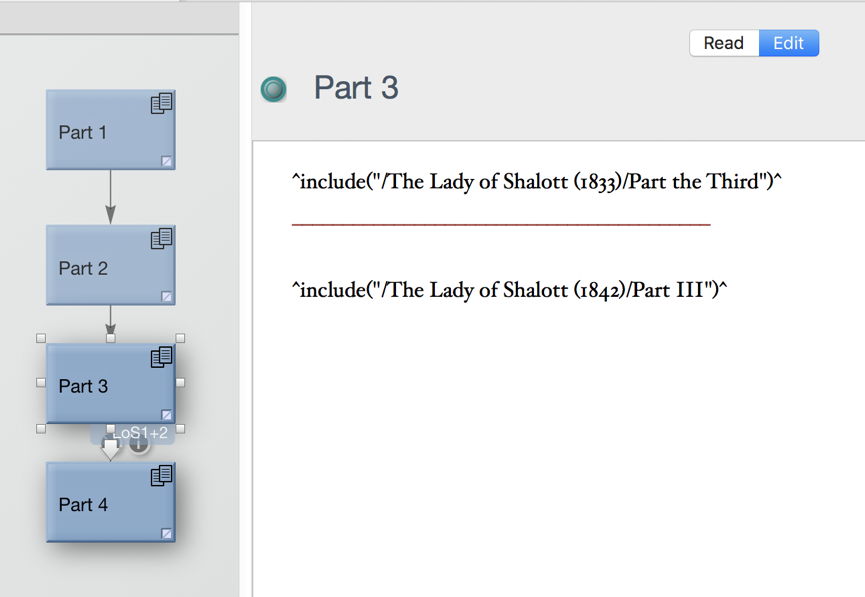
I then create the container for the composite writing spaces, and create each of them, set to my prototype. Their content is minimal: two include statements to bring in the text from the single-poem writing spaces, and a red line formed from underspace characters as a separator.

When I have got the details for the cited writing spaces correct, switching to Read mode brings across all the included content. The only disadvantage with using include is that, although the embedded thumbnail images are displayed, their links are not functional. Here, that makes life a bit simpler, as the paintings then don’t need return text links.
Timeline
I already have all the content that I need to make a timeline; I just haven’t yet added the event information to that content. I start by adding dates to the three poems. As their containers do not use a prototype, it is easiest to make $StartDate and $EndDate – the two attributes from the Events list which work with timelines – key for those three writing spaces, and there to insert the period of a year corresponding to the publication dates.
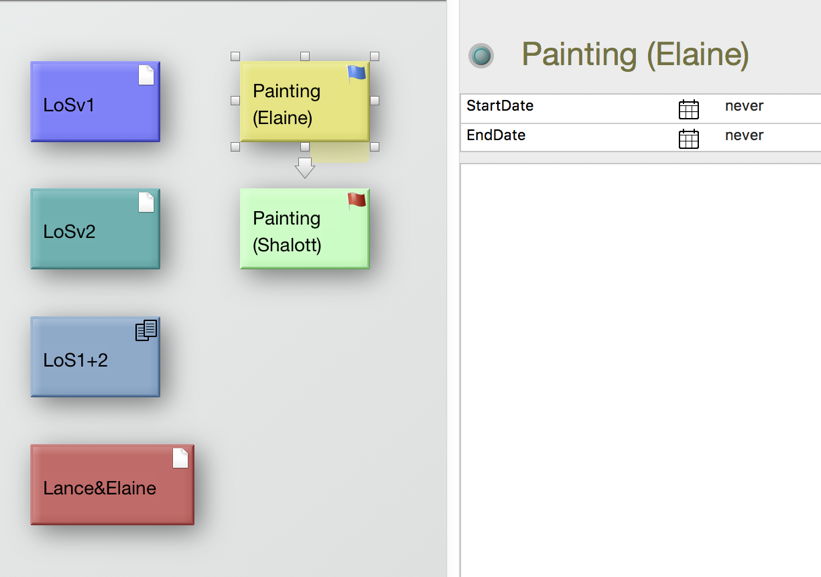
The other items which I want to appear on the timeline are, of course, the paintings. First I create a new prototype so that I can make clear visual distinction between paintings showing Elaine of Astolat and those showing the Lady of Shalott. I then make $StartDate and $EndDate key attributes for those two prototypes.
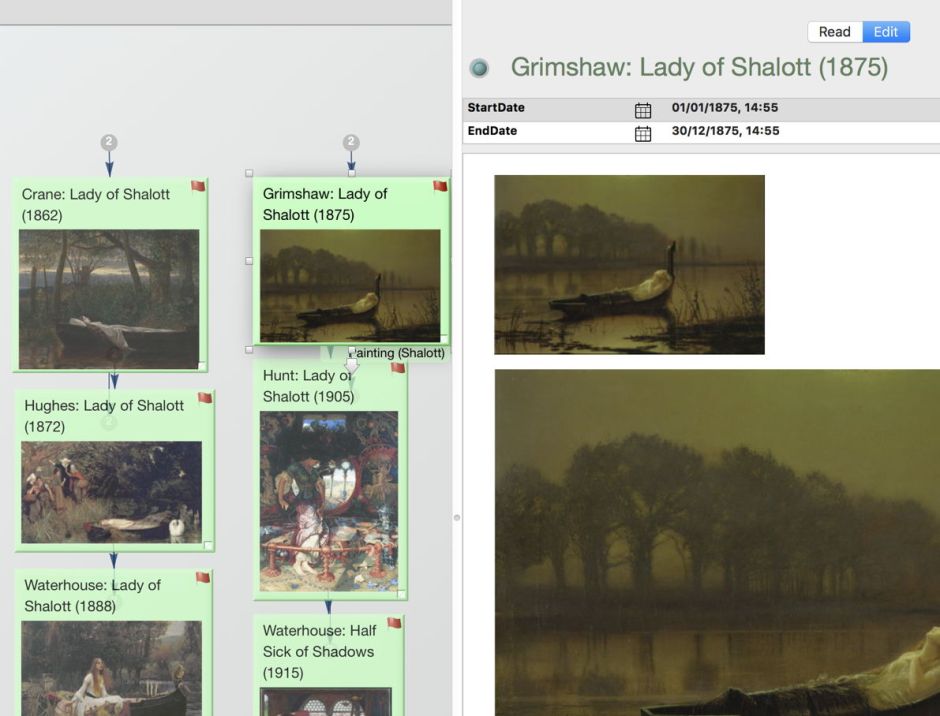
Then it is just a matter of opening the gallery container, selecting those writing spaces which need to have their prototype changed, and switching them over. Then for each painting I set those two Event attributes according to the date of creation of that painting, again using full years.

I have completed almost all my links, so this is a good time to make each of the link types invisible, or they will make the timeline a real mess.
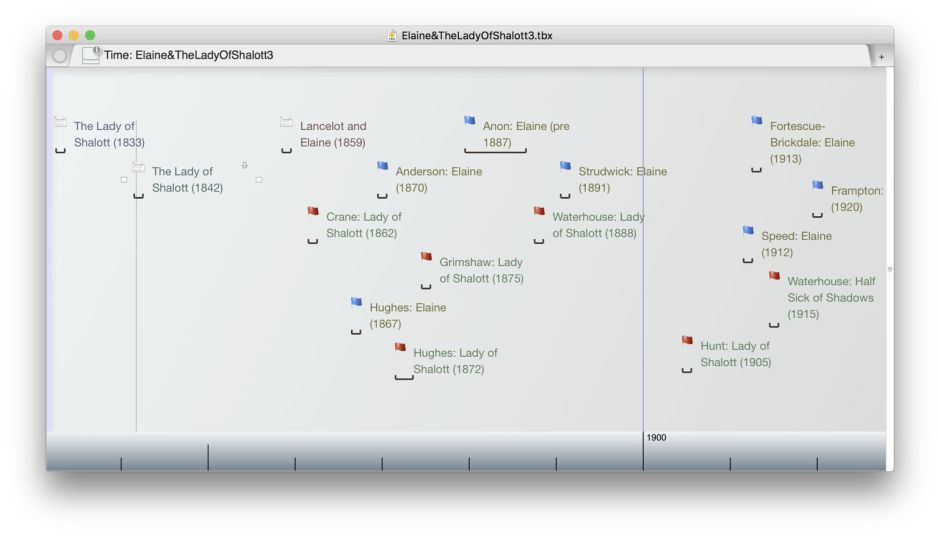
I then open a new window, switch it to Timeline view using the command in the View menu, and drag the text section into a thin bar at the right. One important control to use here is adjusting the $TimelineEnd date. This usually has to be a little more recent than the last item displayed, so that its text is not clipped.
Tidying up
I have added some extra notes about the stories and their interpretation in painting, and one with a set of weblinks. I therefore reorganise the Map view to bring better order there.
I also need to revise the user instructions in the opening writing space, and add text links to the composite text, and to my additional notes, and return links back to here.

I finally work through each of the threads leading from that opening writing space, to check that everything is properly linked and fully functional. I additionally check that each works consistently across the current versions of Storyspace, Storyspace Reader, and Tinderbox.
Here is my test release, ready for you to open in any one of those three apps: Elaine&TheLadyOfShalott3
I hope that you enjoy it, and look forward to your comments.
