

I am nearing the point where I need to implement a medium-sized project in Storyspace, and just want to tidy up a couple of loose ends before embarking on that. So far in these tutorials/explorations, I have not used its other view types (I even implemented a timeline in the Map view), nor its unique linked window feature.
One of the distinguishing features of hypertext is its inherent ability (not always exploited) to let the reader approach and see the same underlying content in several different ways. This is, of course, frequently attempted in printed books, but there the reader can only choose between the fixed views offered by the author (and publisher).
Taking my favourite subject of a painter, their paintings, and their place in the history of art, a book might tell us the dates of birth and death of the artist, and the years of creation of each of their works. Very few books place these on a timeline, and most leave us to collate such information in our own minds or notes. Comparing the paintings that, say, Pissarro, Monet, and Sisley produced in the same year is something we are left to manage ourselves; with the seemingly rapid loss of indexes in printed books, that is becoming very hard work.
If you have experimented with Storyspace (you can download and use it in demo mode if you have not), you may have discovered that its approach to multiple windows on the same document is unusual if not unique. Normally, the contents of a second or subsequent window opened on the same document are controlled independently. In Storyspace, they are linked. If one window has a Map view, and you select a particular writing space there, the other windows will synchronise on that same writing space.
At first this might seem an annoyance, but it brings with it some powerful applications, as I will shortly demonstrate.
Design
My aim is to produce a hypertext document in which the reader can browse different artists, and view representative paintings created by each. The period of each artist’s life and the date of each painting will be shown on a timeline, allowing the reader to examine changes in their style over time, and to compare contemporary works from different painters.
To do this, I am going to use two prototype writing spaces: one for painters, and one for paintings. Each individual artist’s writing space will act as a container for their paintings, so that an Outline view will show a list of paintings for each artist. This provides the reader with a rich choice of informative views of the writing spaces.
Implementation
Start with a fresh writing space, set to the default Map view. Create a new writing space named painter, which has two key attributes of StartDate and EndDate from the Events list. Give these default dates of 01/01/1800 and 01/01/1900 respectively. Give it a default badge too, depicting a person, and then use the Properties Inspector to make it a prototype.

Create another new writing space named painting, which has the sole key attribute of StartDate from the Events list. Give this the default date of 01/01/1810, the default badge of a paintbrush, and make it a prototype.

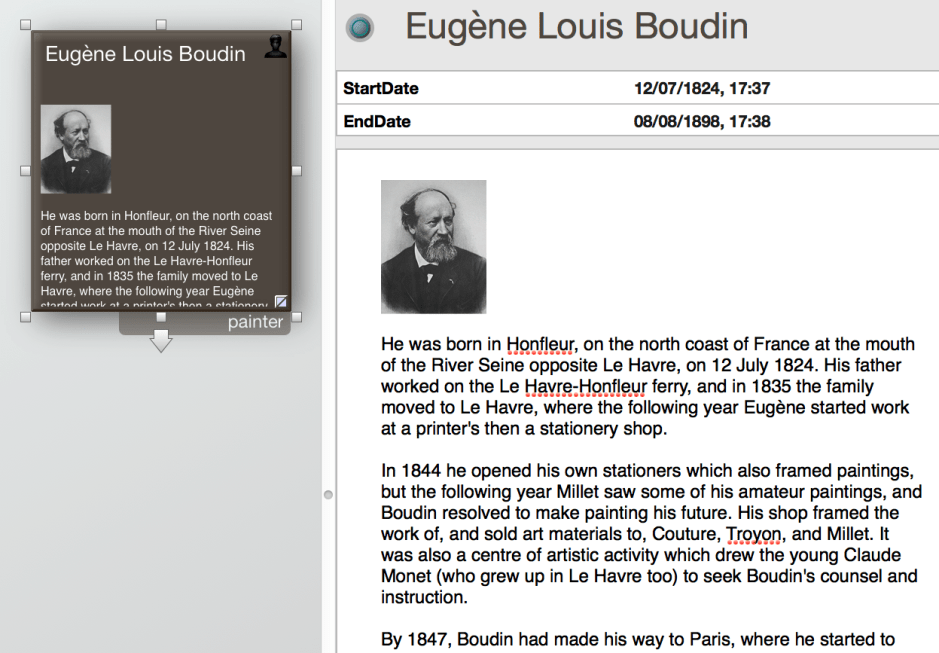
Now create the first instance of the prototype painter, name it Eugène Louis Boudin, and set its start date to 12 July 1824 and its end date to 8 August 1898, using your normal localised date format. Enter some bibliographic text about him, and possibly a photograph or portrait, copied and pasted from Wikipedia perhaps.
For the purposes of this workthrough, we will create just three example paintings. You can download the originals from my article about Boudin, or use others. To help scale them, I have included a simple drag-and-drop rescaler app created using AppleScript, which is detailed in this article (and slightly modified for this purpose).
Create three writing spaces, based on the prototype painting, and give them the correct dates, drag and drop a suitably scaled image onto each, and add the details of each painting and a little text about it.
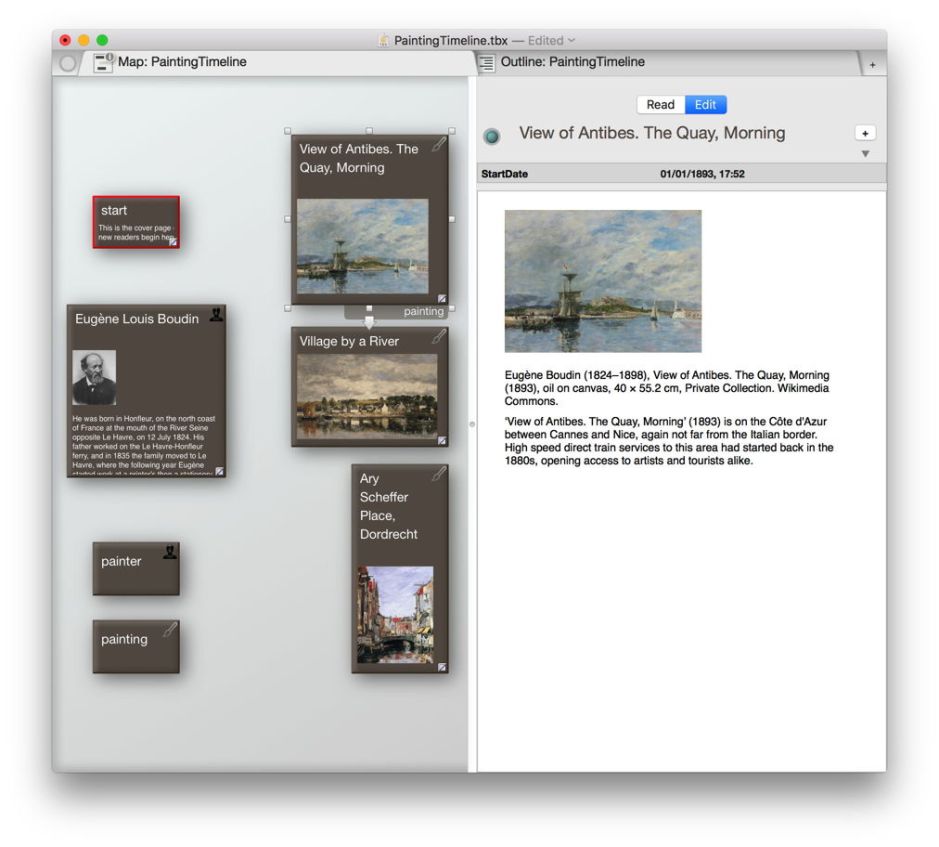 Drag and drop each of those three paintings into the Boudin writing space, making it a container with them inside.

As usual, you can open the container by double-clicking on the lower part of its icon in the Map view, and return to the top level Map view by clicking on the left end of the Breadcrumb Bar at the top of the Map view, labelled PaintingTimeline (the document name).
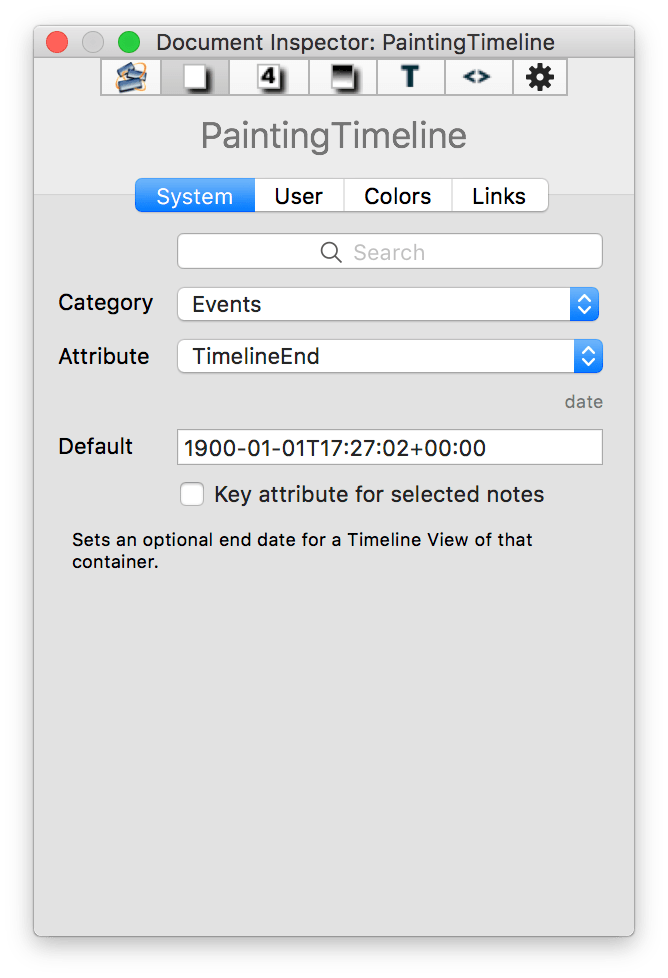
Before creating the Timeline view, it is worth setting its timescale in the System tab of the Document Inspector. Select the Events item in the Category menu there, and set the TimelineStart attribute to 01/01/1800, and the TimelineEnd attribute to 01/01/1900. Then create a new window using that command in the File menu. Show its toolbar using that command in the View menu, and set that to the Timeline view and hide the toolbar again. Alternatively you can Control-click the view icon at the top left, and switch straight to the Timeline view in the menu which pops up there.
Adjust the Timeline view to suit. Drag its divider to hide the Outline view on its right, having closed that view using the button in its tab, and resize the window until the full timeline is visible. You can further customise the view by adding a title, etc.

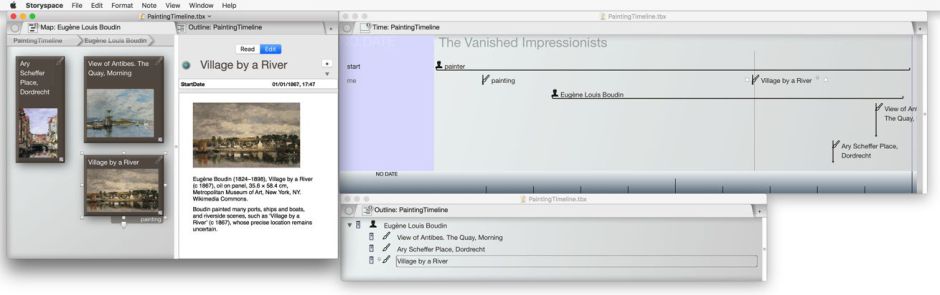
Open another window, switch it to an Outline view, close the right hand pane, move the divider to the far right, and adjust the window to show an exploded outline listing the three paintings under Boudin’s name (as their container).
 You now have one window showing the Map view and contents of the currently selected writing space, a second with the painter’s life and paintings shown on a timeline, and a third listing the works available for each painter in turn.
Having tiled the three windows so that you can see them properly, bring the Map view to the front and move round the writing spaces. As you do so, the content in each of the three windows will reflect your selected writing space: select a painting, and it will be selected in the Timeline and Outline windows automatically.
Try doing that in print!
As usual, here is the Storyspace document, with the AppleScript rescaling app in case you want to try your own images: sspace5files
Thanks to Mark Anderson for his helpful suggestions which led to this.
