

If you thought that AppleScript had been eclipsed by cross-platform scripting languages like Python, tcl and Ruby, you should take a look at its current power and utility.
AppleScript itself has been updated to version 2, with many new features but backward compatibility so that it will run scripts developed for version 1.x, and its documentation updated properly, so that you no longer have to flit through lots of release notes about various updates.
OS X offers additional system-level applications that act as front ends to features such as image processing. This article concentrates on accessing those through Image Events: this suite of functions supports many basic transformations such as flipping, rotation, scaling and cropping, as well as access to image properties and metadata. Although not exactly Photoshop, it allows you to do quite a lot without the overheads of the big guns.
The problem that is solved by the script and droplet developed here is how to adjust the size and cropping of an image, so that it can be assembled into a slideshow or movie at SD video resolution, 768 by 576 pixels. This is helpful if you construct time-lapse movies from timed still photos, for instance, where you might need to size and crop thousands of individual images – just the job for this droplet using features that come free with Leopard.
The outline plan is:
- develop your script using Apple’s image processing templates, here to scale then crop an image to SD video size;
- once tested as a script, wrap it into droplet form, and save it as an AppleScript application for use as a droplet;
- drag and drop any QuickTime-readable graphics file onto the droplet and it will automatically be scaled, cropped, and saved
Example scripts are here: imageprocscripts.
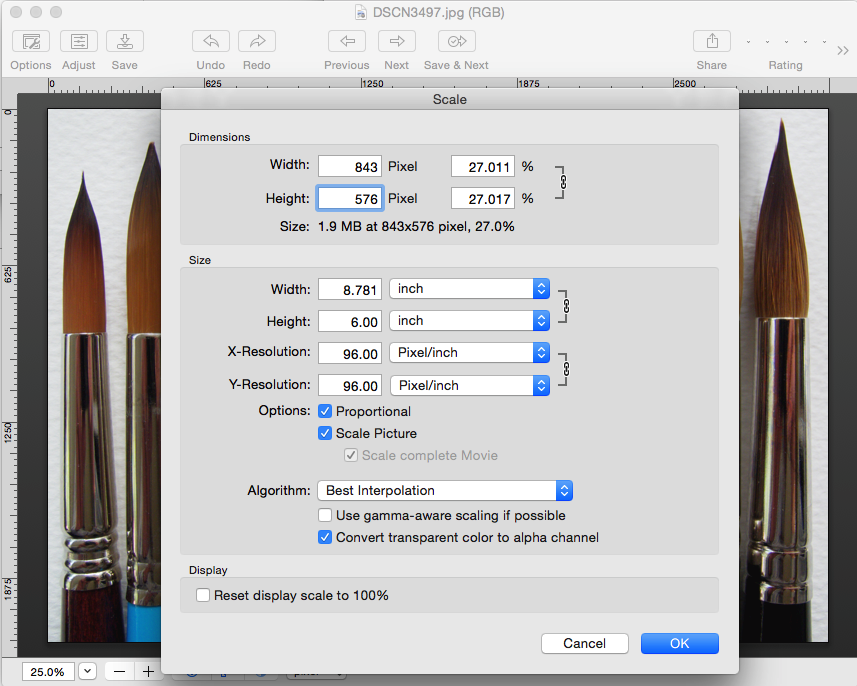 1. Step through actions. Before you can develop your script, you have to work out exactly what you want it to do, and step through each action using an application such as Graphic Converter. The first step in resizing an image for SD video is to scale it so that it is no smaller than 768 by 576 pixels. Then the image needs to be cropped to exactly that size. Decide how to do that.
 2. Study dictionary. Open the free Script Editor, normally in /Applications/Utilities, and use the Open Dictionary… command in the File menu to browse the AppleScript dictionary for Image Events.app, the interface to OS X’s image processing. Study the Scale and Crop commands that you will use. Note that scale to size uses the longer side as the size argument.
3. Create new script. Open script templates to see how to structure your script. Copy and paste from those, or type the AppleScript source given here, into the editor window. At first write the outer sections of code that choose and open the image, then scale and save it. Until you save or compile the script, it is left in unstructured text format, and its lines are not indented.
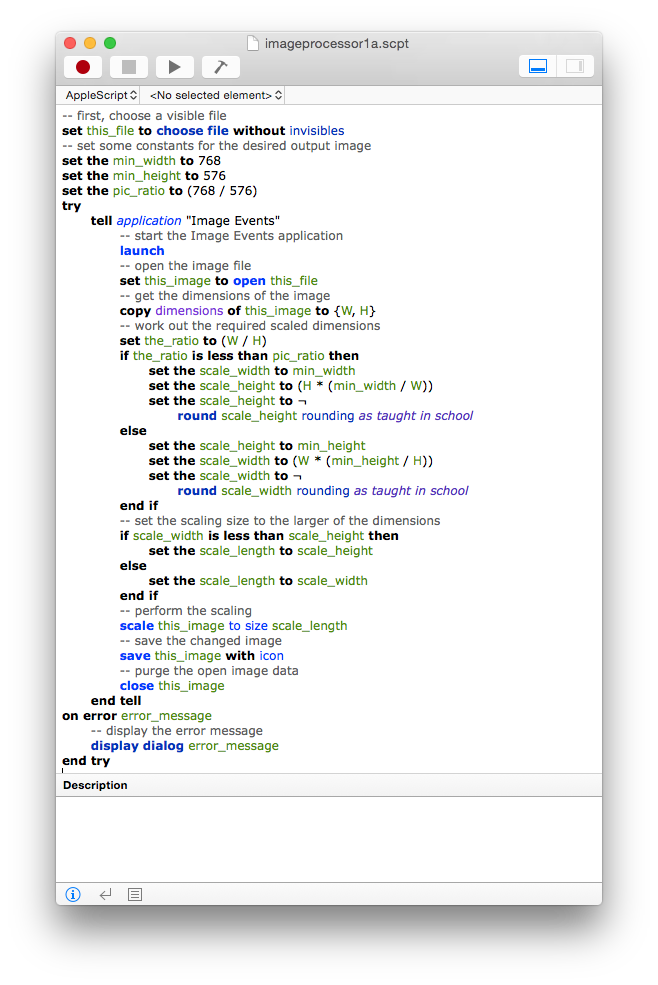 4. Develop first action. Once you have sufficient code entered, save the script. This also compiles it, and you will see error messages arising from typos or other slips. The difficult part of the first scaling task is working out the correct size argument to pass to the scale command: this will be 768 or greater, but needs to be calculated to keep the other dimension correct. Save and test. My example script is named imageprocessor1a.scpt.
 5. Develop second action. Create a second new script, copy and paste in the outer code, omitting the scaling calculations and the scale command. The cropping step is much simpler, as you simply need to specify the dimensions as {768, 576}, here achieved using the same min_width and min_height constants as in your first, sizing script. Save and test this script too. My example script is named imageprocessor1b.scpt.
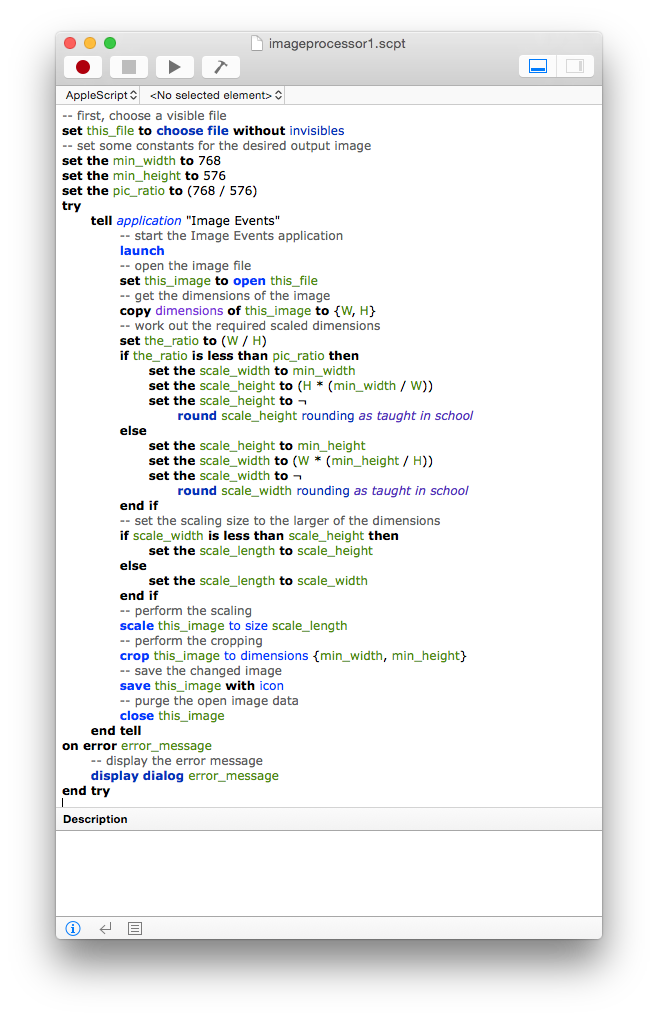 6. Complete script. Open both your scripts, and save the first, sizing script as a duplicate document, giving it a new name. Because the outer code to open and save the image is the same, all you need do now is select the crop command from the second script, and paste it into the new script immediately after the size command. Save the third script and check that it works. My example script is named imageprocessor1.scpt.
7. Test script. Just because your complete size and crop script works on one or two images does not mean that it works on all images. Select and copy a good range of different images, including some in portrait orientation, and those with unusual width:height ratios, and check that your script works on them all. If it does not, correct the code and test again until it passes.
8. Study sample droplet. Although scripts are useful, turning your script into a droplet makes it more convenient. Open the Image File Processing Droplet template script provided by Apple and study its structure. Instead of displaying the Open File dialog to choose an image, a droplet has to iterate through the list of files dropped onto it, performing actions in the process_item routine.
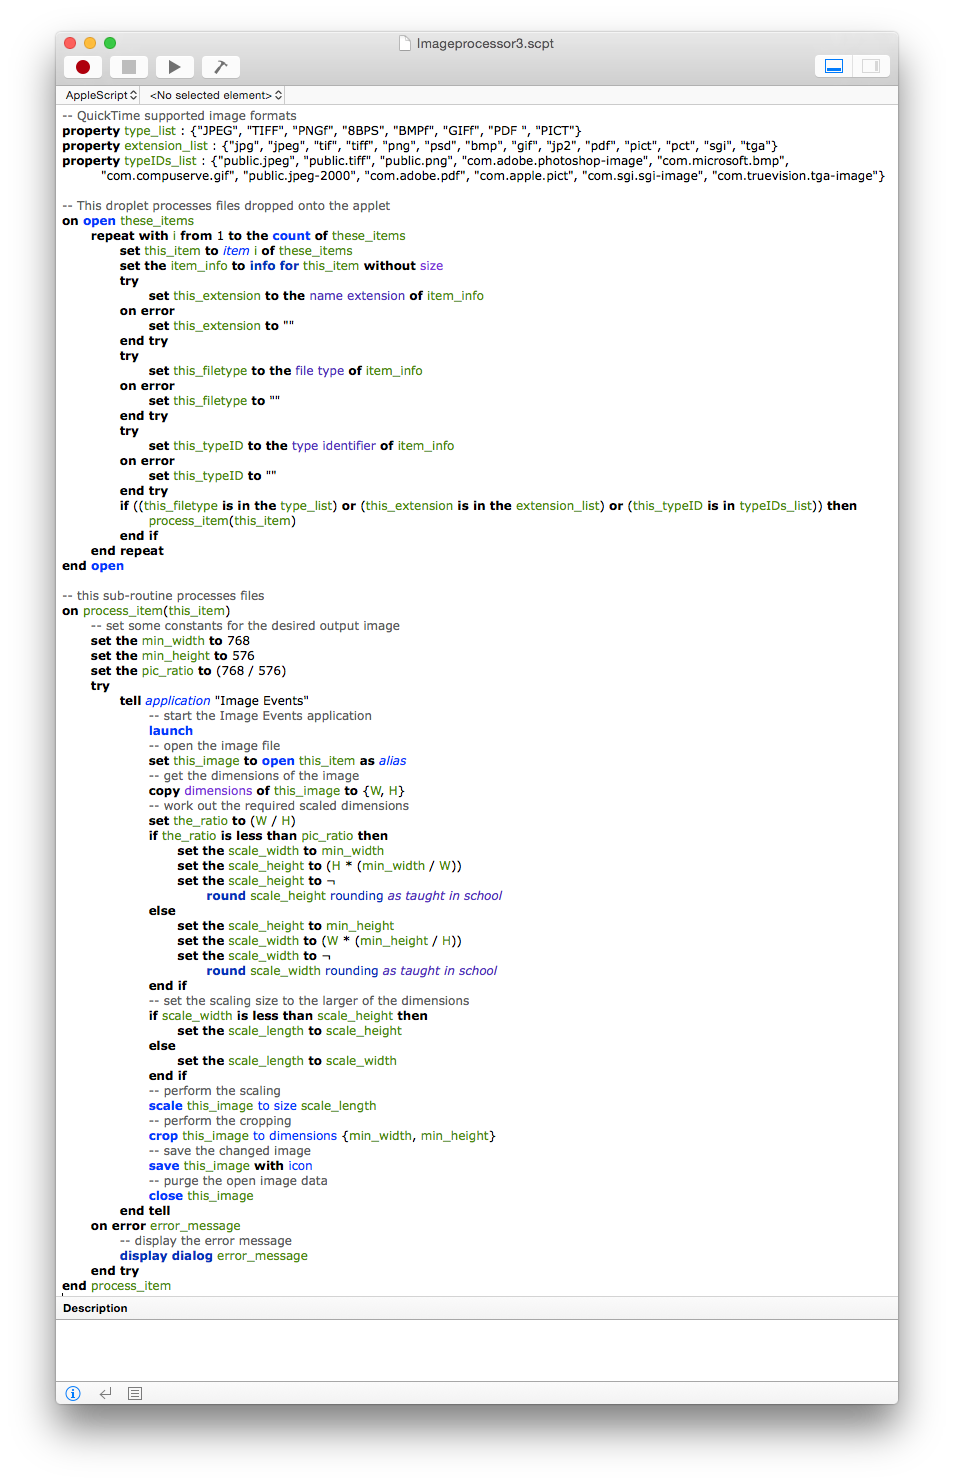 9. Wrap script into droplet. Create a new blank script, select the whole droplet template script, copy and paste that into the new document. Then open your finished script from Step 6, select it all, copy and paste it into the process_item routine of your droplet script. Edit that to remove the initial choose file command, and alter open this_file to open this_item to handle each file. Note that at present there is a bug in image processing droplet scripts: instead of the code line
set this_image to open this_item
you should append as alias, making the line
set this_image to open this_item as alias
If you do not do this, the droplet will return an error. My example script is named imageprocessor2.scpt.
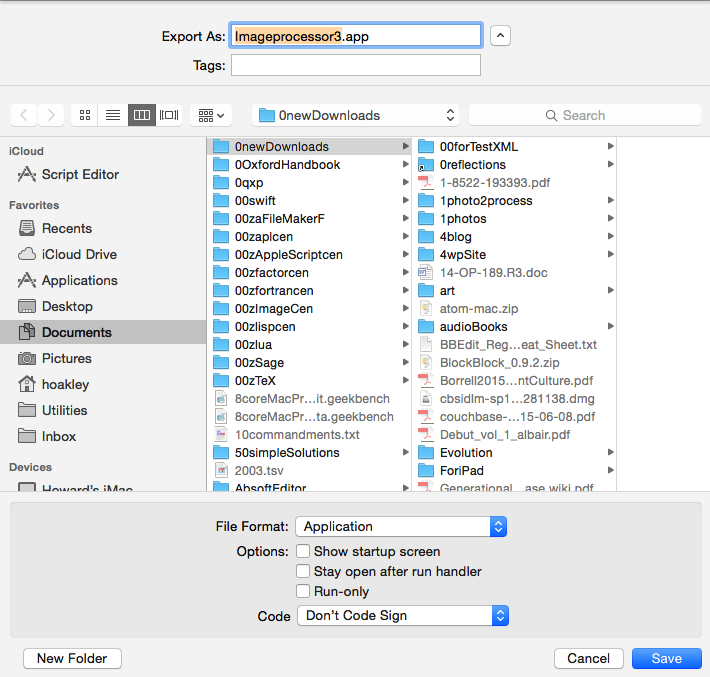 10. Complete droplet. Check your droplet’s code through thoroughly to ensure that it is right. It is harder to diagnose and debug problems in droplets than in standard scripts. When you are ready to try the droplet out, use the Export… command in the File menu, and select the File Format as Application, leaving other options set to defaults. Your droplet will then be ready to test.
11. Test droplet. Assemble a similar collection of test images to those that you used in Step 7, and drag and drop them onto your droplet application. Try them one at a time, and several together. The results should be the same, and identical to the scaling and cropping accomplished by your original script from Step 6. If it is not, compare the droplet and original scripts.
12. Create folder script (optional). An alternative to using a droplet application is a folder script. Open the example named Image – Flip Horizontal.scpt in /Library/Scripts/Folder Action Scripts and you will see that it too has an obvious location in which you can paste the active code from the script at Step 6. Try that, remembering to change this_file to this_item, and try it out as an alternative.
Based on a Masterclass which was originally published in MacUser volume 24, 2008.
