
Even when you aim to keep ample free space on your startup Data volume, you can get caught out when much of it disappears at once. What had been a comfortable 100 GB or more can drop to less than 30 GB, insufficient to update macOS and in dangerous territory. This article suggests a method you can use immediately to restore as much of that as possible in minutes rather than hours. There’s just one overriding rule, that you shouldn’t delete or remove anything you’re likely to regret later.
Safe Mode
Before going any further, save all open documents, park and close all open apps, shut your Mac down and start up in Safe Mode.
For Apple silicon Macs, wait at least ten seconds before pressing and holding the Power button, keeping it held until the display confirms the Mac is entering Options. When the Macintosh HD icon is displayed on the left, select it and hold the Shift key to see the button underneath change to read Continue in Safe Mode.
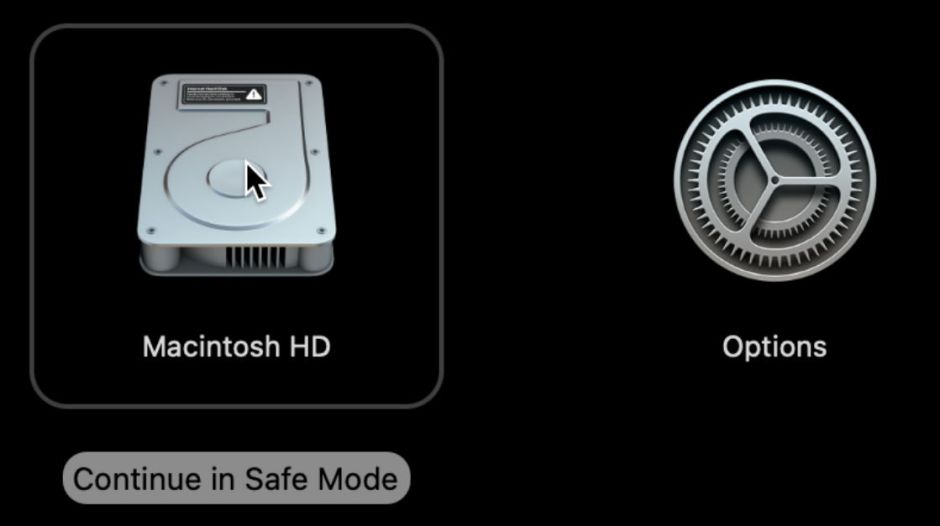
Click that button, and you’ll be asked to sign into your Mac twice before the Finder and Desktop are displayed. Confirm it really is in Safe mode by opening System Information. Click on Software at the left, and the line Boot Mode should say Safe rather than Normal.

Leave your Mac alone for at least two minutes, then restart it back into normal mode.
Safe Mode should flush most system caches, and delete temporary files. This can prove sufficient to recover enough free space for your Mac to press on until you have time to tackle the problem more systematically.
If there’s still a long way to go before your Mac has recovered enough free space, open Disk Utility and check snapshots.
Snapshots
The most common reason for sudden loss of free space is the presence of huge snapshots on the Data volume, and the quickest way to address that is to remove them using Disk Utility.
In Disk Utility’s sidebar select the Data volume in your active boot volume group, normally Macintosh HD on its Internal storage. If you don’t see its snapshots listed in the lower part of its main view, select the Show APFS Snapshots command in its View menu. Scroll down through that list of snapshots and identify any that bring a marked increase in Size. You might find it useful to Control-click the header row at the top of that list and tick both Private Size and Cumulative Size to display them.
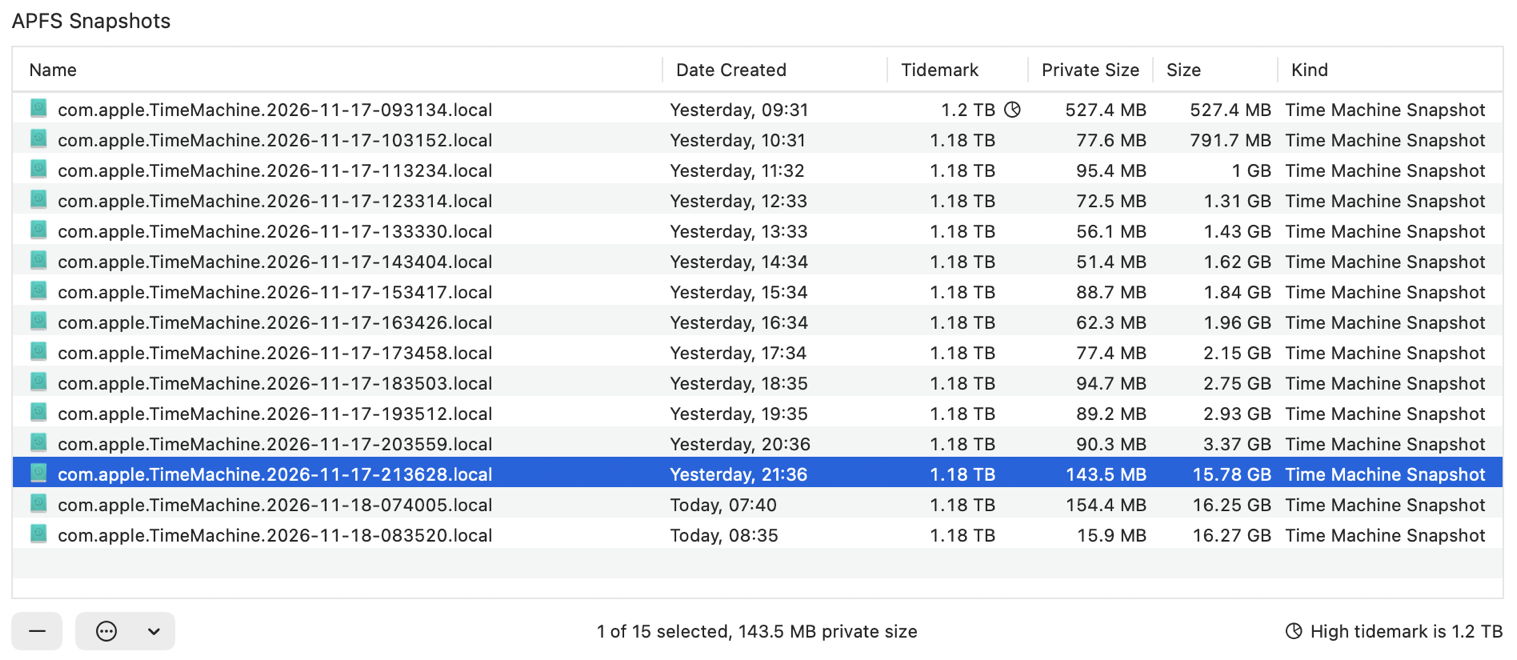
Check in your backup storage that you have saved backups covering the period in which any exceptionally large snapshots were made. This is to ensure that deleting snapshots won’t compromise your backup coverage.
Select snapshots to delete, perhaps starting from the oldest and running to the largest, and delete them one at a time using that command in the contextual menu (Control-click). Leave the most recent, as Time Machine or your backup software may rely on that when it makes the next backup.
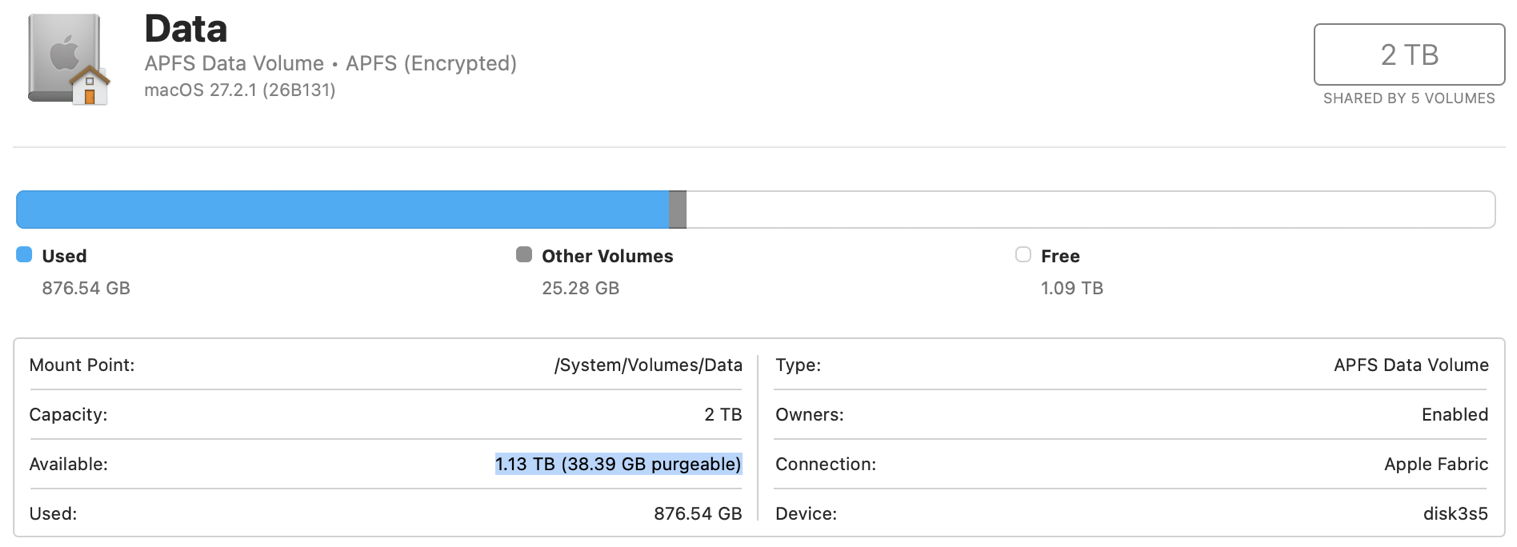
Deleting snapshots is the slowest task performed by APFS, and it may take many seconds before those snapshots are all successfully removed. Then look above to the free space shown as being Available on that Data volume. That may report how much is purgeable. If that’s any more than 20 GB, and your Mac is still short of free space, you have further work to do.
Document versions
Many apps including Pages and Numbers now save document versions in that volume’s hidden Revisions folder. If you have documents that you update or change frequently and keep using for weeks or months, those saved versions can number hundreds or even thousands. There’s no direct way to discover how much space all those versions take, but if you don’t need them, it’s quick and simple to clear them out: duplicate (Command-D) the document in the Finder, trash the original, and rename the clone file you just made. A few minutes after emptying the Trash, your Mac should recover all the space those versions took.
Further details are in this article.
Storage
Before resorting to slower and more thorough checks using DaisyDisk, GrandPerspective or your favourite storage analyser, open Storage in General settings and spend a few minutes checking there. Although this has its limitations, it’s good for a brief check at this stage.
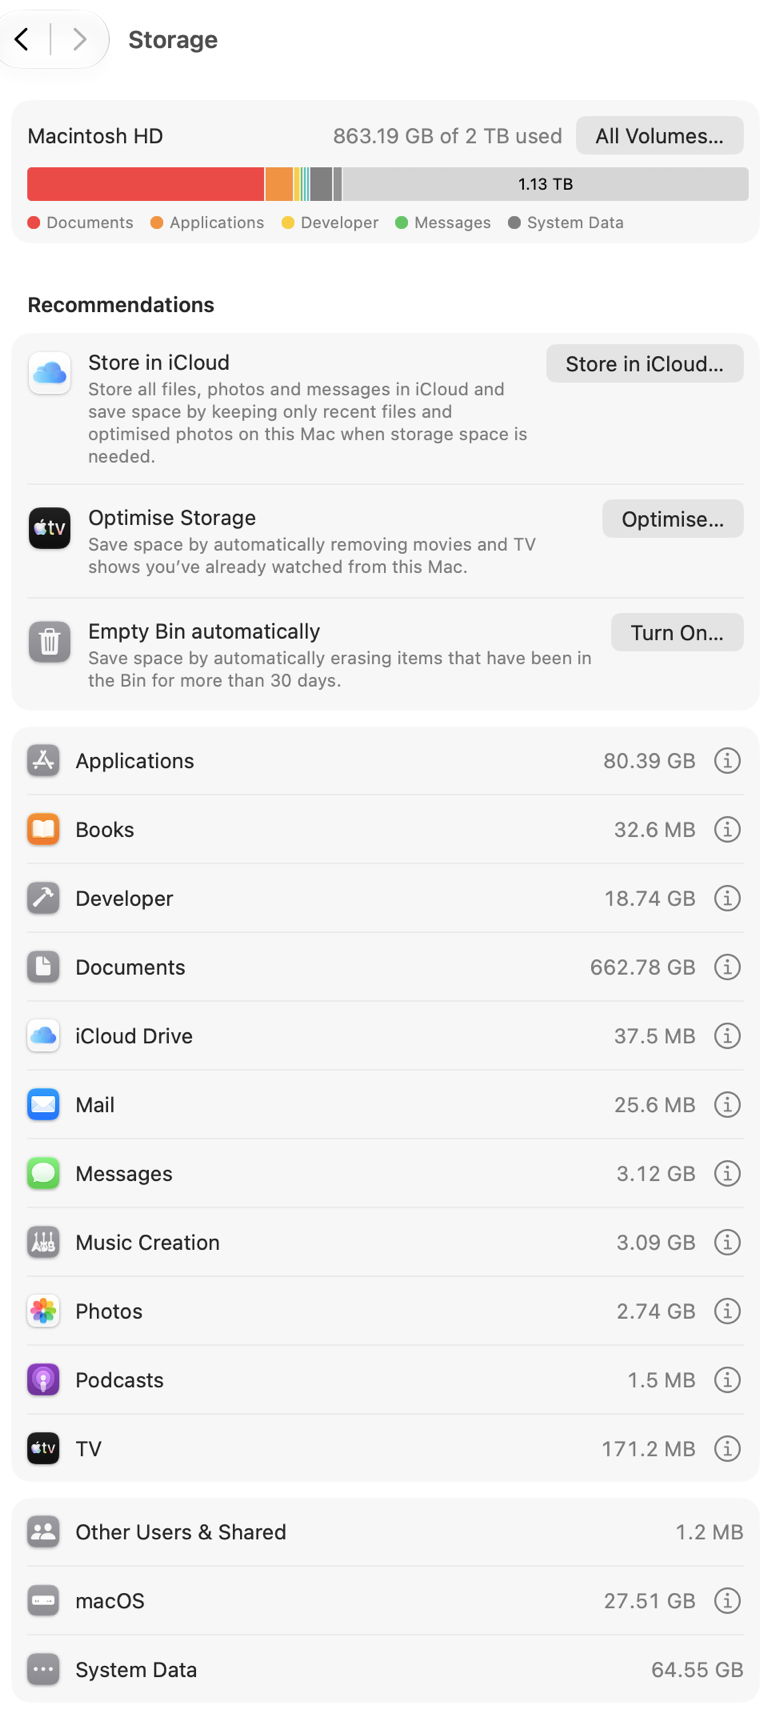
Below the Storage Bar at the top comes a series of actions you could take to free up space. These operate across more than one category, but have only limited usefulness:
- Store in iCloud includes standard options such as putting your Desktop and Documents folders into iCloud Drive, and enabling iCloud Photo Library, which you’ve probably already decided on.
- Optimise Storage isn’t the same as the Optimise Mac Storage option in iCloud Drive. What it does is remove the TV content that you’ve already watched from local storage, which could help.
- Empty Trash Automatically simply deletes anything left in the Trash after a period of 30 days, an option also offered in the Finder’s Settings. Some love it, others manage by themselves.
The remainder of the view is devoted to individual categories, most of which are used to label segments of the Storage Bar. For most there’s an ⓘ Info button at the right, and in some cases that offers useful tools.
- Applications can be listed by size or date of last access, making it easy to remove them. The total size given, and this list, excludes those apps bundled in macOS, as they can’t be tampered with.
- Books, Music, Music Creation and TV each let you delete local copies of content you have licensed, allowing you to download them later when you wish.
- Developer can clean up some of the potentially redundant build and device support files accumulated by Xcode.
- Documents offers lists of documents to show largest files, older downloads, unsupported 32-bit apps, and a file browser using column view to sort files by size. If you don’t want to use one of the third-party products that do this better, you may find this helpful, but it’s inferior to the likes of DaisyDisk and GrandPerspective.
- iCloud Drive to enable Desktop and Documents in iCloud, also offered in numerous other places.
- iOS files to remove unwanted device backups and firmware if you sync them with your Mac.
- Mail adds nothing.
- Messages can be frustrating, as it lists large attachments, but won’t preview them in the Finder. Instead, select the attachment and press the Space Bar to see a preview.
- Photos can enable iCloud Photos, as offered elsewhere. Note that, as far as this category is concerned, the size given is that of the current System Photo Library, and excludes all other Photos Libraries and images in the Pictures folder.
- Podcasts adds nothing.
- Trash (or localised equivalents) lists items there for you to delete them, much as the Trash itself does.
- Other Users & Shared covers Home folders of other users and any shared files.
- macOS reveals how much space is being used by components supporting AI.
- System Data is the one category that desperately needs further information, but doesn’t have a button. It’s discussed below.
Throughout those, Storage shows space actually taken on disk, rather than the nominal size. So a 100 GB VM stored as a sparse file might be shown as occupying only 62 GB, for example.
Storage appears to total all other categories up and account for the remainder of storage used in the category System Data. That doesn’t include the size of the System volume, or its snapshot, but can include temporary files like caches, snapshots, and anything else it can’t account for elsewhere. To dig deeper into what this could include, you’ll need to use a storage analyser, such as DaisyDisk or GrandPerspective.
Never
Whatever you do, don’t delete any file you don’t have properly backed up. Be extremely wary of deleting folders or their contents that you don’t understand.
Never paste a script into Terminal or Script Editor that claims to recover free space for you, no matter how convincing it might appear. That’s one of the classic ClickFix attacks, and will download and run malware to steal all your secrets.
Never blindly follow instructions given by AI, even if it’s reputable. Always check with human experts and their advice. Remember that all AI can give incorrect and potentially damaging answers at times.
Plan
- Start up in Safe Mode and leave for at least 2 minutes.
- Check for and delete snapshots in Disk Utility, keeping at least the most recent.
- Clean document versions by duplicating the file and trashing the original.
- Storage settings.
- Storage analyser, such as DaisyDisk or GrandPerspective.
- Never delete items that aren’t backed up, or paste a script that claims to recover free space for you. Always check AI answers.
I wish you success.

