
The moment you press the Power button, Intel and Apple silicon Macs are different. What happens next on an Intel Mac is governed by its (U)EFI firmware, and any keys you might be holding at the time, whereas an Apple silicon Mac runs its own firmware and checks what you’ve done with the Power button alone.
Intel startup controls
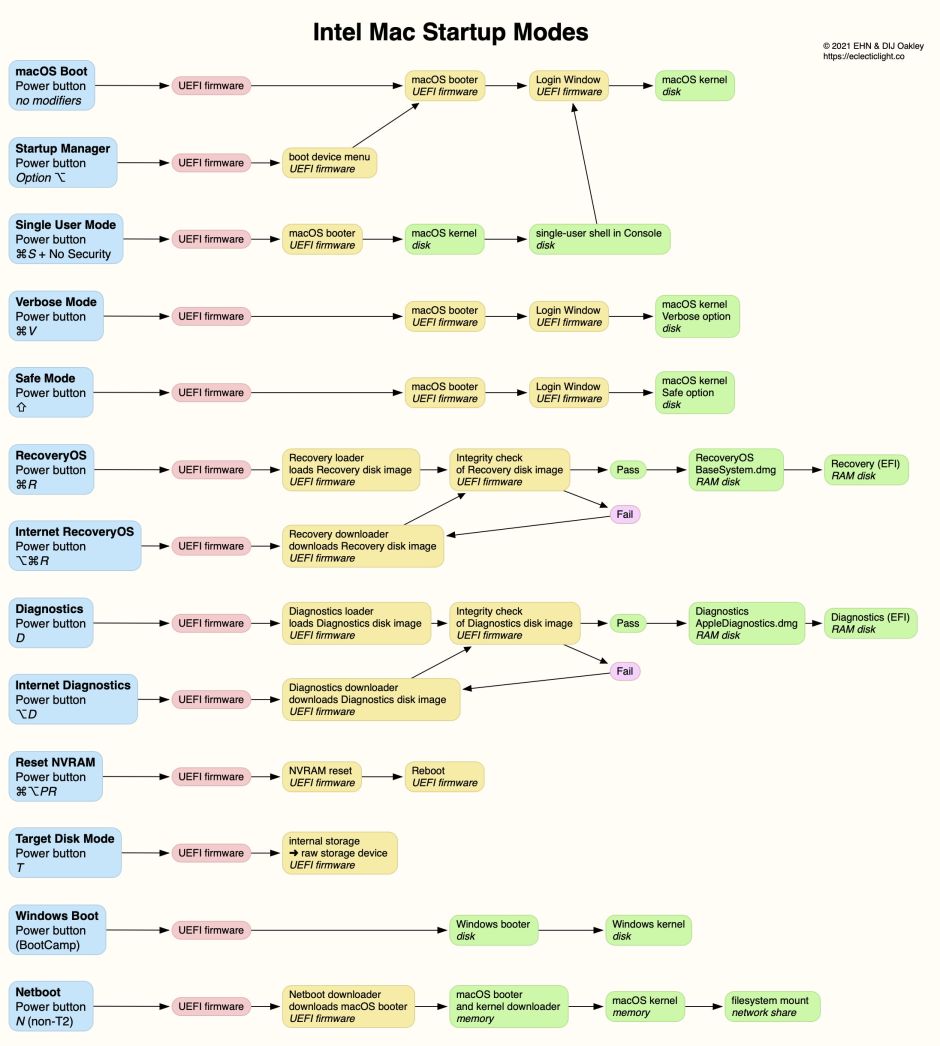
For Intel Macs, the mode to be used at startup is almost entirely determined by any keys held down during the startup process, and the (U)EFI firmware installed. Early during the boot process, the firmware checks which, if any, keys are being held, which determine how it proceeds. Although these often work using Bluetooth, some Macs with certain firmware versions don’t read the keyboard status reliably. It may prove best to connect any wireless keyboard using its charging cable, or to use a USB keyboard instead.
Here’s a tear-out PDF version: IntelMacBootModes2
Information from Apple reveals important details about how current firmware handles Recovery and Diagnostics modes. Local versions of those modes load disk images containing the required software; prior to their loading, their integrity is checked. If the disk image can’t be found or fails its integrity check, the Mac should automatically switch to using Internet Recovery or Diagnostics. In that, the appropriate disk image is downloaded from Apple’s servers via HTTP (not HTTPS) and undergoes the same integrity check. If that fails, the download process is repeated up to 11 times before abandoning the attempt.
Internet versions of Recovery and Diagnostics work the same, except that they don’t perform any local search for the disk image, and proceed straight to download. If you’re having problems getting your Mac to boot in local or Internet Recovery or Diagnostics, be sure to give it plenty of time before concluding that the attempt has failed, as your Mac may be still trying to download the software for that mode, even if you have tried to start it up in a local and not Internet mode.
This chart doesn’t include resetting the SMC, which isn’t a startup mode as such, and varies by model.
Further details about choosing startup modes for Intel Macs is in this article, which has links to more detailed accounts.
Apple silicon startup
The primary control of startup on Apple silicon Macs is the Power button alone.
When pressed briefly, it starts the Mac up in normal macOS mode; when pressed and held until the Mac reports that it’s loading Recovery Options, it engages Recovery mode, where you navigate startup and other options using buttons and menus. These invariably work fully with Apple’s wireless keyboards and mice/trackpads, so there’s no need to connect them with their charging leads.
There’s also a Fallback Recovery Mode engaged by pressing the Power button twice in rapid succession, and on the second press, instead of releasing the button, hold it pressed until recovery options are reported as loading. This provides all the features of regular Recovery Mode, with the exception of Startup Security Utility, which isn’t available.
From Monterey onwards, regular Recovery is run from the paired Recovery volume in the current boot volume group, while Fallback Recovery uses a previous version of Recovery installed on a dedicated hidden Recovery container on the internal SSD.
Holding Intel startup keys when starting up an Apple silicon Mac does nothing, as its firmware doesn’t even notice them. In particular, you can’t hold the Option key to select the boot volume group to be used to start that Mac up. To perform any of the functions supported by startup key combinations on an Intel Mac, you must hold the Power button in and load Options for Recovery. A fully illustrated guide is available here.
Startup keyboard
During normal startup, before you have logged in as a user, your Mac doesn’t use the custom keyboard set for a specific user, and in older versions of macOS should use that stored in /Library/Preferences/com.apple.HIToolbox.plist, which may be quite different from any set in a user’s ~/Library/Preferences/com.apple.HIToolbox.plist file. This doesn’t appear to be true for Ventura, where the pre-login settings are now hidden.
In some cases, this can prevent passwords from being entered correctly, and can readily confuse. When there’s only a single admin user, macOS should keep settings in sync, but when there are multiple users with different keyboard settings, they can become confused. Starting up with the wrong keyboard can make it incredibly difficult to type your password in. If you’re keying in what you think is the letter Q but your Mac is using a traditional French keyboard and thinks that’s an A, that’s not going to help you enter your password correctly.
Like all preference files, they are now maintained by a service which means that editing them directly is unlikely to do a great deal: the service will happily overwrite the files with what it thinks they should be.
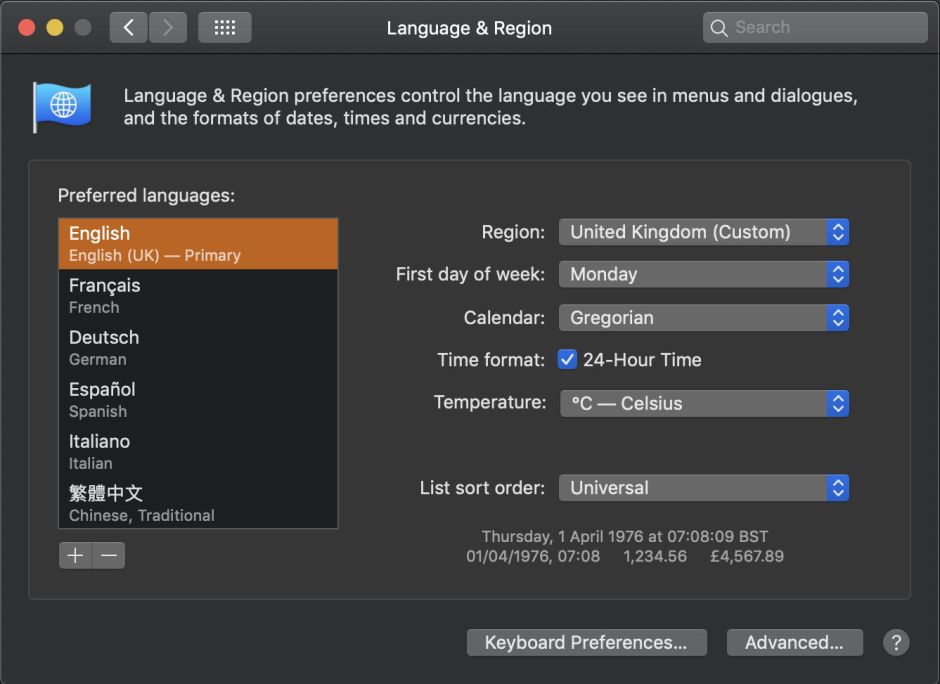
Before Ventura’s System Settings, Apple recommended that the most reliable way to set the language and keyboard to be used at startup, when there’s only a single admin user, was to use the Language & Region pane. If the language that you want isn’t in that list, click on the + tool to add it. Then drag it to be the top of the list, so it’s designated as Primary.
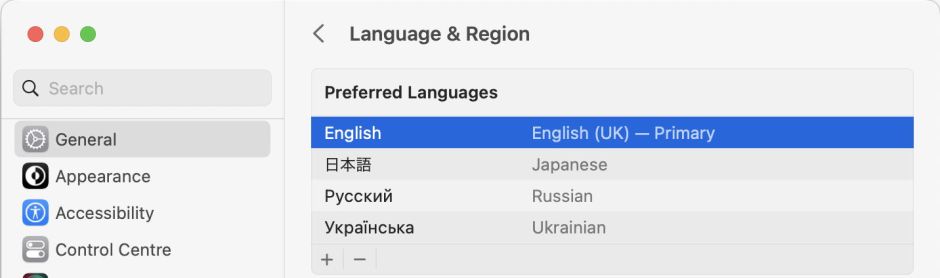
There are two different places you should visit in Ventura’s System Settings. The direct equivalent of the previous control is the list of Preferred Languages at the top of System Settings > General > Language & Region.
But the list of available keyboards is controlled in System Settings > Keyboard > Text Input, Input Sources, Edit button.
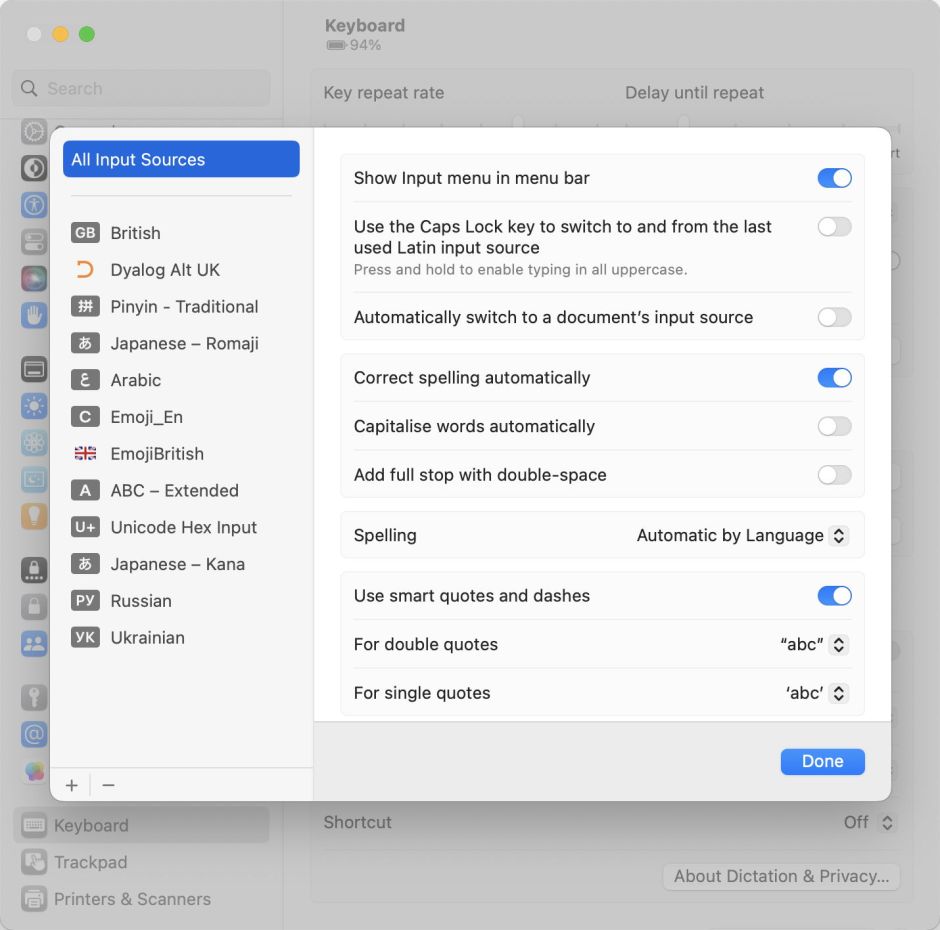
Selecting the keyboard is most easily accomplished in the Input menu, enabled in the Input Sources tab of the Keyboard pane, or the Input Sources dialog in System Settings. Whichever keyboard is set at the time that you shut down or restart should be used when you start up again.
Multiple user keyboards
This all gets more complicated when your Mac has more than one user, and the users don’t all have the same keyboard selected. You may also encounter situations where the primary language and keyboard for a single admin user may not get properly synchronised with those used prior to logging in. If keyboard and/or language settings are confused or inconsistent, or they are different across two or more user accounts, you can use the command line once you have set the individual users up correctly. The command you need is languagesetup, and if you want to change the system settings, you’ll need to run it as root using sudo.
The command that you need runs something like
sudo languagesetup -langspec [lang]
where [lang] is a recognised name like "English", or an ISO-639 language code such as "ko" – either should be entered inside standard double-quotes like that. You’ll then need to authenticate with your admin user’s password.
You can get further information about this command using man languagesetup or languagesetup -h. ISO-639-1 codes can be found here.
Thankfully, Ventura now ensures access to the Input menu on the login screen, making it simple to select the correct keyboard before trying to type your password in. Older versions of macOS required that this was set in advance in System Preferences: open the Users & Groups pane, unlock it, click Login Options, and there tick the box labelled Show Input menu in login window.
In the next article, I’ll look in more detail at keyboard layouts and how you can create your own.
