
I’ve been writing Question and Answer (Q&A) sections for Mac publications for longer than I care to remember. Despite having advised many questioners to use tools like Tinderbox to help them structure their work and keep it in order, I’ve never been particularly good at that myself.
Currently, I write the Genius Tips section for MacFormat, which with its sister title Mac|Life are, I believe, the last general-readership Mac magazines still in print.
One of the perpetual problems of the Q&A writer is repeating similar questions. In real life, we often get asked the same questions time after time, but subscribers need to see ever-changing and interesting content. “Have you read this month’s question about beachballing in Safari?” doesn’t go down well with editors.
I have now reached the stage where I cannot remember all the questions that I have answered over the last year or so, a total of around 250, so need to be a bit more systematic. I need a database or collection of the Q&A items that I have written, so that I can check each potential item before including it in my outline draft for the next issue.
There are many other optional extras which this could bring. Editors tend to leave the Q&A writer to their own devices as much as possible, so each issue I get to choose which areas to cover, and which page layouts to use, from a fixed menu. It would be very good to be able to know instantly when I last wrote a spread on Networking, or Peripherals, which would help me plan options for the next issue. This makes a conventional database, like FileMaker Pro, less attractive, but Tinderbox a far better choice.
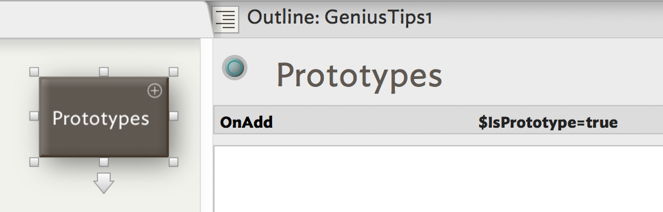
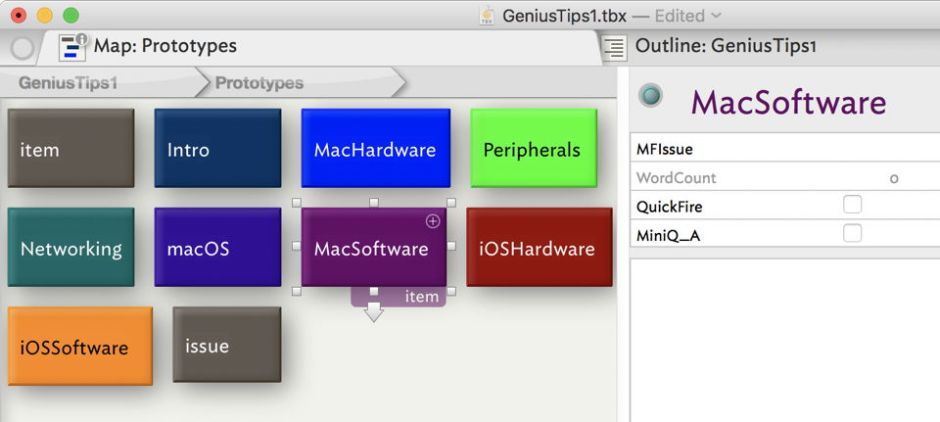
In a fresh Tinderbox document, I create a new note which is to form the Prototypes container, in which to keep my prototype notes. Note the name, with a capital P, which follows Tinderbox’s own convention for the location of prototypes.
To ensure that every note in that container is set as a prototype, I add an $OnAdd attribute to that container to run the simple script
$IsPrototype=true
Then I don’t have to remember to make all notes in that container into prototypes; Tinderbox takes care of that for me.
My first prototype is a parent for most of the other prototypes which will go here, named simply item. This represents a single Q&A text item, and its descendant prototypes will then specialise that into each of the topics which can form a page or spread: a standard Intro item, optional topics such as macOS and Networking, and a choice of iOS Hardware and Software for the final page. They only differ in the colours used for their tiles, which enables me to tell them apart readily.
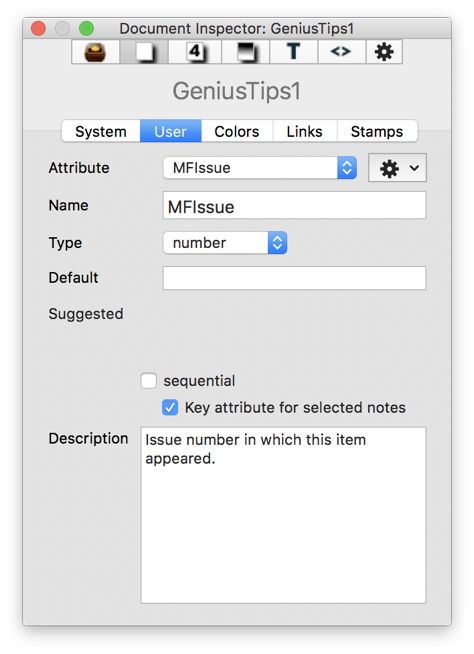
The item prototype has three User attributes:
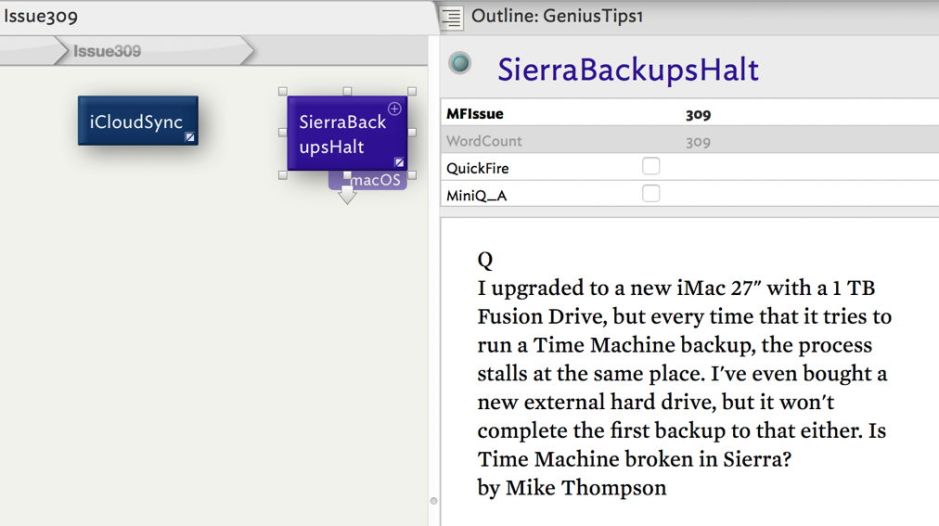
$MFIssue(Issue is already used), which records the issue of the magazine in which that item appears;$QuickFire, which is a Boolean to indicate whether this is a short ‘quick fire’ item of 60 words or less;$MiniQ_A(an ampersand not being permitted in an attribute name), which is a Boolean to indicate whether this is a very short ‘Mini Q&A’ item of around 35 words.
I also make $WordCount a key system attribute for item and its descendants. Although the actual printed wordcount will be less, and is usually part of the text, this is a useful rough indicator which comes free.
With these set up, I then open the text which I wrote for MacFormat, and manually place its contents into notes, to see how well this works.

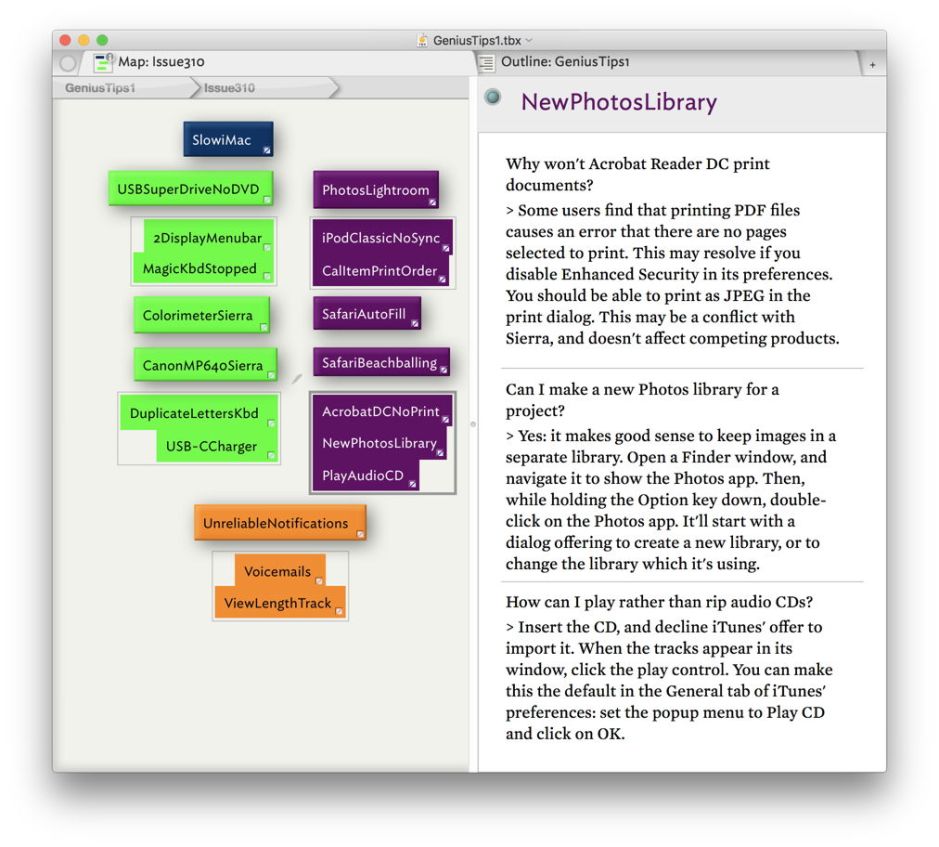
The $Name of each note is a terse title for the topic, given in CamelCase to spare the space. QuickFire and MiniQ&A notes are then glued into Composites, which still allows their independent access, but shows them as the group that they are. Composites are a new and valuable feature in Tinderbox 7, in case you have not yet upgraded.
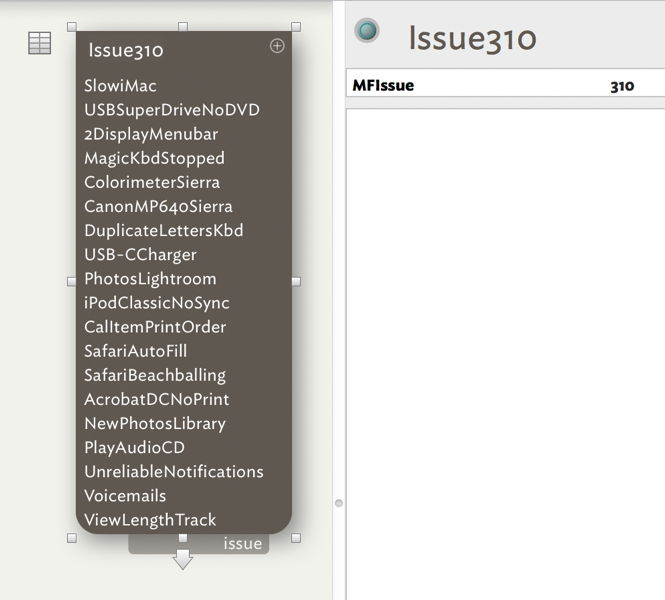
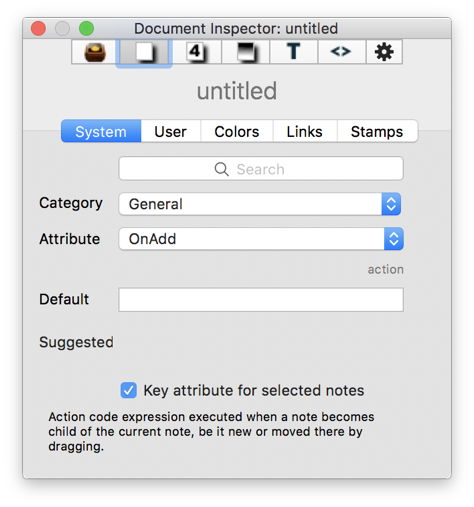
I then make a new prototype issue, which will be used for the containers for all the notes making up each issue of the magazine. This has only one key user attribute, $MFIssue. I then create a note, set it to use that prototype, and put all the notes which I have now made for that issue into it as a container.
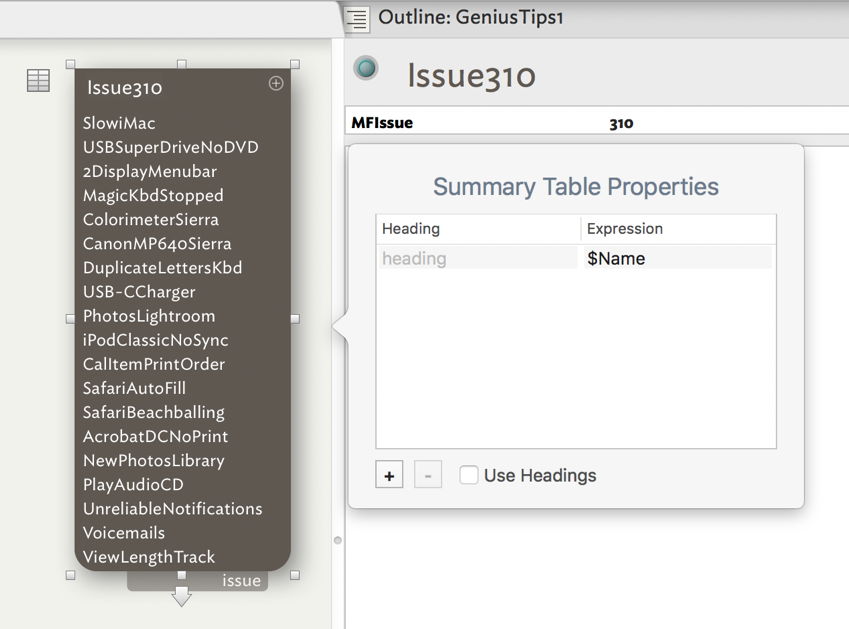
I list the contents of these issue containers on their tile by clicking on the matrix icon at the top left of the tile, then adding a property with the + button. I turn off Use Headings, and enter the expression $Name to set that. The tile then needs adjusting in dimensions to display just that table of contents.
Having done all this once manually, I now know how long it is going to take me to do the same to import the contents of another seventeen issues! Thankfully, Tinderbox (and Storyspace) provide a feature which can split the text within a note into many other notes: Explode… in the Note menu.

The basic principle behind Explode is simple: it will chop its text up into separate notes according to delimiters, and give each new note a title based on its content. To get this started, I open a copy of the text for one issue in BBEdit, my text editor.
Sometimes text comes ready to Explode – poetry, for instance, is often divided into stanzas or verses, some prose into appropriate paragraphs – but I am going to need to mark my text up. I use a character combination which I know appears nowhere in the text itself, a double ampersand &&. At this stage I also do a little light editing, removing some of the superfluous text, but will do most of the cleaning up in Tinderbox, once it has been Exploded out into individual notes.
There is nothing that I can usefully do here in terms of assigning each section a title, without spending a lot of time editing it. I’ll leave Tinderbox to create note names, and change them later.

I then drag the whole text document from the Finder into the correct issue container, which imports it all into a single note.

With that note selected, I use the Explode… command to start the process. In the popup dialog, I set the text to be broken at delimiter, enter that delimiter as &&, and set the delimiters to be deleted. I leave its title to be set from the first sentence, and check the preview given at the right. If you are not sure that this will work out right, you can use the control below to preview each of the notes which will result, and tweak the settings until you’re happy.
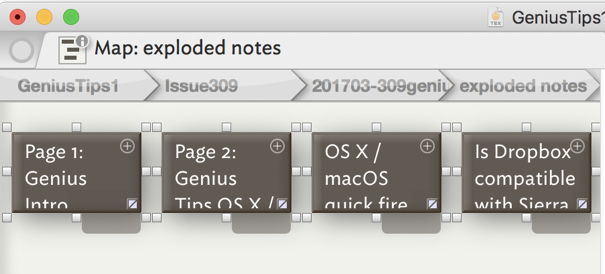
The result of Explode is a container (which still contains the whole text version) inside which is a container named exploded notes, inside which are each of the exploded notes. As these look good, I cut them from here and paste them at the top level of that issue’s container, then delete the redundant containers.
Now I have to work through those notes, setting the appropriate prototype according to the topic of that note, setting $MFIssue and other attributes as appropriate, tidying up the text content, and giving each an appropriate title. This sounds onerous, but is actually quite quick when the tasks are done in batches.

As the number of issues builds, I can quickly see some very useful features. The most important, of course, is Find… from the Edit menu, which lets me view all the notes containing specified text. At last I can tell very quickly whether I have used a similar question in the past.
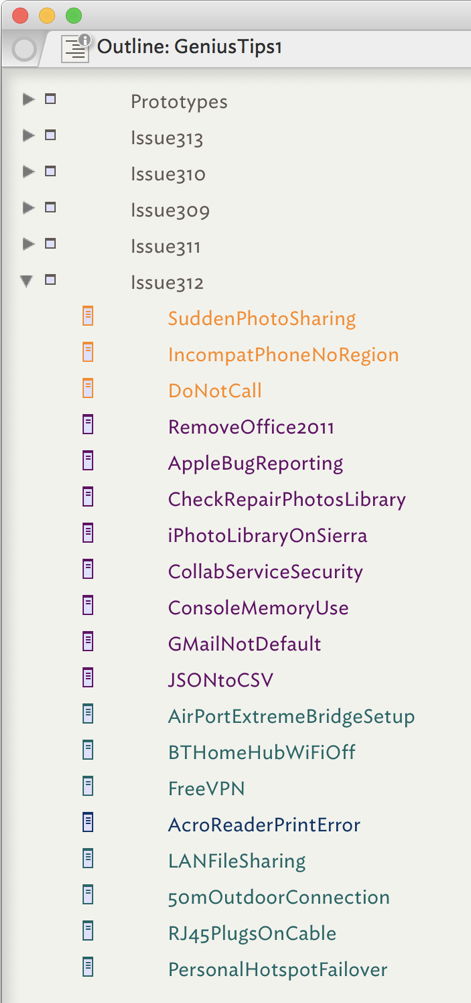
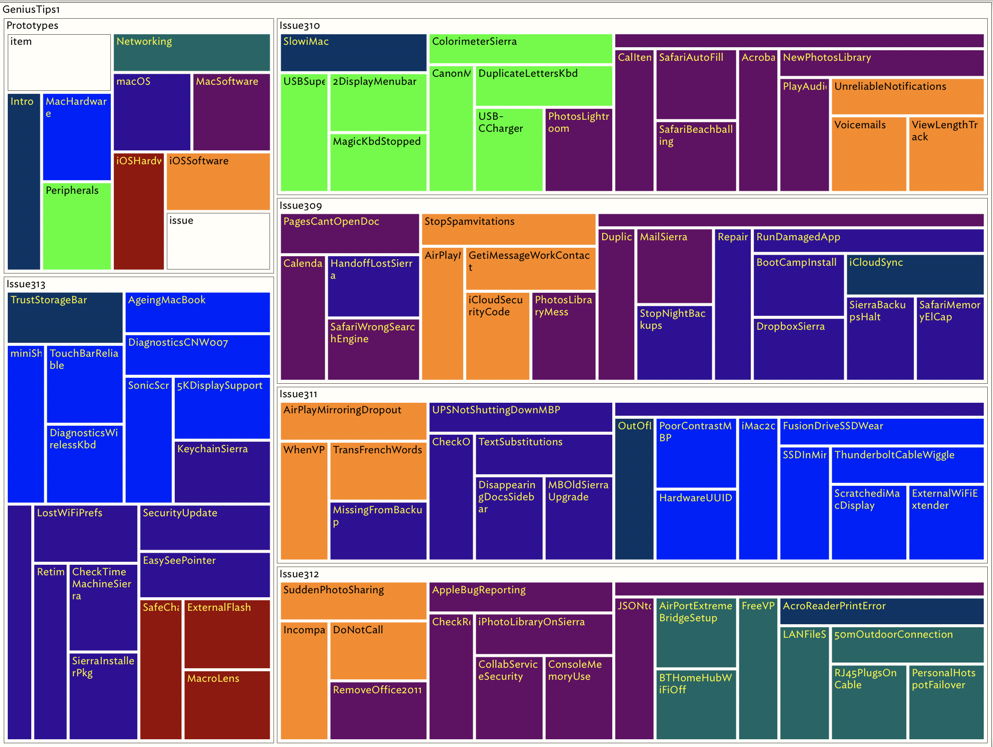
Using the View menu, I can switch to an Outline view, which – coupled with the colours used for each topic – gives me an excellent summary of the content for each issue.

The Treemap view is even better: if I select all then, holding the Command key down, click on those areas which I wish to deselect, I can colour that view to see the balance across issues of items for each topic. For example, this shows that in the last five issues, I have covered iOS Hardware just once, and that I have also covered Networking and Peripherals only once.
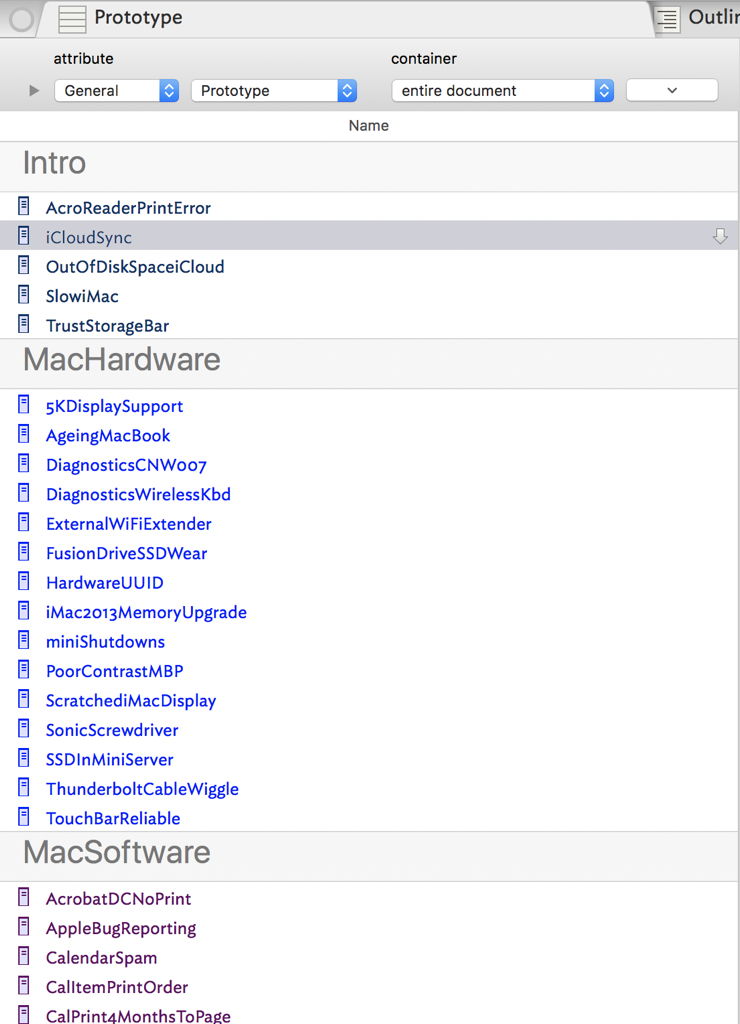
You can do a great deal in Tinderbox without writing any scripts. This is the Attribute Browser view, sorting the notes by prototype, i.e. topic, which gives me a quick way to look at division and balance between topics.
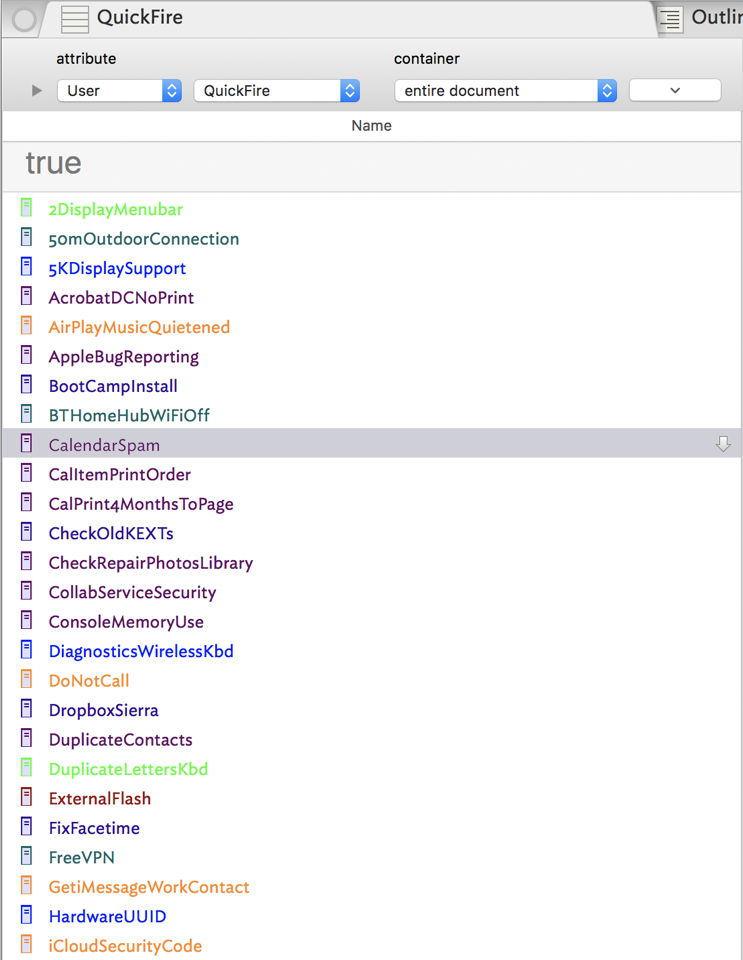
The same view can also sort by the value of my user attribute $QuickFire, which lets me browse coverage of different topics in shorter items.
As with all the best tools, Tinderbox has not just done the job that I wanted it to do, but now provides powerful ways of looking at and browsing the content which I have imported into it. That is exactly why I encourage users to do what I have just done. I hope that I have encouraged you too.
