

Storyspace and Tinderbox are sister applications with quite distinct purposes. Tinderbox is the most sophisticated notemaking app around, which helps you structure the information which you put into it, then export content as HTML, to Scrivener, etc. Storyspace is the most advanced environment for developing and accessing true hypertext – not just with HTML’s simple links, but with guard rules, scripts, and a lot more.
Both now provide strong support for timelines, and this article focusses on using them purely to create a timeline comparable to that generated by Aeon Timeline. The instructions below can be followed in either app, although I use the terms for Storyspace, such as writing spaces rather than notes. You can download a demo version of Storyspace 3 for OS X El Capitan from here if you want to try this for yourself. I also provide the document file at the end.
Start Storyspace and it will make you an Untitled and empty document.
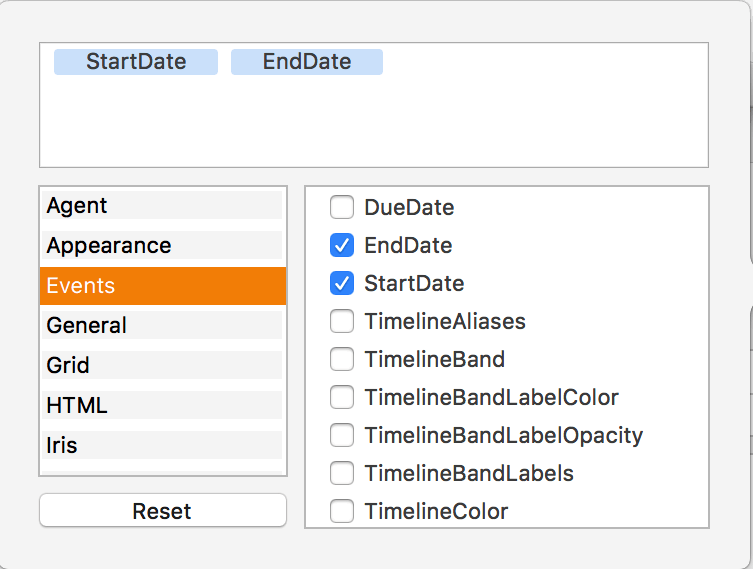
Double-click in the left hand pane of the default Map view to create a new writing space (= note). This will be our prototype for paintings. Name it painting, and make two key attributes using the + button to the right of the name in the right-hand view. In the window that pops up, in the left list select Events, and in the right StartDate and EndDate.
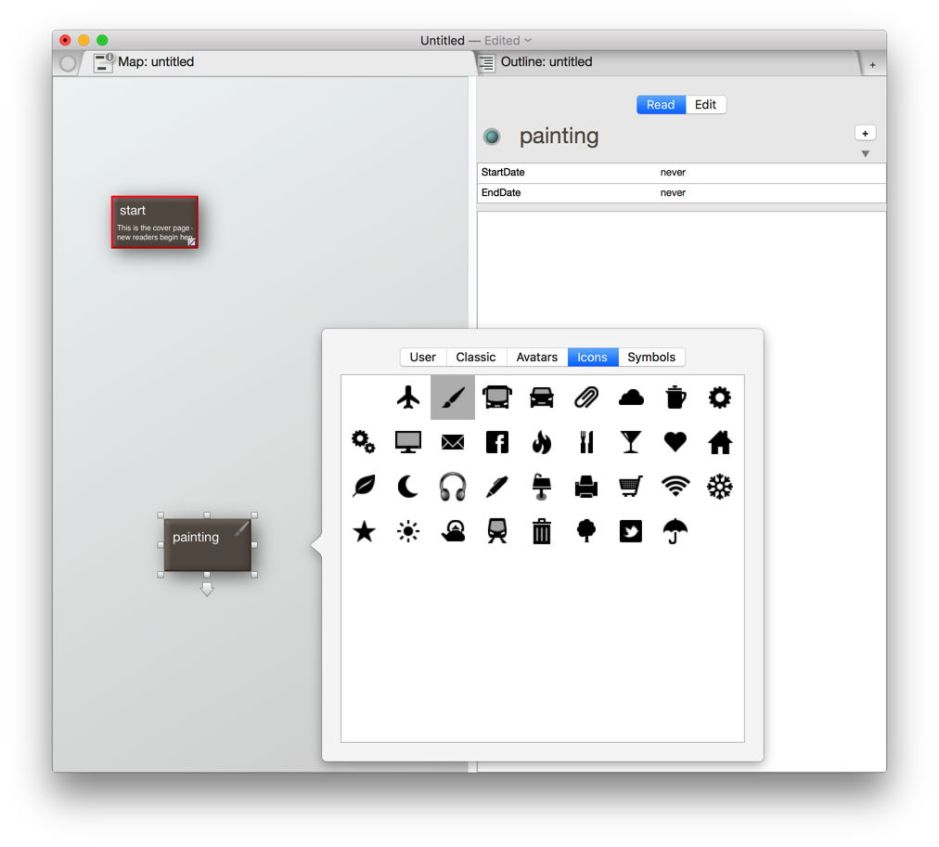
Click on the main window to close that popup window, and you will see those two attributes exposed in the right-hand view. Then give it a Badge by clicking on the icon in the upper right of the writing space in the left-hand pane of the Map view. This will produce a popup window containing available badges: select a paintbrush or similar.
Turn painting into a prototype. Open the Properties Inspector using the Inspector command in the Window menu. In that select the properties tool by clicking on the icon with the figure 4 in it. In the Prototype tab, tick the Prototype box.

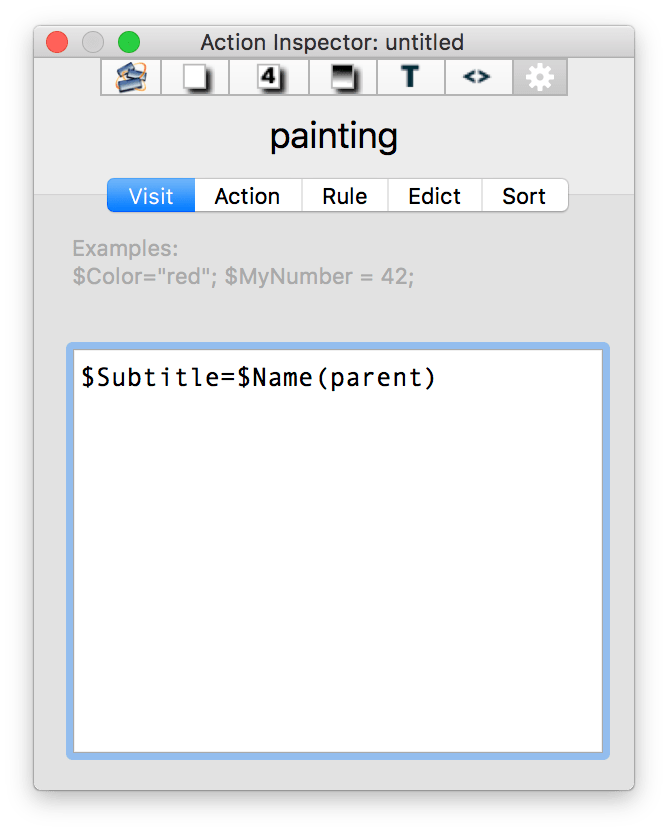
Finally, add the artist’s name to appear as the subtitle for a painting. Click the cogwheel icon at the right of the Inspector, and in the Visit tab, enter the following script
$Subtitle=$Name(parent)
This simply obtains the Name attribute (title) of the container writing space, and sets the painting’s Subtitle to be the same.
Then make a similar prototype for artist. Double-click in the Map view to create it, give it the name artist, make StartDate and EndDate key attributes, give it an appropriate Badge, turn it into a prototype, but do not add the Visit script, of course.

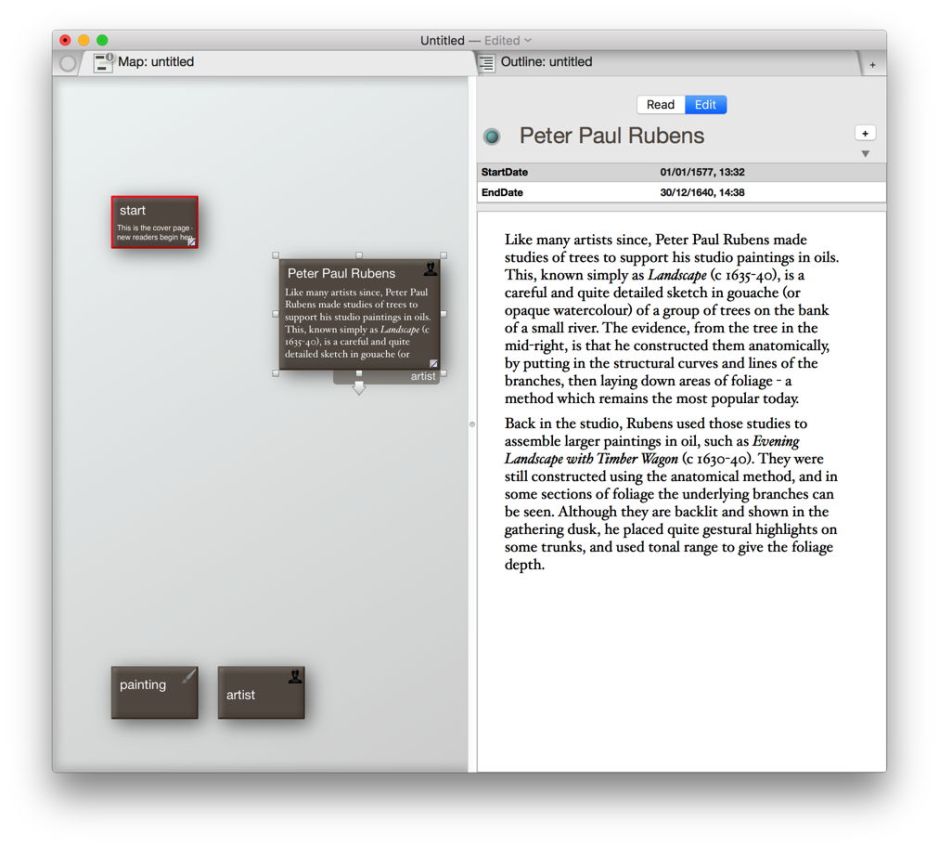
Now make your first artist writing space, for Peter Paul Rubens. Double-click in the left-hand pane of the Map view to make a new writing space, and name it Peter Paul Rubens. At the lower right of the tile there is a tab visible: click on it and a menu will pop up offering the artist prototype, which you should set it to. Click on the Edit tab in the right-hand pane to edit this writing space. Set the StartDate to his year of birth, e.g. 01/01/1577, and the end date to the year of his death, e.g. 30/12/1640 (using your normal localised date format). Copy and paste any relevant text into the text area there that you might wish.
Now create a writing space for one of Rubens’ paintings. Double-click in the Map view for a new writing space, give it the name of the painting, and switch it to use the painting prototype. Set its start date to the date attributed to the painting; if a range of dates is given, as here, give those as the StartDate and EndDate. Then drag and drop a small image of the painting (perhaps no larger than 512 x 512 pixels) into the text area, and add details about that painting.
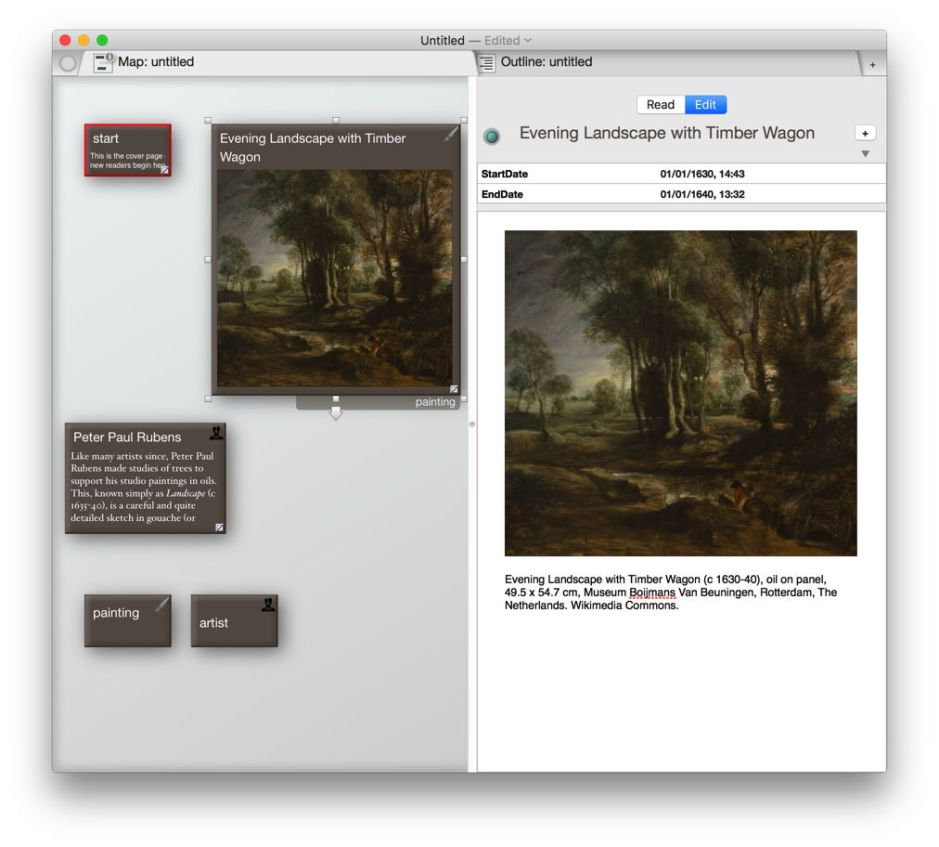
Note that at this stage no subtitle is shown for the painting, because it is not yet inside a container. Once happy with the painting, drag and drop it (in the left-hand side of the Map view) onto the Peter Paul Rubens tile, making the latter its container.

With the Peter Paul Rubens container selected, you will see the painting inside, and the details for Rubens in the Outline view.
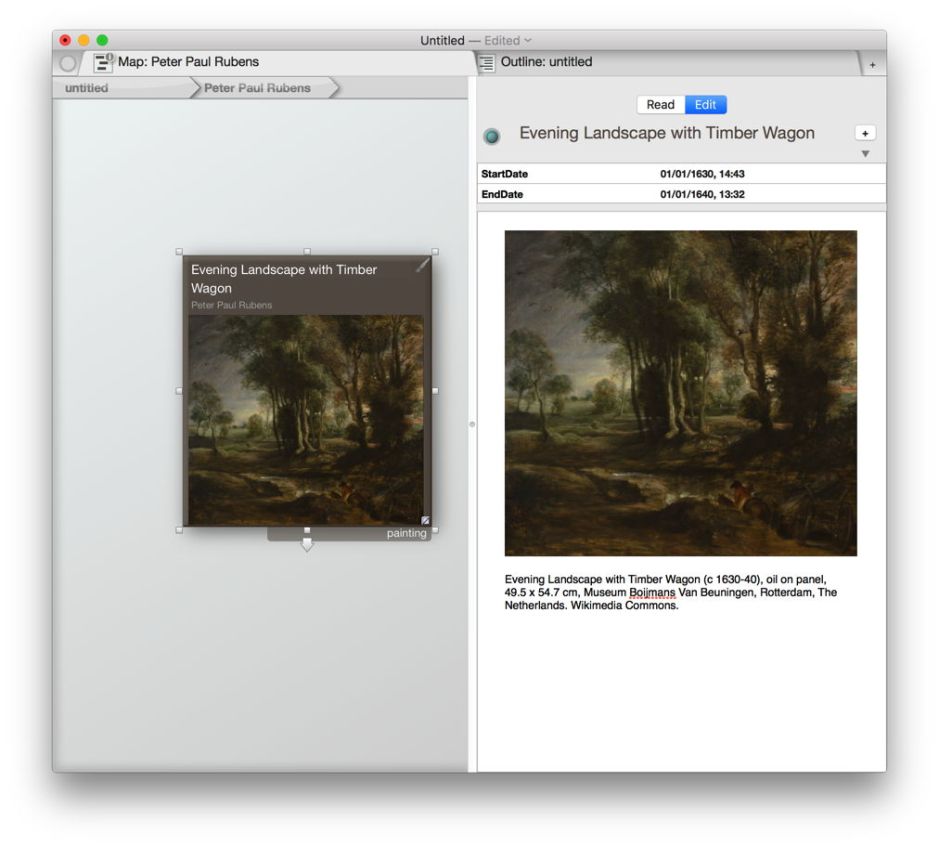
Double-click the top of the container to look inside it, and you will see the painting, complete with the subtitle of the artist’s name now. You can navigate back up to the top level of the document by clicking on the left item in the ‘breadcrumb bar’ above the left-hand pane of the Map view.
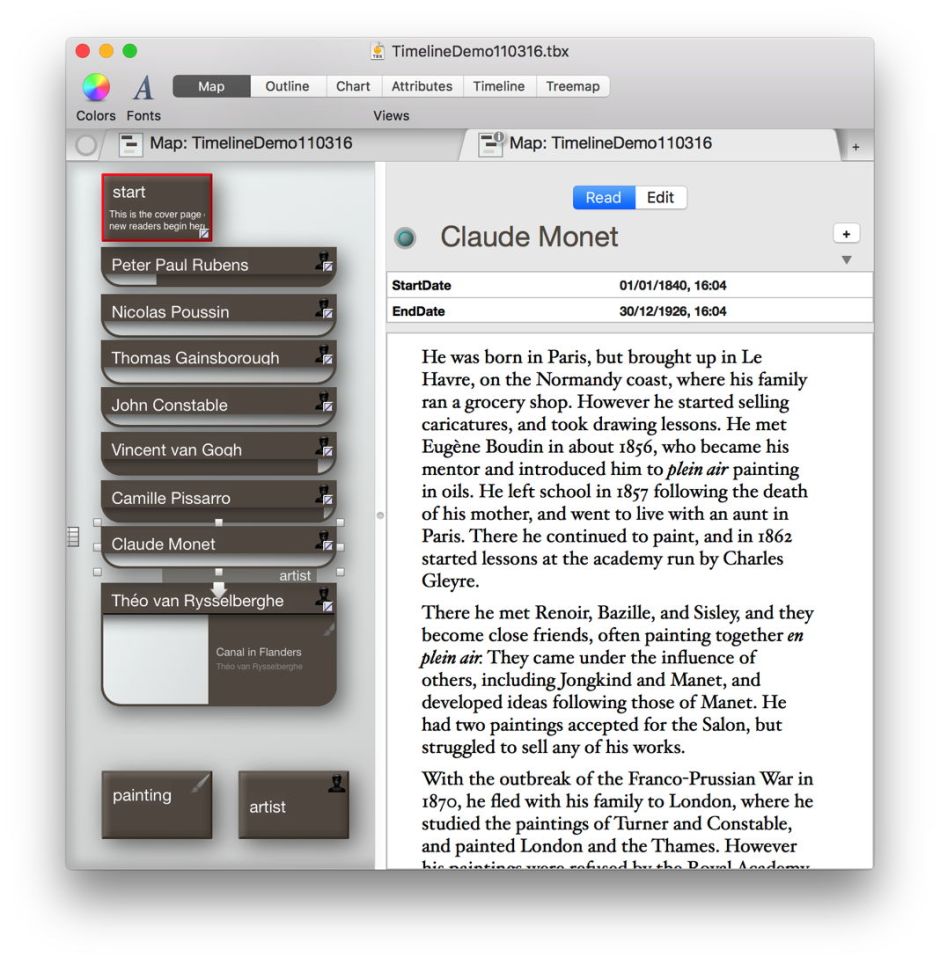
You then need to populate your document with artists and paintings, one at a time. This is a quick and simple process once you get into it. When you are ready to view the results using the Timeline view, use the View menu to show the toolbar, and switch the left hand pane to a Timeline view. You can close the Outline view, and adjust the remaining Timeline view so that it displays the complete date range. Navigate by selecting paintings or artists directly, or using the left and right cursor keys.

Here is my complete document, compressed using Zip, which can be opened in either Storyspace 3 or Tinderbox 6 if you prefer: TimelineDemo110316
Although neither Storyspace nor Tinderbox seem able to display thumbnails of images directly on the timeline, at present, the end result is excellent. Storyspace is geared mainly to creating hypertext to be read using its own reader (which is coming soon); Tinderbox has more sophisticated export options, and can be customised to meet most needs.
If all you want is a simple app to generate images of a timeline, then these are clearly overkill. However if you will be able to use their rich authoring environments, sophisticated links and scripts, they are unique products. My index of tutorials and other articles about Storyspace is here.
