
There’s more to storage management than freeing up space. One of the more fundamental decisions is when to create a new container, or add another volume, or just to make do with a folder. Pick the wrong one and you could soon find it running out of space.
Basics
When you format storage such as an SSD or hard disk, the space it has available is put into one or more partitions or containers. Those are normally treated as having fixed sizes, although their layout can be changed later if you must. Each HFS+ volume is also a partition, so adding another HFS+ volume to a disk requires its partitions to be changed.
APFS volumes are different, in that one or more volumes share each container. That means their size changes in use without making any changes to the containers, provided the total space they occupy remains within the size of their container. Because each volume only occupies the storage space it’s currently using, the free space within a container is common to all the volumes it contains.
Folders are merely directories, highly dynamic and fully merged within a volume. Moving a file between different folders within the same volume is just a matter of changing its place in the directory tree within that file system.
Disk Utility
When you format an SSD or hard disk in APFS, the default is to create one container filling its storage space, and a single volume within that containing the many folders you then create as you use that disk. For most general purposes that’s ideal, and straightforward to manage.
When you want to limit the size of groups of volumes, one simple step is to partition the storage into two or more containers of fixed size. For example, if you have a 2 TB disk and want to limit half of it to contain backups, you could divide it into two containers of equal size.
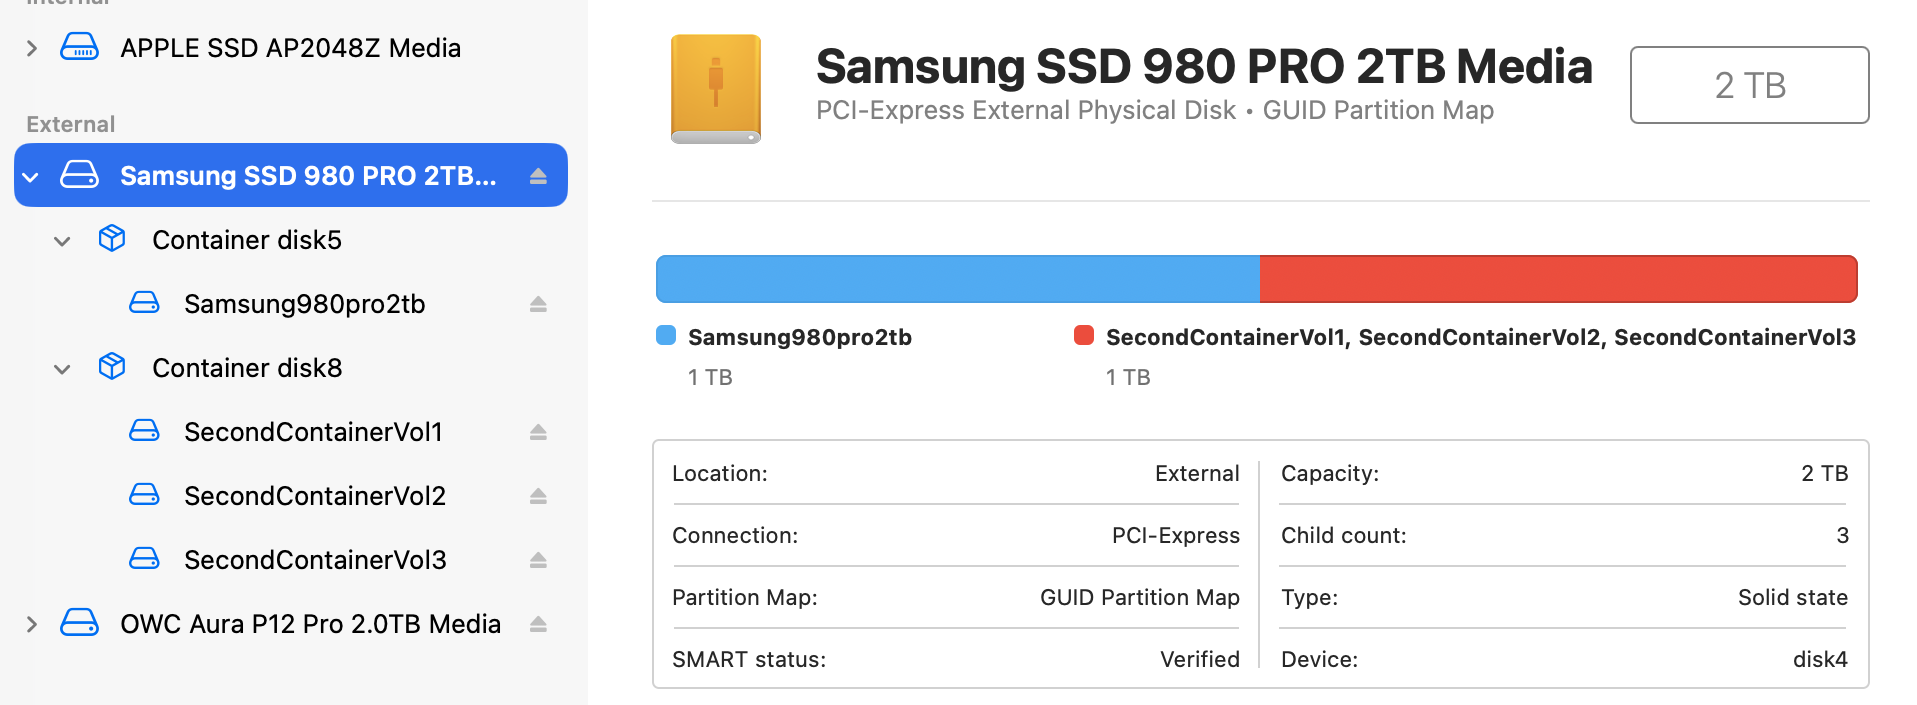
The first container (in blue) has a single volume, while the second (red) has three. The additional two volumes are added to the second container by selecting it in the list at the left and clicking the + Volume tool.
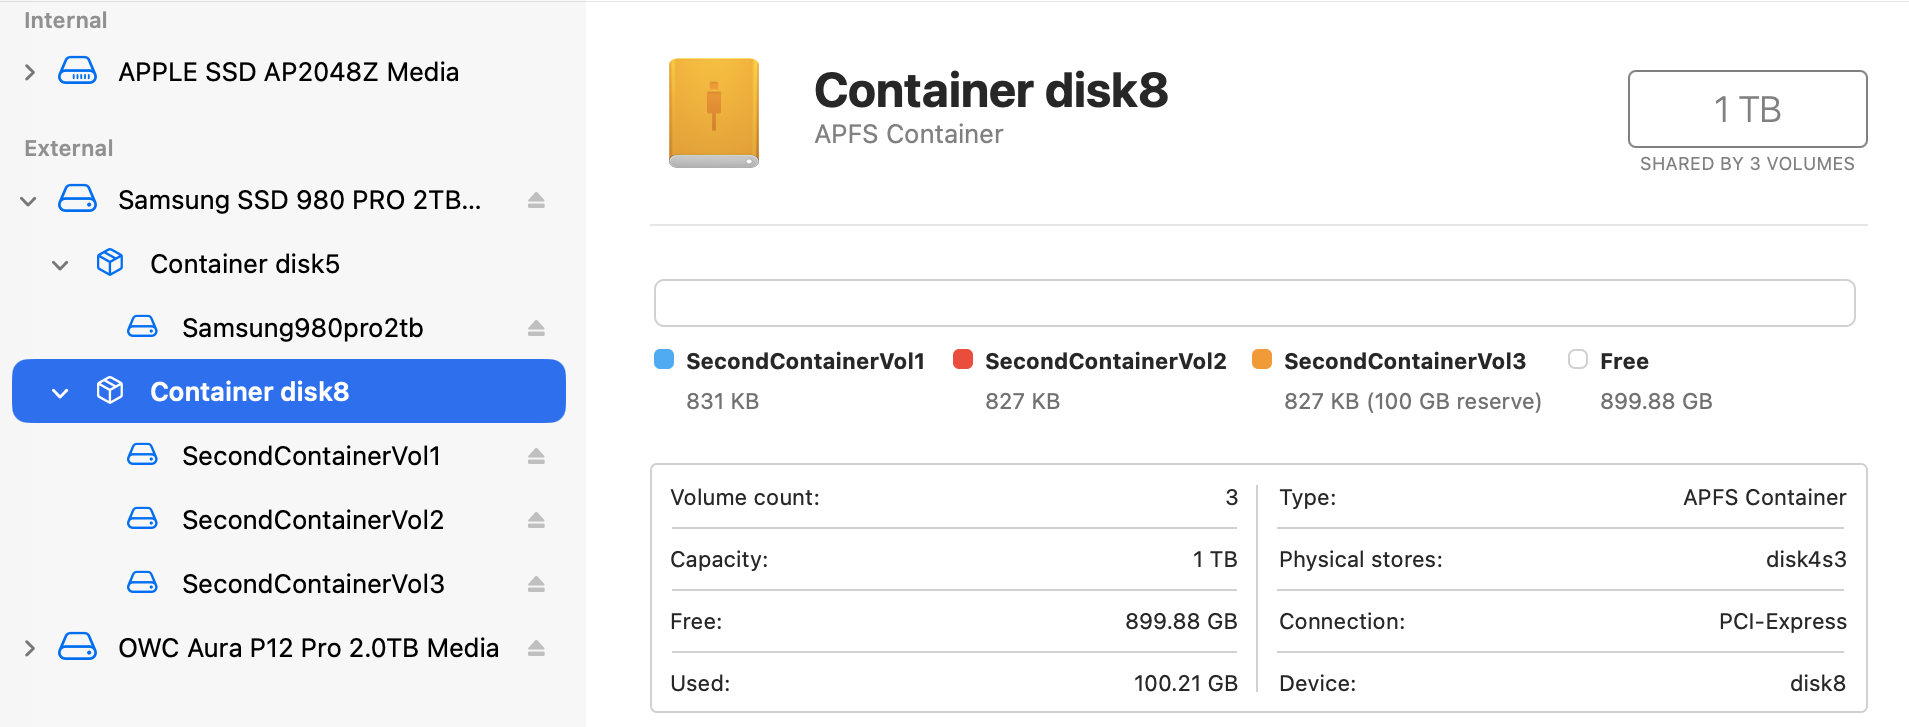
Vol3 in that container is different, as it had a maximum and minimum size set when it was created. Although all three volumes are empty, Disk Utility reports just over 100 GB is already in use, as that has been set as Vol3’s Reserve size.
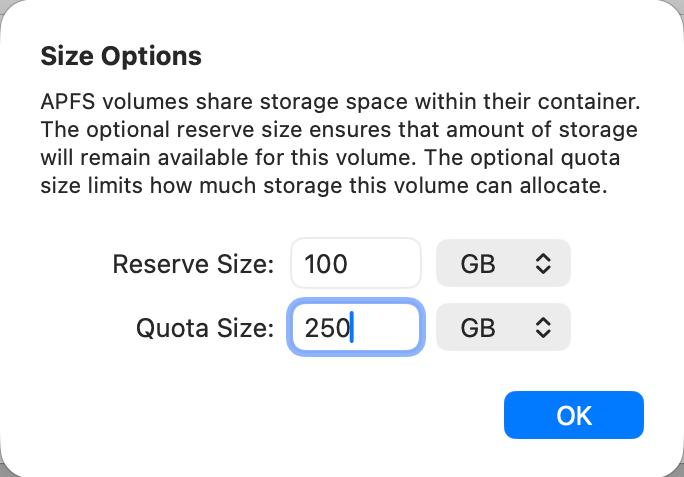
When adding a new volume to a container, click on the Size Options button to specify them.
The Reserve size is a guaranteed minimum size allocated to that volume at all times, and the Quota size is the largest size it can occupy within that container.
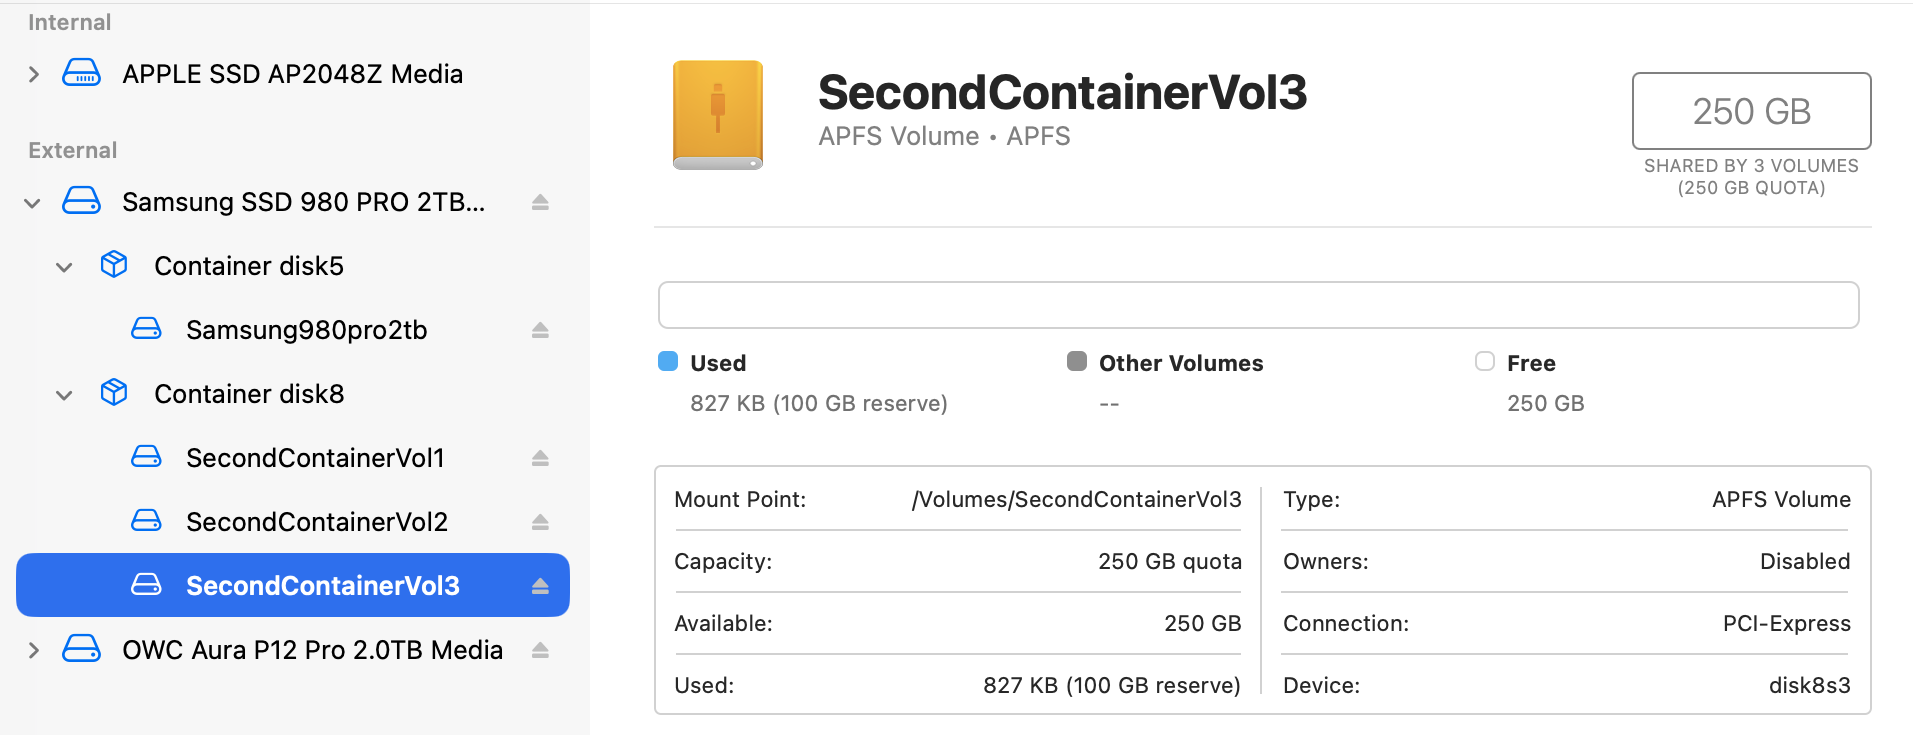
Select that volume and you’ll see the effect of those options: it has a maximum capacity of the Quota, and its Reserve size is stated in the space used, even though it’s empty at present.
Using those options gives the benefits of being a volume and sharing free space within the container, and of constraining how that free space can be used. Reserve and Quota sizes can currently only be set when a volume is first created, and can’t be changed or removed once the volume has been created.
Folders are created in the Finder, or as directories in the command line, as and when you want them.
Pros and cons
Containers are relatively isolated from one another. If the file system in a volume inside a different container is corrupted, then it shouldn’t have any adverse effect on those in other containers. Even when setting up an otherwise empty disk, Disk Utility encourages you to create new volumes rather than containers. At that stage, repartitioning the disk should be completely safe, but that becomes increasingly risky as containers fill with data. Although every effort is made to repartition non-destructively, that may not be possible. It’s therefore better to assume that, once the containers are laid out, no further changes to them will be made until the whole disk is reformatted.
Containers can simplify otherwise complex folder layouts, as will occur if you want multiple boot volume groups for macOS on a single disk, although Apple has always recommended setting them up inside a single container so they can share all the free space in the disk.
APFS volumes each have their own file system, so are separated from one another, but not as robustly as with different containers. Snapshots are whole-volume, and the only effective way of preventing huge files like virtual machines from resulting in large snapshots is to store them in a separate volume that doesn’t have snapshots made of it.
Because volumes have separate file systems, they can’t share file data using APFS clone files, nor hard links, which only work within the same volume. That can lead to duplication of data when compared to using a single volume. File system features such as encryption and case-sensitivity apply to whole volumes, and mounting and unmounting are also performed with volumes.
Files are readily moved within folders, and can be cloned to share their common data, minimising disk space used and erase-write cycles in an SSD. However, they’re all included in any snapshots made of that volume, and can’t be opted out, nor can there be any limits placed on their size.
Common examples
- Containers – hidden containers for firmware and fallback recovery on the internal SSD, where they’re relatively safe and can be unmounted.
- Volumes – Time Machine backup storage, which is required to be case-sensitive, and is often encrypted, the Data volume in a boot volume group, additional volumes to contain huge files such as VMs so they aren’t included in snapshots.
- Folders – standard folders in the user’s Home folder, those in Library folders.
Reserve and Quota sizes are rarely set, although there are many situations where they can be valuable, for example in ensuring a backup volume can’t be squeezed out by one for general purpose storage.

