
The Undo command so often proves a lifesaver, but isn’t sufficient for undoing substantial changes made earlier in the day. The challenge is to locate a recent version of the document you’re currently editing that contained a section that you later removed or changed substantially, then to paste that section back into the current version. For that there are three obvious choices: saved versions, snapshots and backups. This article looks at how they work in macOS Tahoe, and their pros and cons.
Versions
When first introduced, the macOS versioning system wasn’t widely adopted by apps. Since then many popular apps have adopted it, although it remains exceptional in those that work primarily with images. Apps that use this system can be distinguished by their Revert To option in the File menu, containing the command Browse All Versions, although some that don’t offer that do still save versions.

That command opens a version browser similar to the Time Machine app, where you can look back through previous versions that have been saved automatically to that volume’s hidden .DocumentRevisions-V100 folder. A new version is added each time the current document is saved, whether automatically by the editor or manually.

Although those old versions can be purged when volume free space is insufficient, in most cases they’re preserved until a document is deleted or moved to a different volume, when they are lost altogether. Indeed, one of the problems with this system is that it can readily accumulate hundreds or thousands of old versions.
The standard version browser supports copying content from an earlier version of a document and pasting it into the current version, although you might find that awkward in practice. If you prefer you can browse saved versions of a document using Revisionist, copy their contents from a preview of an old version, and paste that into the current version in its editor. What you can’t do, of course, is to make any changes to previous versions.
If you use another version control system like Git or Subversion, then you can use those to make similar changes based on content copied from an old version.
Snapshots
Local snapshots are made automatically by Time Machine and third-party utilities when backing up to APFS volumes, and include all files in that volume, even those that are excluded from backups. Although they’re normally included in the Time Machine app and the built-in version browser, they can also be mounted using Disk Utility and other apps, then accessed in the Finder.
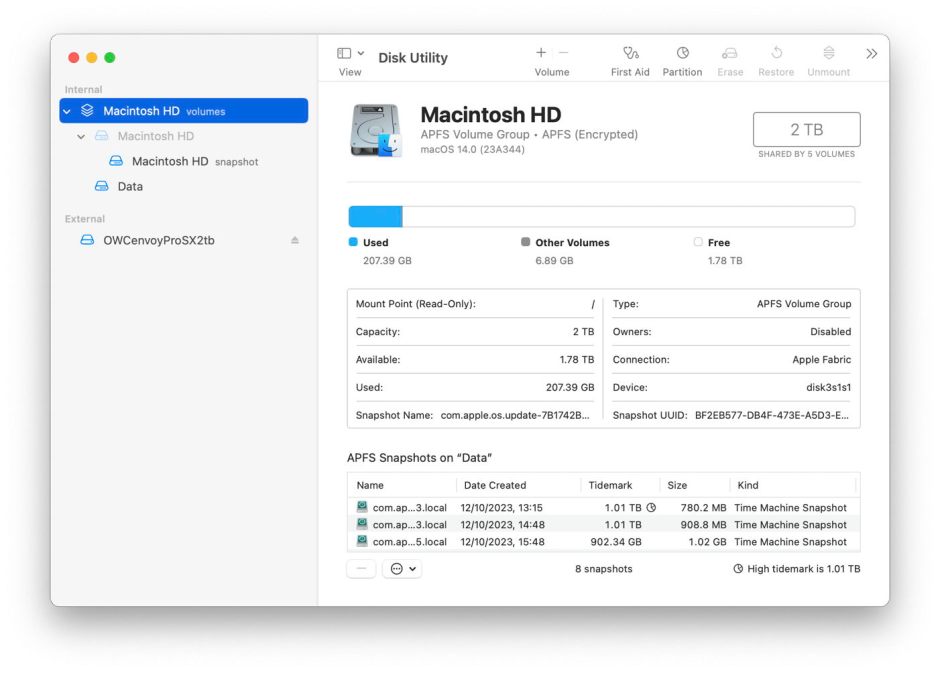
For example, select your Data volume in Disk Utility and ensure its View menu is set to Show APFS Snapshots. In the list of those at the foot of the main window select the snapshot you want to mount, and use the popup menu below the list to Mount it. It will then appear in the list of mounted volumes named something like Data@snap-5682771, and can be browsed there.
If you know exactly when your document last contained the contents you want to recover, this can be a good way to do so, as it covers all files and doesn’t require their editor to use the versioning system. However, it becomes clumsy when you need to browse through a document in several snapshots. All backup utilities are required to automatically delete old snapshots, and Time Machine does that once each is 24 hours old. That limits this method to accessing content that was still present within the last 24 hours.
Backups
Although Time Machine commonly makes hourly snapshots and backups, it can instead make them daily, as do third-party apps, which limits their usefulness for stepping back to more recent versions of files. Time Machine’s backups can be accessed using its app, or in the Finder.
Although many are put off by the Time Machine app’s whizzy interface, it’s actually suited to this purpose, as you can select a copy of a document in an old backup and use the contextual menu to view it in a QuickLook preview. If all you want to do is copy a chunk of content from it, that can be performed in that preview, then pasted into place in the current version open in its editor.
Browsing backups in the Finder makes it more ponderous to locate the file in any backup, but it’s then more flexible as its QuickLook preview offers the option of opening the backup copy using its default editor, where it’s quick to copy the required content for pasting into the active document.
Comparison
- Versions require an app that supports them, can cover any period back to the creation of a document, and can be performed in the standard version browser, or with the aid of Revisionist. Browsing and copying are straightforward. Where supported, this makes a good first choice.
- Snapshots may be available for the last 24 hours, depending on backup software and frequency. Their contents can be selected in the Finder, but can’t be browsed easily, although copying is straightforward.
- Backups are limited by their frequency. Even with hourly backups, changes can be omitted. Browsing isn’t easy, but copying is straightforward.

