
Although checking and repairing volumes and disks in Disk Utility should be straightforward, a combination of its quirks, APFS foibles, and a bug or two can cause confusion and worry. This article describes how to cut through the chaos and get the job done properly.
First you need to decide whether the volume or disk you want to check is part of your current boot disk, such as your Data volume. Although Disk Utility allows you to run First Aid on that while booted from it, it’s far better if you can do that in Recovery instead.
Check a volume that isn’t part of your current boot disk
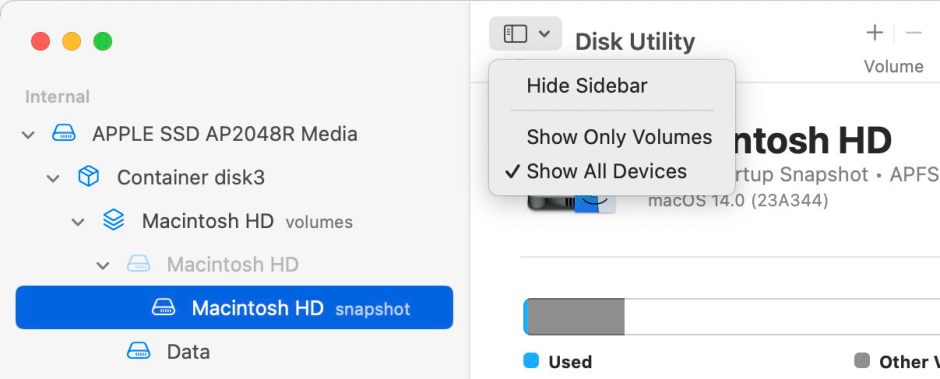
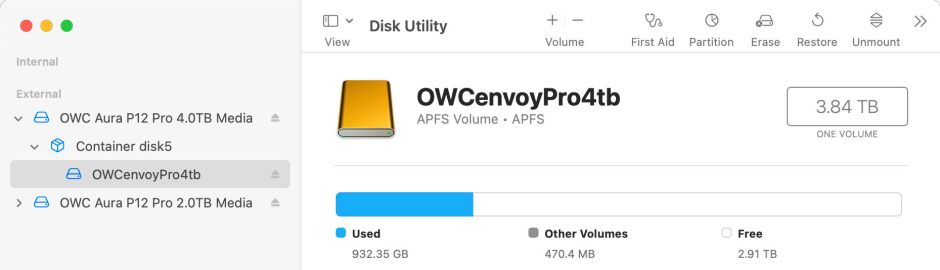
This is the more straightforward, unless it’s your Time Machine backup storage, in which case you may need to pause automatic backups until you’ve completed your checks. Open Disk Utility and first check that its View tool is set to Show All Devices before selecting the first of the volumes on the disk that you want to check. Then click First Aid.
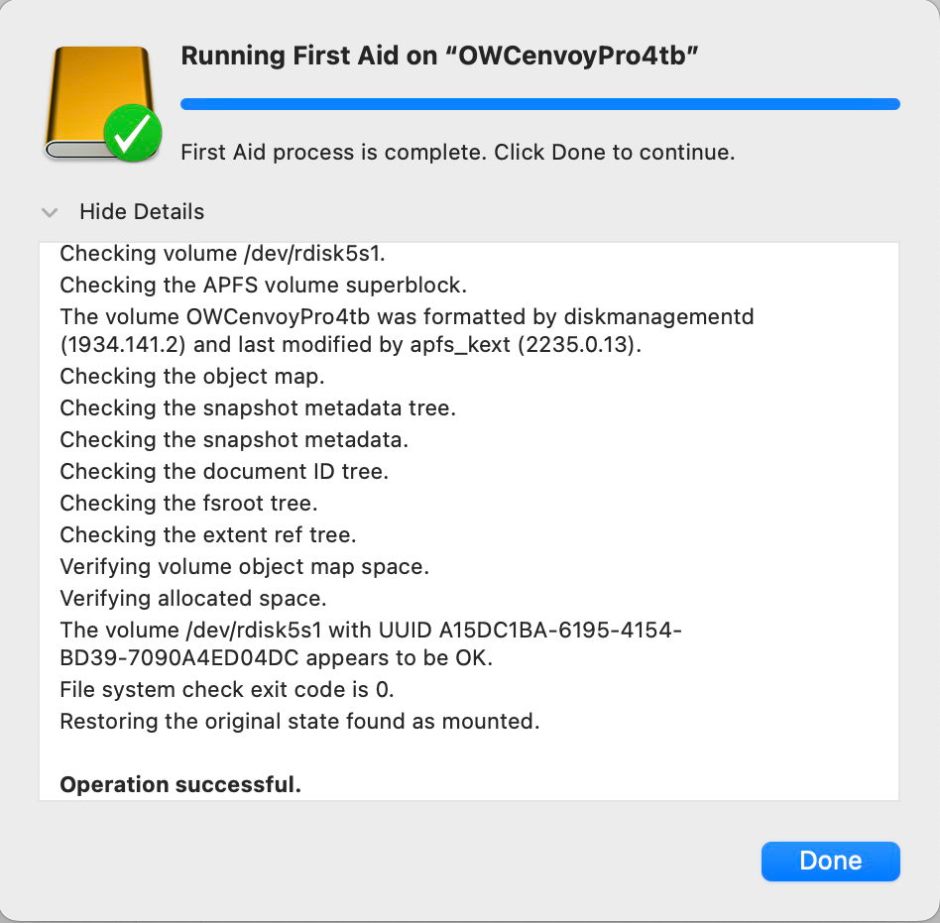
Show details in the pane during checking and repair to see what happens.
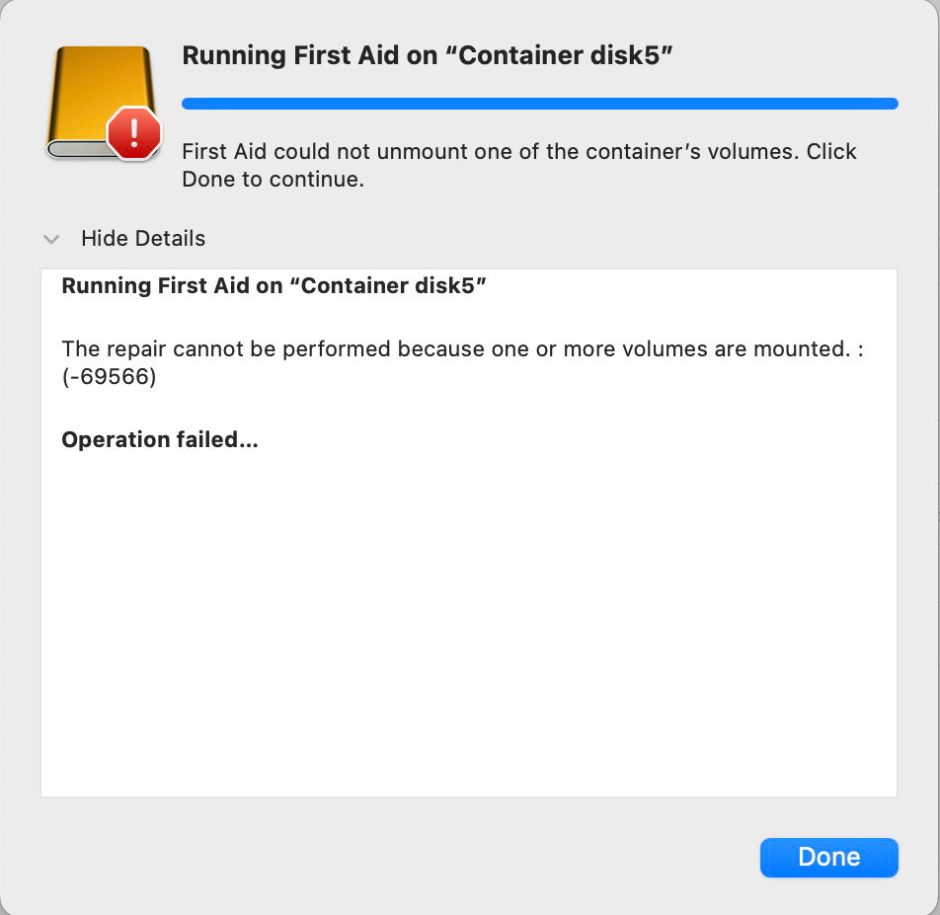
If First Aid complains of an error because one or more volumes are mounted, select the volume in the list at the left and click the Unmount tool. Once that volume has unmounted, select it again, and try First Aid. If that also fails for the same reason, select the disk itself, click on Unmount and then First Aid again. If you don’t have any joy, start your Mac up in Recovery and work from there instead.
Disk Utility calls the command tool fsck_apfs to check and repair APFS volumes and containers, and that requires the volume or volumes to be unmounted for the procedure. For some years now Disk Utility has shown itself to be unreliable at unmounting volumes before running fsck_apfs, and often requires manual help.
When you’ve checked all the volumes you want to on that disk, select the first container on the disk, and repeat, unmounting volumes if prompted. Checking the container will normally repeat checks on each volume within the container, but bear with it, as that may still pick up errors that can only be repaired in the whole container.
Finally, select the disk itself at the top, and run First Aid on that.
At the end, select any volumes or disks that remain unmounted, and Mount them again.
Check a volume in your current boot disk
Start up in Recovery, select Options, click Continue underneath it then select Disk Utility in the window and click Continue.
Once again, set its View tool to Show All Devices, then select the Data or Macintosh HD – Data volume in the boot group you want to check, and click First Aid.


Once that’s complete, select the container above that Data volume, and click First Aid.


Finally select the disk above that container, and click First Aid.

Dealing with problems
Most errors reported should be self-explanatory. Those in snapshots on a volume that’s backed up by Time Machine or a third-party utility, are normally dealt with when that snapshot is automatically deleted in a day or so. If Disk Utility reports an error and identifies the file at fault using its inode number, then this article explains how you can translate that into a file path; that’s also a feature supported by my free utility Mints.
Disk Utility may refer to performing “deferred repairs”; those appear to be repairs to errors that APFS has already decided it needs to make, but can’t at that moment. Sometimes they and other errors require “full space verification”, normally performed when you run First Aid on that container rather than the volume. In that case, when you check and repair the container, the error should be fixed.
Check without repair
In the past, you were given the option not to repair any errors detected, but you now have no say in the matter. If you do want to check a volume fully but without performing automatic repairs, use the command
sudo fsck_apfs -n /dev/disk7s2
for the volume disk7s2. Further details and other options are explained here.
Errors that can’t be repaired
When fsck_apfs or First Aid can’t repair an error, the ultimate solution is to reformat that disk, partially or completely, install a fresh copy of macOS and migrate from your backup. This article explains the different options.
Summary
- Check and repair volumes in your current boot group in Recovery.
- Other volumes can be checked and repaired using Disk Utility on your boot disk.
- Set View to Show All Devices so you can see containers.
- Run First Aid on volumes first, then containers, then disks last of all.
- If any fail because they’re mounted, select the volume or disk, unmount it, and try again.
- Check without repair using
fsck_apfs.
