

This week I look at paintings of two of William Shakespeare’s most popular history plays, the two parts of Henry IV. These provide a fairly liberal account of events during the reign of this King of England and Wales, but not Scotland, between the months prior to the Battle of Shrewsbury in 1403, and Henry’s death in 1413, almost two centuries before Shakespeare wrote these plays in 1596 and 1597-98. Henry IV came to the throne in 1399, after he had overthrown and imprisoned King Richard II.
As a piece of English history, these plays have been painted almost exclusively by British artists, and those who settled in Britain. Although of less significance in European painting as a whole, these paintings are significant in the history of history painting in Britain, and efforts to produce distinctively British art.
Several of these paintings place emphasis on one of Shakespeare’s great characters, Sir John Falstaff, who reappears in The Merry Wives of Windsor.
King Henry IV wants to mount a crusade, but has to postpone plans when he learns that Edmund Mortimer has been captured by the Welsh rebel leader Glyndwr. However, there’s also cause for celebration in Hotspur (Harry Percy, son of Northumberland) beating the Scots in the north, even though he is refusing to deliver any more than one of his prisoners to the King.
In London, Prince Harry, eldest son of the King and heir apparent, agrees to join Sir John Falstaff, Poins and others in a highway robbery at Gads Hill. Poins suggests to the Prince that they should let Falstaff and the others do the robbing, then rob them in disguise, before meeting them later in Eastcheap to hear the story of their loss.
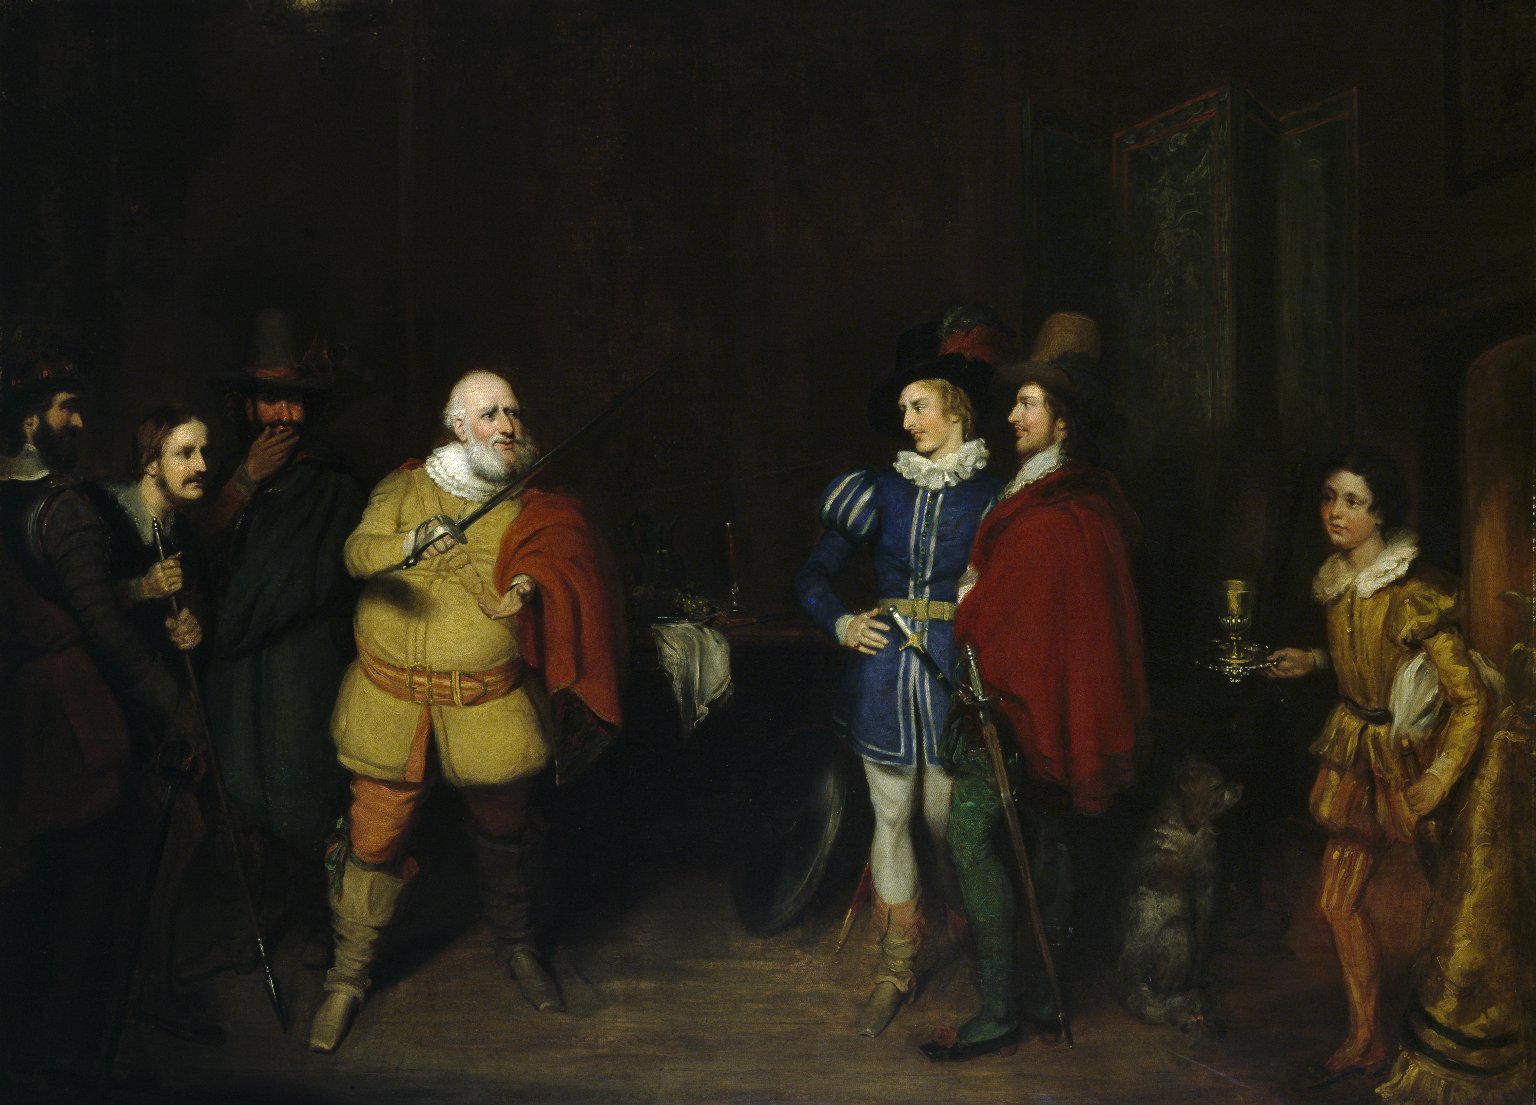
In Windsor, the victors from the north are explaining to the King why they have refused to deliver their prisoners to him. Hotspur says that he will do so when the King pays Mortimer’s ransom. As Mortimer has married Glyndwr’s daughter, the King believes he has turned traitor and repeats his demand for the prisoners.

Samuel John Egbert Jones’ undated painting of Hotspur and the Fop provides part of Hotspur’s excuse, as the fop on the left was sent with the message to Hotspur, on the right.
When the King has gone, the victors reflect on the King’s attitude, given that they had helped make him monarch in place of Richard II. Worcester then outlines a plot to combine their forces with those of the Scots, Welsh and the Archbishop of York’s in a rebellion against the King.
Before dawn the following morning, Prince Harry and the others meet to carry out the robbery. As planned, the Prince and Poins disguise themselves before the rest rob the travellers, then rob Falstaff and the others, who quickly run away.
That evening, in the Boar’s Head Tavern, Prince Harry and Poins wait for Falstaff and the others. When they arrive, Falstaff gives an overinflated account of the robbery, claiming they had to fight off fifty attackers before eventually losing their booty. The Prince then reveals that it was just he and Poins who had relieved them of their ill-gotten gains, which Falstaff insists he had known all the time.

Thomas Stothard’s Falstaff Describing the Fight at Gadshill from 1827 shows Sir John in the midst of his exaggerated account, demonstrating how he took on their attackers.
George Clint’s painting of Falstaff Relating his Valiant Exploits from about 1835 uses a different composition to tell much the same. The Prince and Poins are here on the right.
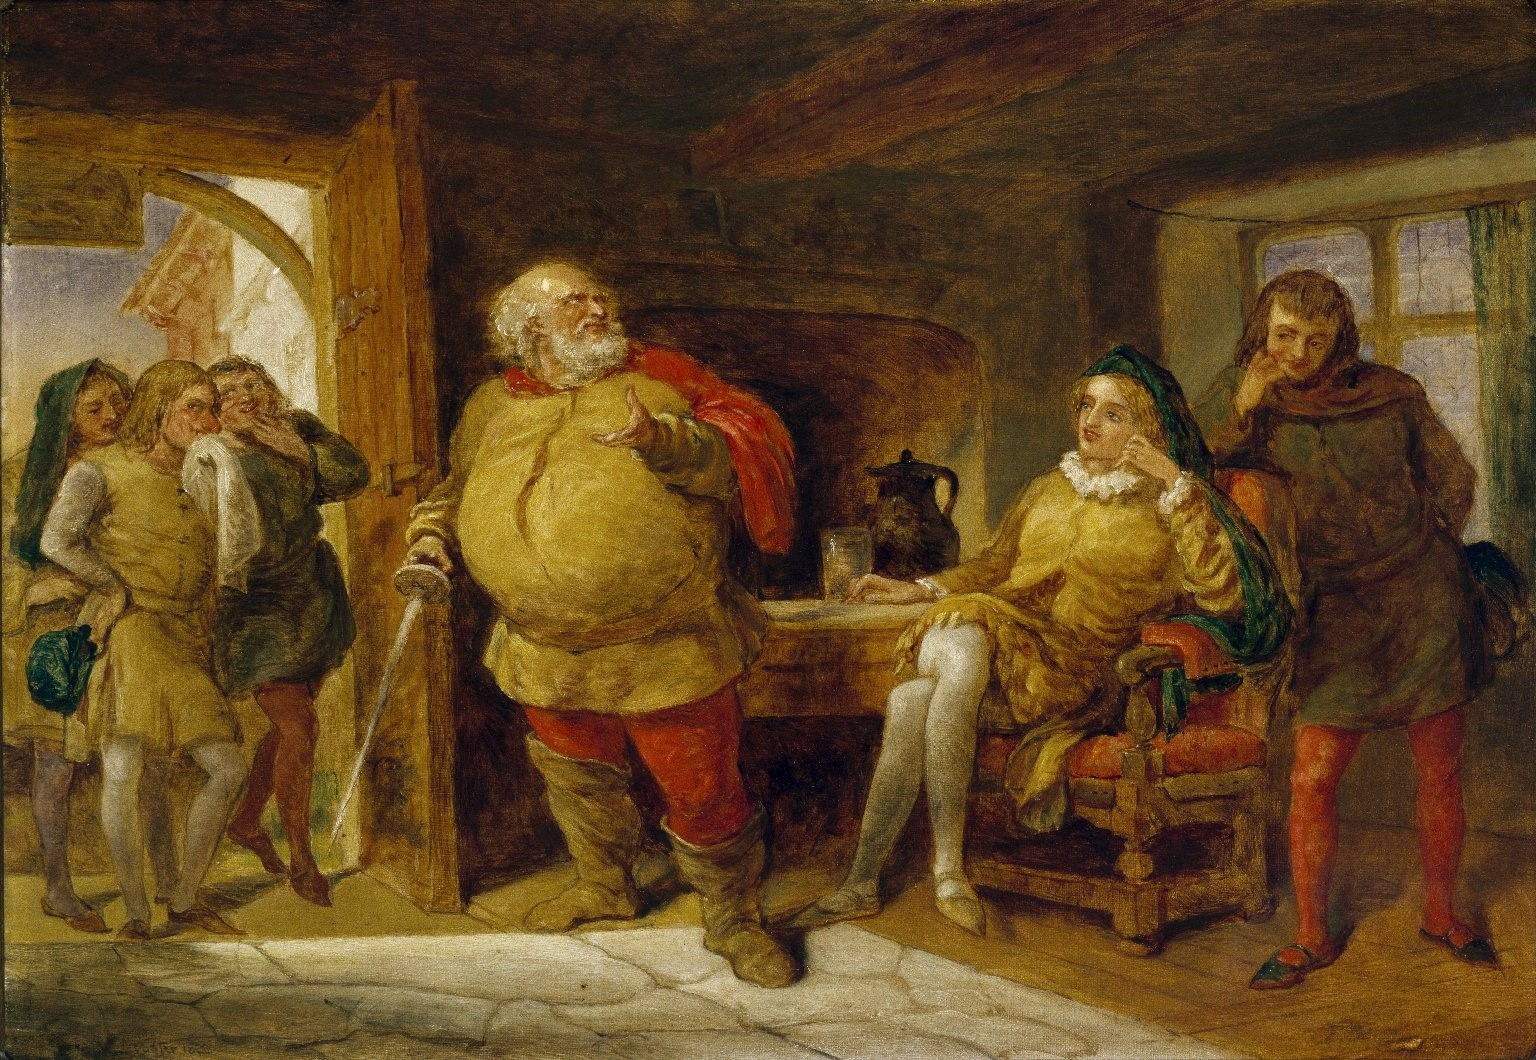
This painting of Henry IV, Part 1, Act 2, scene 4 by an unknown artist in about 1840 shows a more recognisable tavern. Peto, Bardolph and Gadshill are at the left, Falstaff in the centre, and the Prince and Poins are at the right.
News then arrives of the uprising against the King. The Prince and his group perform a mock play of how the King will admonish Harry for being absent from court. Officers arrive to arrest Falstaff and those involved in the robbery, but the Prince protects them, hiding the fat Falstaff behind the arras (a heavy fabric curtain), where he falls asleep. The Prince promises to reimburse the victims of the robbery, and to secure Falstaff a place in the King’s army.
Meanwhile, in Wales the rebels are planning how to divide England and Wales between them, once they have defeated the King. But communication isn’t easy, as Mortimer’s wife, Glyndwr’s daughter, can only speak Welsh, and her husband only English.
The King tells Harry off, comparing him with Hotspur, so Harry promises to recover his honour by defeating Hotspur. The King’s forces then set off to confront the rebels at Shrewsbury. The Prince returns to the tavern to collect Falstaff, who is to command infantry in the coming battle.
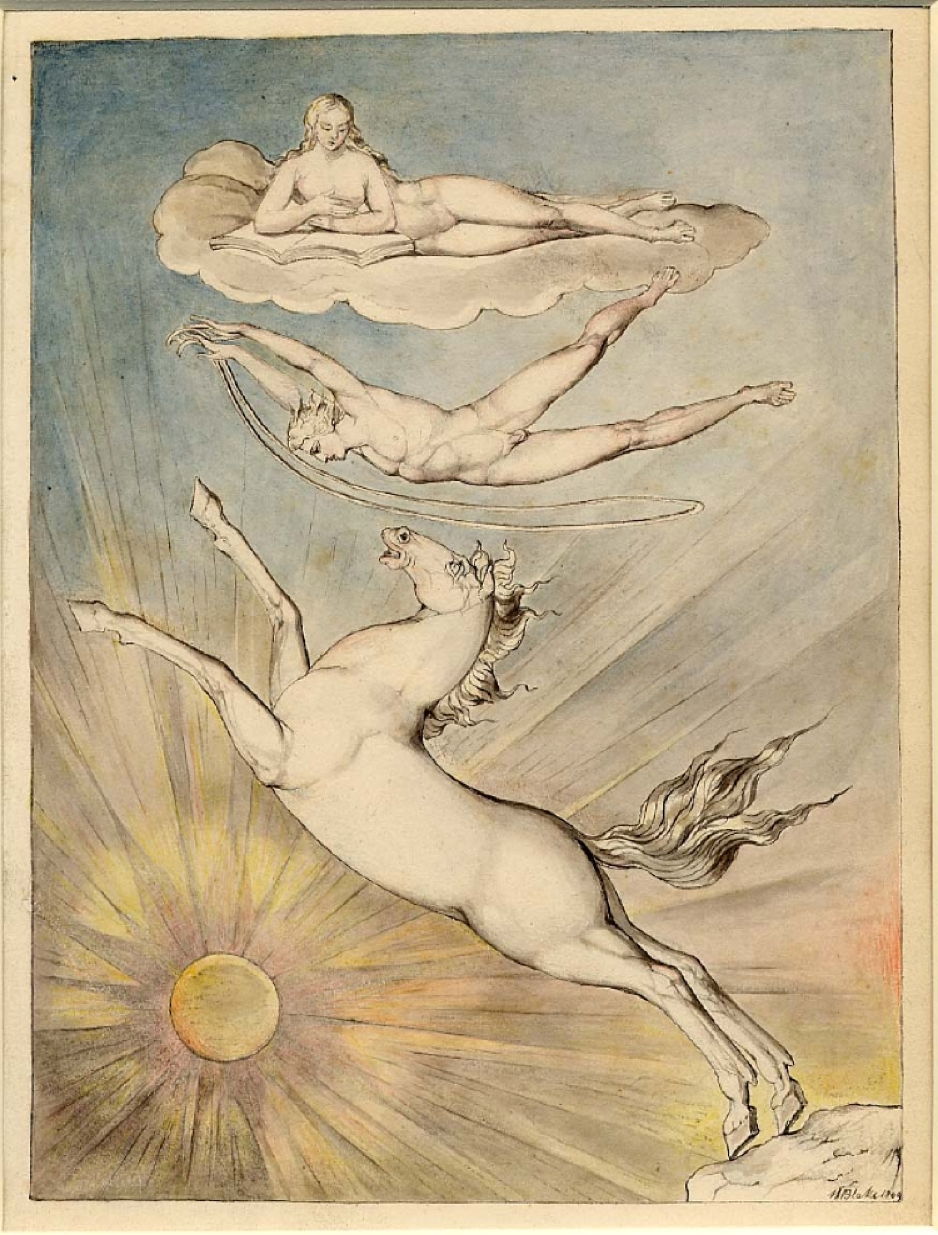
William Blake’s watercolour As if an angel dropped down from the clouds from 1809 draws on a quotation from this point in the play, and was intended as an illustration for it. It shows a nude woman reading from a book in the clouds, above a male angel and Pegasus below, with the sun’s rays behind them. This is based on Sir Richard Vernon’s comments on the transformation of Prince Harry into a soldier who
“vaulted with such ease into his seat
As if an angel dropp’d down from the clouds
To turn and wind a fiery Pegasus
And witch the world with noble horsemanship.”
Blake wrote of this: “the Horse of Intellect is leaping from the cliffs of Memory: it is a barren Rock: it is also called the Barren Waste of Locke and Newton.”

Edwin Austin Abbey’s painting from 1905 bears the line The King to the Prince of Wales: “Thou shalt have charge and sovereign trust herein.”
As the battle looms, Northumberland excuses himself as sick, and the Welsh aren’t ready to fight.
Falstaff has been accepting bribes to excuse the most able from fighting, and his soldiers are a shambles as a result. Prince Harry comments on that, and urges Falstaff to hurry his men to battle.
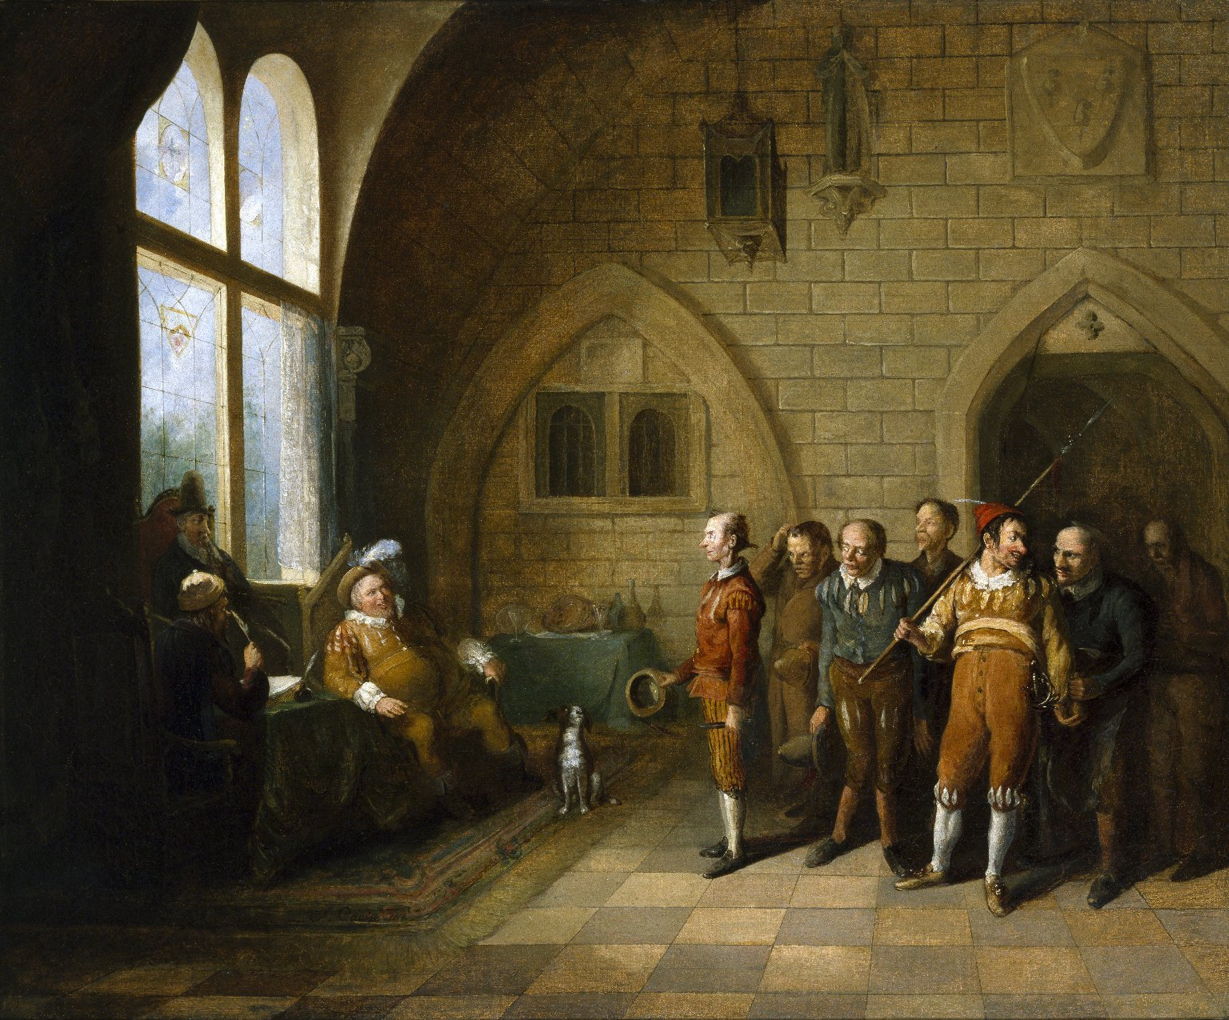
John Cawse pictures this flawed process of selection in his painting of Falstaff Choosing his Recruits from 1818.
The King sends Sir Walter Blunt to learn of the rebels’ grievances against him. Hotspur explains, doubts the King’s right to the throne, and promises to send Worcester to meet the King the following morning. At that meeting, Prince Harry offers to fight Hotspur in single combat; the King then promises to pardon the rebels if they will stand down, but his army prepares for battle.
Worcester returns to the rebels, but doesn’t inform them of the King’s offer as he doubts that it would apply to him and others. They prepare to fight immediately.
In the battle, Falstaff’s infantry are quickly wiped out, and when the Prince checks Sir John’s pistol case he discovers it contains a bottle of sack instead of the intended weapon. Although wounded, Prince Harry refuses to disengage, and rescues his father from attack before he fights and kills Hotspur, whose body falls next to that of Falstaff. When the Prince moves on, Falstaff gets up to claim that it was he who killed Hotspur, and carries the body away.
The King is victorious over the rebels, and sentences Worcester and their other leaders to death. The King’s army then divides into three to pursue fleeing rebels throughout the kingdom.
References
Wikipedia on Shakespeare’s play.
Full text at Project Gutenberg.
Michael Dobson and Stanley Wells (eds) (2015) The Oxford Companion to Shakespeare, 2nd edn, Oxford UP. ISBN 978 0 19 870873 5.
