
macOS Mojave doesn’t make any great changes in printing, but printer support has become a bit more complex, as Apple has stopped updating its list of compatible printers, and appears to have also stopped updating the drivers it supplies for older printers, to focus support on AirPrint instead. All is not lost, though: follow these steps and you shouldn’t have to send that printer for recycling, or give it away.
1. Clean up any old printer software
If the Mac you are going to install the printer on has never supported a printer, and hasn’t been migrated from a Mac which has, you won’t have any old printer support software, and can move straight on to step 2.
In all other cases, before you even turn the printer on, uninstall and remove all old printer support from the Mac. Open the Printers & Scanners pane, select any redundant printers listed there, and use the – tool to remove them. Check through /Applications and /Applications/Utilities, and uninstall or remove old printer software from there. If you really want to be thorough, take a look in /Library/Printers too, but be a bit more cautious there as InstalledPrinters.plist and some of the contents of the PPDs folder can be important.
If you’re unsure what you can remove safely, don’t put it in the Trash, but move it to a folder in Documents for the time being, so you can replace it if necessary.
2. Turn the printer on and follow the manufacturer’s instructions
Your printer will need to be connected properly to your Mac and ready to use before you start installing it on your Mac. This may mean configuring its Wi-Fi or other networking, or enabling AirPrint, perhaps: consult the printer documentation. Despite its name, AirPrint doesn’t require a Wi-Fi connection, and can operate perfectly well over a wired ethernet connection, for example.
3. Add to Printers & Scanners pane
Open the Printers & Scanners pane, which should now be empty.

Click on the + tool at the far left to browse available printers.
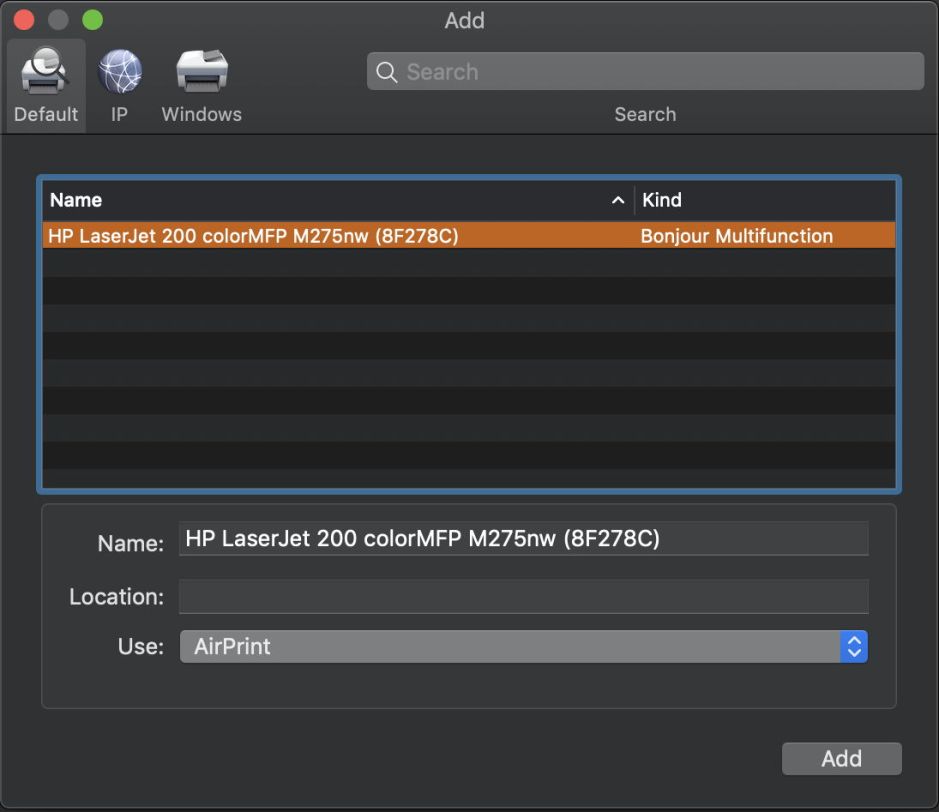
Your Mac should then offer you the printer in the list of those available. Select it there, and then look at the Use: popup menu below.
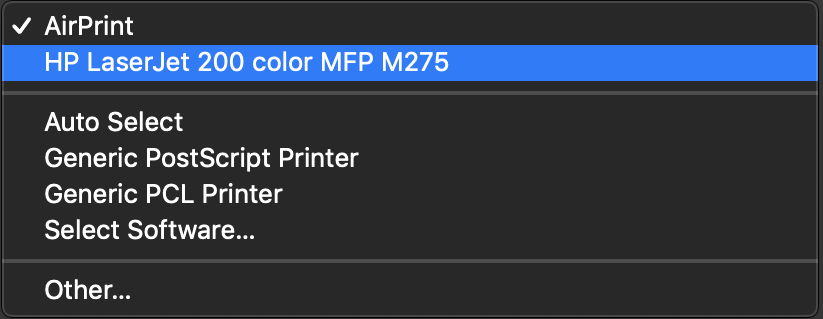
All more modern printers, models released since about 2012, should now support AirPrint, and in most cases that should be your first choice. The item listed below that is a legacy driver, which may have to be downloaded via Software Update, and installed in /Library/Printers. In the first instance, try with just AirPrint, which should work without any additional driver.
The AirPrint driver may not support all your printer’s features, and in multi-function devices may only support printing not scanning or faxing. If that’s the case, try installing the legacy driver next.
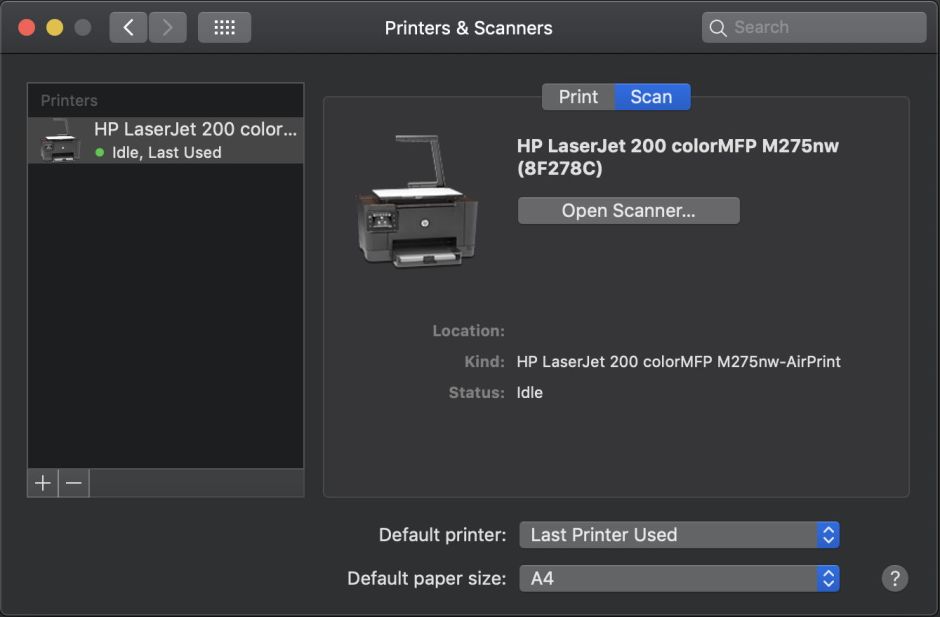
That should add any other supported features, in this case access to the peripheral as a scanner. Legacy drivers should be downloaded automatically. If they aren’t, or you’re not happy with them, Miles has kindly catalogued all the final versions of legacy drivers available from Apple in this article. Select the one that you need and install it, then go back through this step in the process, and see if you get better support for your printer’s features. If that doesn’t do the trick, remove the printer and go to step 5 below to try the manufacturer’s driver instead.
4. Test the printer
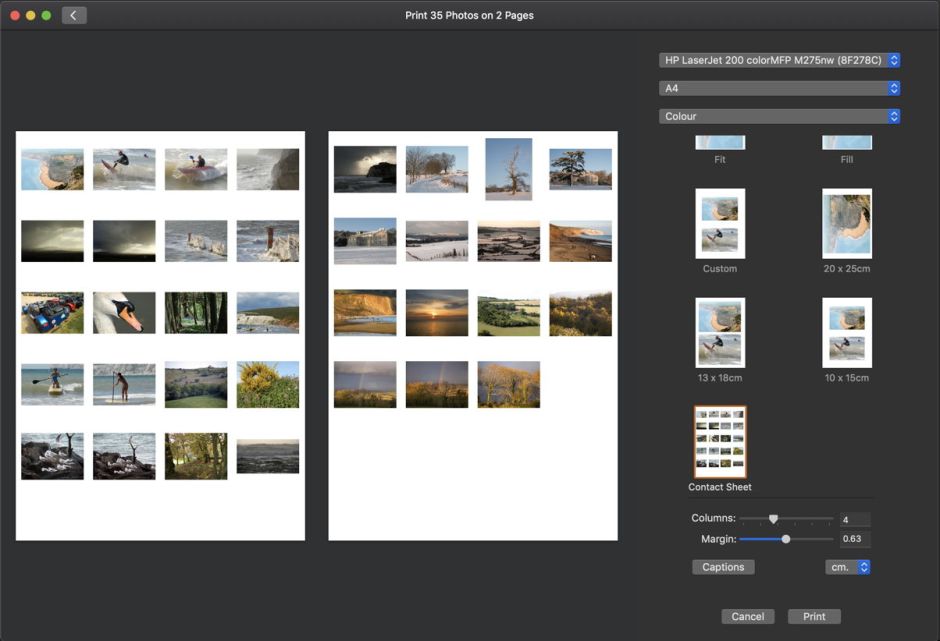
With everything enabled and running, now’s the time to test that the printer and any other features work properly. If you use apps with high-end printing support, such as Adobe CS, you’ll obviously want to check those out. One common test is to open Photos and ensure that it can print proper contact sheets.
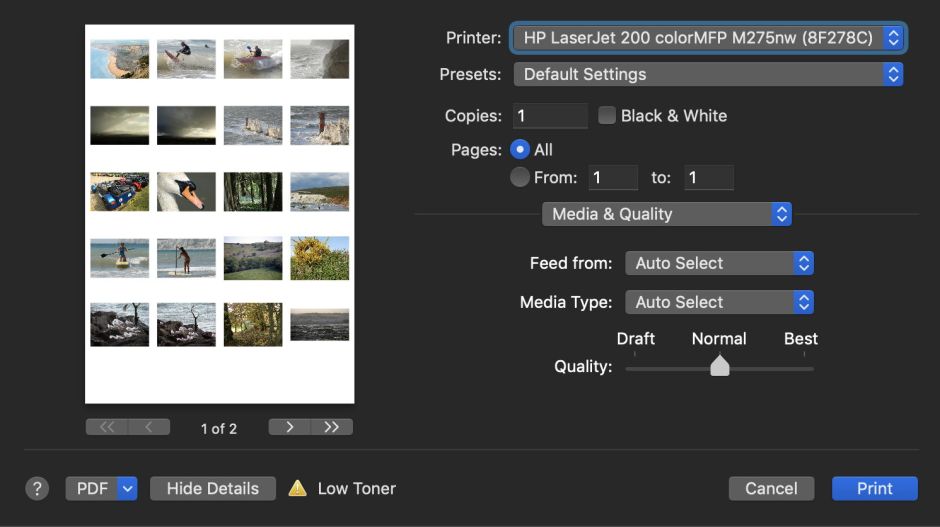
You should also see printer-specific features when you progress to its Print dialog proper.
If your current installation does the job properly, then it’s done. If you can’t get your printer to work, or key features appear unsupported, try using the manufacturer’s software instead. Before installing that, select the printer in Printers & Scanners, and click on the – tool to remove it, and start again.
5. Install the printer manufacturer’s software
Generally, most users find that printer support installed through macOS is the most reliable and compatible, but some prefer going straight to that supplied by the printer manufacturer instead. If you can’t get your printer to work properly using software supplied with macOS, this will be your next option.
Support by printer manufacturers varies greatly in its quality. Some supply apps which do all the work for you, others expect you to rummage through model-specific driver listings, and some erroneously refer you back to Apple’s now unsupported list of printers. There are no useful rules here, and at the end of all this, you could end up with a driver which doesn’t work at all or, worse still, causes crashes or other problems.
What you do want to avoid is having macOS support, as installed in step 3 above, and the manufacturer’s own software trying to operate together.
6. Try Gutenprint
If your printer isn’t supported by macOS or its vendor, all is not lost: it may still be supported by Gutenprint. Its site has extensive information and documentation which you should consult before trying to install anything further.
7. Generic printer drivers
Some orphaned printers can be put into generic PostScript or PCL modes; provided that your Mac can see the printer to install it, you may have success with one of those.
