
Last week, I looked at changing the permissions of a file or folder, both using the Finder and in the command line. Permissions are granted on the basis of the item’s owner and group, so this short article looks at how you can discover lists of owners and groups, and how to change the owner and group of a file or folder – another basic user skill.
macOS, like all breeds of Unix, doesn’t itself work with names for users and groups, but with numbers. In this context, you should remember just one number: 501, the number invariably assigned to the primary admin user of every Mac. When macOS is configured on your Mac, that first admin account is always given the number 501.
This is important because of the association of that user ID with all your files and folders. Move an external drive to another Mac, and it won’t see the files on there as being owned by username, but by user ID 501. Try removing user ID 501 and you will immediately wreak havoc with every file and folder owned by the primary admin user – this is the notorious ‘missing 501’ problem.
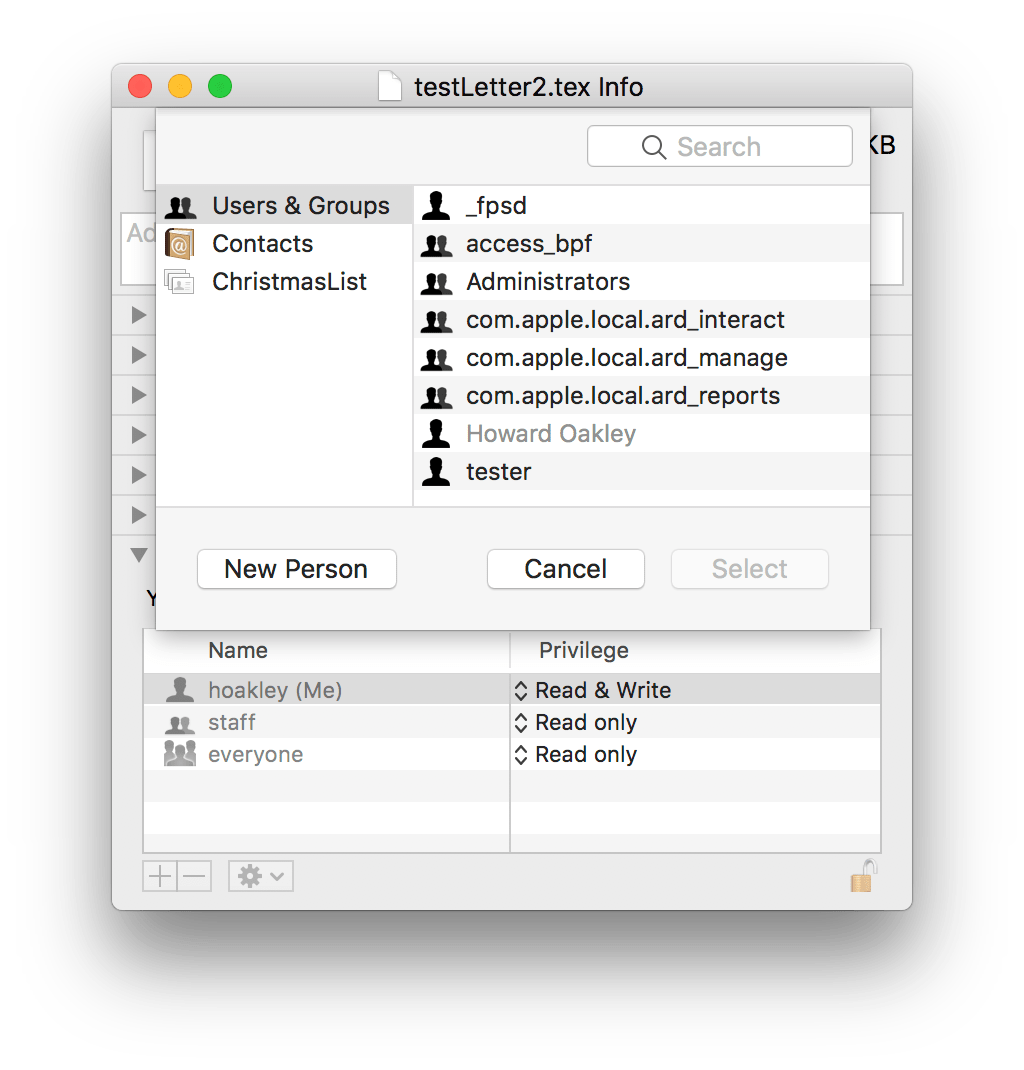
Although the Finder’s Get Info dialog will display lists of users and groups, they’re incomplete, and the best way to view and study them is in Directory Utility, a tool now hidden away in /System/Library/CoreServices/Applications. Be careful using this: Apple hides it away because of the dangerous changes which you could inadvertently make with it. When you’re only visiting to browse lists, don’t authenticate to it, and you won’t be able to mess anything up in its directories.
Click on the Directory Editor, and you can now select in the Viewing popup menu at the top left Users or Groups. In contrast to the Finder, there are dozens that appear listed below. Select any in the left view and their details, including their ID and, for Groups, the RecordName, are displayed.
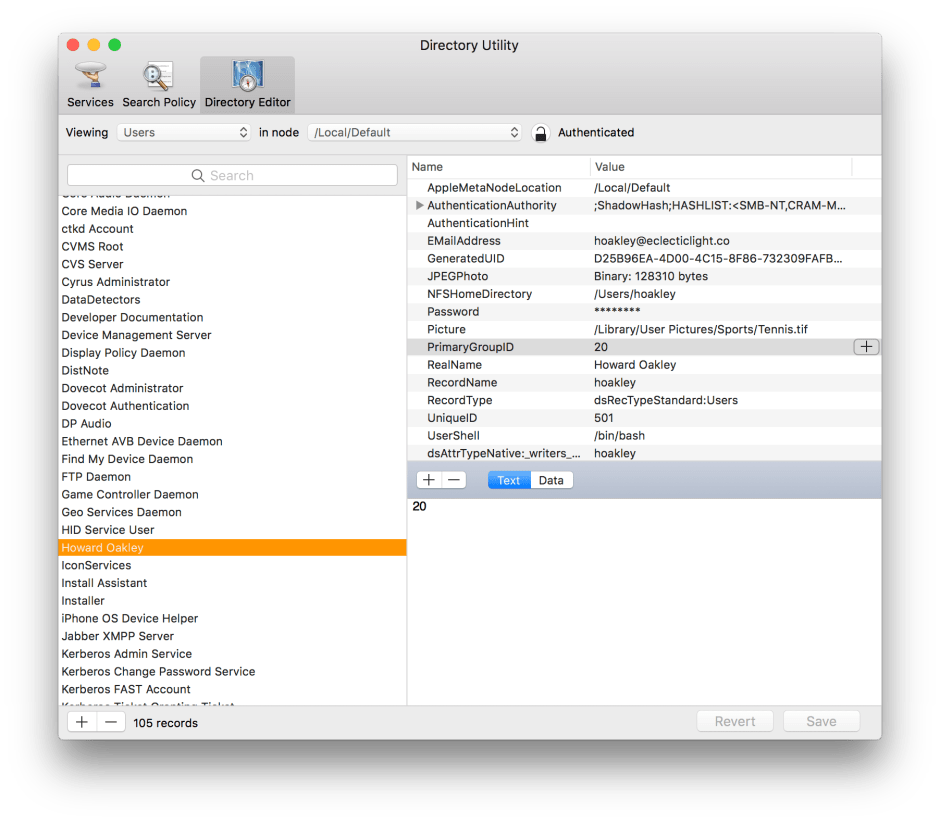
For users, we are interested in their UniqueID, which is the user ID I referred to above, and PrimaryGroupID.
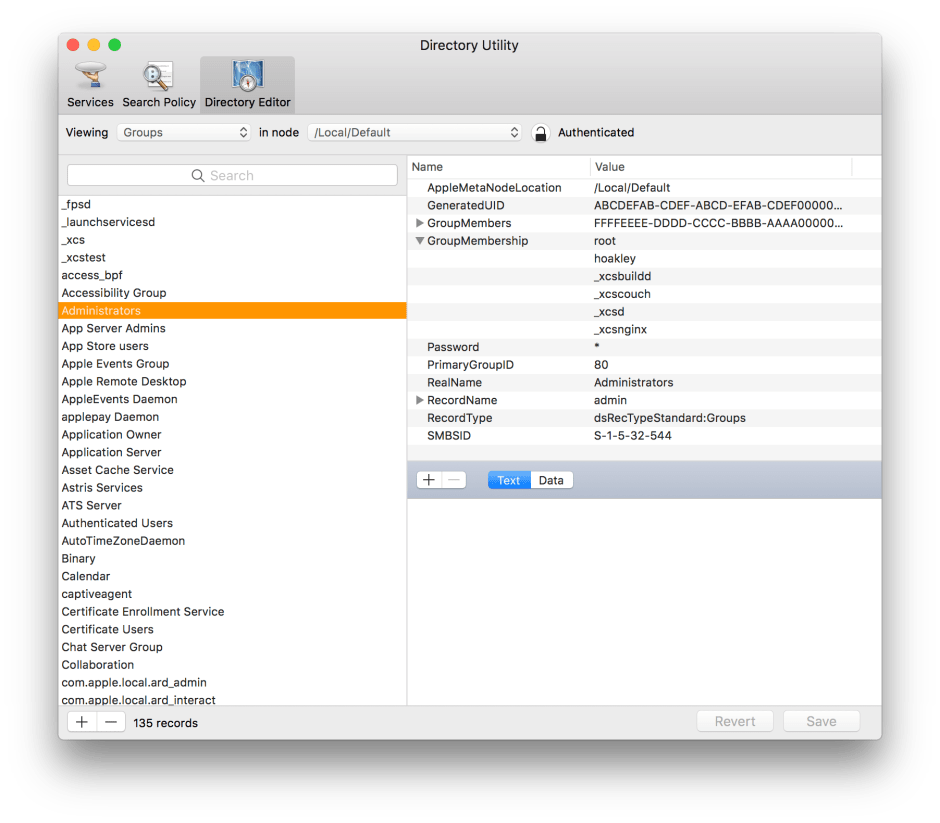
For groups, we are interested in their PrimaryGroupID, RecordName, and the list of group members.

Compare those lists with that offered by the Finder!
You can now try adding another user or group to the permissions in Finder. Check in Terminal what the effect is on permissions, using ls -la, and you’ll see that going beyond the standard owner-group-everyone structure doesn’t alter the basic permissions. You could perhaps add a new group and remove the old one, but that’s an ungainly way to go about changing owner or group.
There are two main commands to do this in Terminal: chgrp and chown.
chgrp will only change the group, not the owner, and is best used to do that when you, the user, are a member of the original group listed in the permissions. You then don’t need to acquire elevated privileges using sudo, and can just, for example,
chgrp admin myfile.text
or
chgrp staff myfile.text
Specify the group here either using the group’s PrimaryGroupID or the short RecordName – using the full group name, like Administrators, will result in an error.
chown can change owner and/or group, but will require elevated privileges, so should be prefaced by sudo. When you provide it with just a username or user ID, it changes the owner to that. Preface the name or ID with a colon : and it assumes that is a change of group, not user. So the equivalents of the chgrp commands above using chown would be:
sudo chown :admin myfile.text

sudo chown :staff myfile.text
To change both owner and group would go like
sudo chown hoakley:admin myfile.text
Note that there is no space between the owner and :group (thanks for @schackspelar for pointing that out).
Both chgrp and chown have another powerful option: -R will propagate the change in owner/group to all items rooted in the hierarchy of the named item, typically a directory. If you wanted to change the group for the folder test and its entire contents, you could therefore use
chgrp -R admin test
or
sudo chown -R :admin test
chown and chgrp also have other options to determine how they deal with symbolic links, etc.
I hope that is another dreaded Unix problem reduced to easy usage. It’s not difficult, you just need to take a little care when you’re using it.
