
While macOS updates have become increasingly reliable, the more updates you install, the greater the chances of one of them going wrong. Because they can change components from the firmware to bundled apps and Safari, those post-update problems can include anything from kernel panics to Finder glitches.
Did you remember to back up before updating?
The single most important action you should take before starting any macOS update, no matter how small, is to check that you have a current backup. If you have Time Machine or a third-party equivalent set to make hourly backups, this should be no more than a quick check to ensure there’s a backup in storage that was made in the last hour. If full backups are less frequent then you may need to make a fresh one before going any further.
Another good habit of the past, running First Aid on your startup disk, should no longer be necessary, though. To do that properly you’d need to start up in Recovery and run it from there. This was almost essential in the years before journalling was added to HFS+, to ensure there were no minor errors that could escalate to a disaster in the update. With APFS First Aid is only indicated when you suspect there may be a problem with the file system of the boot volume group to be updated.
Boot loop
There’s one emergency situation that can happen on rare occasions if there has been a problem updating firmware: a boot loop, in which the Mac tries to start up, hits an early kernel panic, so tries to restart again, and continues in that loop. If that happens, press and hold the Power button until the Mac shuts down, and refer to this article.
Recovery Assistant (Tahoe and later)
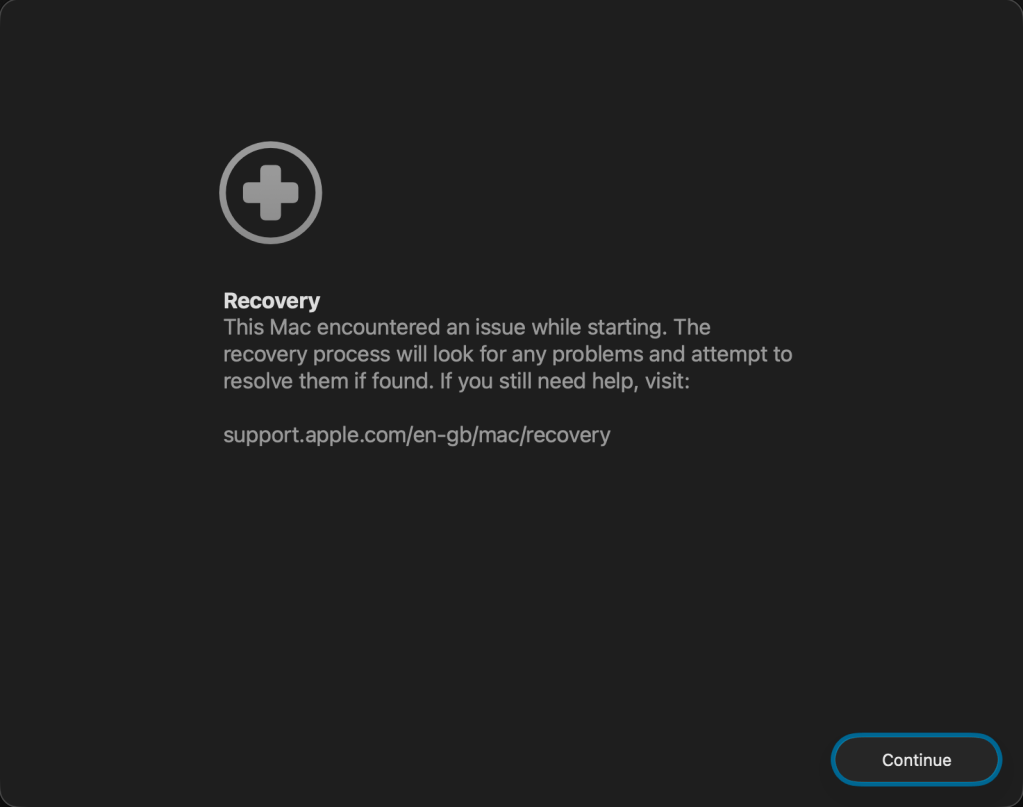
macOS Tahoe introduced a new Recovery mode, Device Recovery Assistant. When your Mac has problems starting up correctly, it may start up in this new mode to perform repairs, and should also capture a sysdiagnose in the process. This is described here.
Restart, Safe mode
Otherwise the first thing to try is simply restarting your Mac normally. If that proves a problem, or things are still awry, try Safe mode. On an Apple silicon Mac, shut it down, wait ten seconds or so, then start it up in Recovery, select the disk to use for Safe mode, hold the Shift key, and click Continue in Safe Mode.
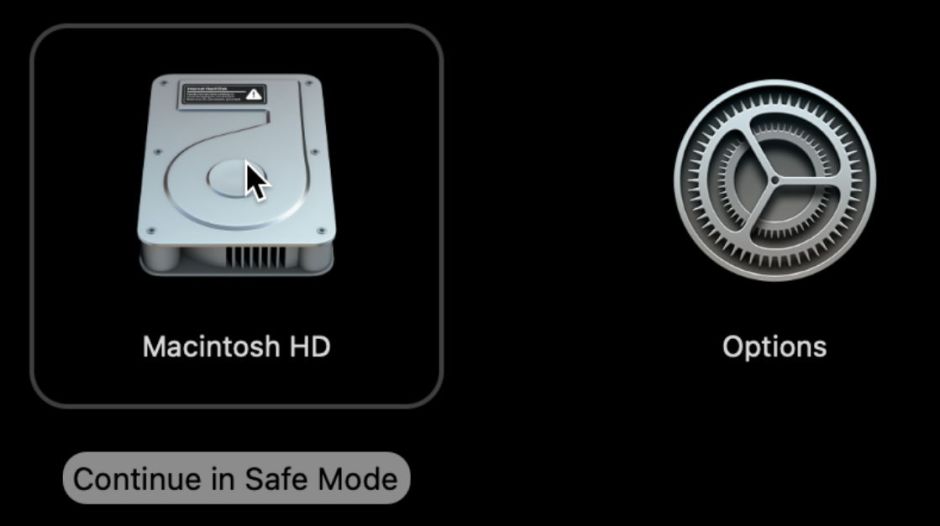
On an Intel Mac, hold the Shift key during startup.
Once running, leave your Mac for a couple of minutes, then restart in normal mode, with your fingers tightly crossed.
Sometimes Safe mode works fine, but as soon as you return to normal mode everything goes wrong again. That’s a good indicator that something you have installed is at fault, rather than the macOS update, although it’s often a combination of both working against one another. You now need to hunt down the third-party software that has become upset by the update, and either update or remove it.
If Safe mode either doesn’t help, or you can’t even enter it, then your Mac’s problems could be from the macOS update itself or something third-party, and teasing them apart isn’t going to be easy. This is when you should, for the first time, ask yourself whether you want to return to your previous version of macOS without the update, or try to fix what you’ve got. You can change your mind later, but this is a key question determining what you do next.
sysdiagnose for reference
In all more serious problems following a macOS update, now’s the time to gather evidence that could be useful later, particularly if you need to call on Apple Support. The best way to do this is to run a sysdiagnose, which captures the contents of your Mac’s log before relevant entries are removed, and adds to that detailed information about everything else that could be relevant to engineers investigating the problem.
There are three ways to create a sysdiagnose for a Mac:
- Using both hands, press Command-Option-Control-Shift-. [period or stop] at the same time.
- In Activity Monitor’s toolbar, open the … [ellipsis] menu and select the System Diagnostics command.
- In Terminal, type the command
sudo sysdiagnose, although I prefer usingsudo sysdiagnose -f ~/Documentsto save the archive in my Documents folder. You will be shown a stern warning and have to press Enter to confirm you really do want to create the archive.
Several minutes later, you should be shown where the sysdiagnose archive has been saved, normally in /var/tmp/ unless you use the -f option at the command line. Copy that to external storage if possible, so you’ll retain access even if the boot disk is completely erased when trying to fix the problem.
Missing files or apps
Rarely, you may discover that some files or even whole apps appear to have vanished from your Mac when it logs you back in after an update. In most cases, these have been moved to the Trash, and should still be there as long as you haven’t emptied it. It’s most unusual, though, for anything to simply disappear.
Before macOS Catalina, you’d be right to suspect this might have occurred as a result of the macOS update. Since Big Sur, it has become more likely to be an unfortunate side-effect. In those more recent versions, for almost the whole duration of the update, the Data volume containing your files and apps is unmounted, as all the action takes place on the System volume and those in hidden containers. When your Mac’s Data volume is remounted at the end of the update, the installer should normally move any problem files to a folder in the Trash, or most typically into a folder named Relocated Items in /Users/Shared, which you should check before assuming that your files have really gone for good.
One potential culprit, if the missing files and apps are all from Adobe or related to its products, is that Adobe’s background updating service has deleted old apps when preparing to update them, but failed to complete that process. Most other updaters don’t run automatically, and move old apps to the Trash rather than deleting them before installing new versions. If you’re uncertain what has happened, contact support, and be prepared to restore any missing files or apps from the backup made shortly before the macOS update.
Reinstall
Before going any further, bear in mind that macOS booted from an SSV is very different to that of the past. Macs with T2 and especially Apple silicon chips verify the contents of the SSV down to the last bit, and they’re checked against what Apple considers to be a ‘perfect install’. So the incomplete or broken updates of the past simply can’t happen with an SSV, which is guaranteed to be perfect as Apple intended. Installing another identical copy of that is therefore unlikely to change anything.
Simplest is to start up in Recovery mode and re-install the current version of macOS, which should by now be the version you’re trying to run. When you do that, ensure you install to your current Volume Group so that the existing Data volume is connected up with the fresh System volume. Because that may not always work, this is where your pre-update backup could prove essential.
If you install macOS afresh with your existing Data volume and the problems persist, then it’s most likely they result not from any error in the system update, but in third-party software. You can then rip out all third-party extensions and anything from your apps that persists, until you find the offender.
Revert to previous
Returning to a previous version of macOS isn’t an easy option after you’ve performed a macOS update. There’s no secret Roll Back button, and you’ll have to perform a fresh install of that older version of macOS, ensuring that hitches up with your existing Data volume. If the latter part doesn’t work, be prepared to migrate from a backup into a fresh Data volume.
Intel Macs have one significant limitation here: firmware. While you can roll the system back, you can’t return an Intel Mac’s firmware to a previous version. So if the problems you’re encountering are firmware-related, your Intel Mac is out of luck.
Apple silicon Macs can readily be reverted to older firmware, by putting them into DFU mode and restoring an older version of macOS complete with its firmware, as explained here. You’ll need another Mac to perform the Restore, and the first time you do this is daunting, but it’s a valuable feature that can recover from apparent disaster.
Apple Support
If your Mac suffers any significant problems after a macOS update, don’t be afraid to contact Apple Support. Sometimes updates have serious failings with specific models, and only Apple Support is likely to discover this, and offer a way forward. Otherwise, I wish you success diagnosing and fixing your problems.
Summary
- If in a boot loop, press and hold the Power button to shut down.
- Otherwise restart the Mac.
- If necessary, start up in Safe mode, wait a couple of minutes, and restart in normal mode.
- Tahoe may put the Mac into Recovery mode for you.
- If the problem is serious, run a
sysdiagnose. - Try to recover or restore any missing files or apps.
- Consider reinstalling that version of macOS.
- Reverting to a previous version is a slow and hard process.
- Consider contacting Apple Support.

