
The whole purpose of making backups is so that you can restore from them. If you don’t check restoring items from a backup every few weeks, you’ll not know when a problem has developed until it’s too late. One of the core admin tasks is to periodically check that your backups work.
With Time Machine, there are two different situations that you need to be prepared for: restoring a whole volume that has become wiped or unusable, and restoring items including folders and individual files, when you might want to access the contents of an older version that’s not available in that volume’s version database.
Restore a whole volume
This is most commonly the Data volume in a Boot Volume Group, for which Apple’s recommended solution is to use Migration Assistant. This can also be used to restore another volume, such as an external media store, from its backup. Using Migration Assistant has its advantages, as it should know the best way to handle more complex items like media libraries, such as a Photos Library.
Restore individual items
The Time Machine app can only restore files and folders to the same locations, although it does give you the option of keeping both copies when appropriate.
To do that in the Time Machine app, browse back through your backups until you find the right one. Select the items to restore, and either click the Restore button or use the Restore [item name] to… command in the contextual menu. Don’t be misled into thinking that gives you the choice of where to save the restored items; if you want to keep both current and restored items, you’ll have to opt for that during restoration.
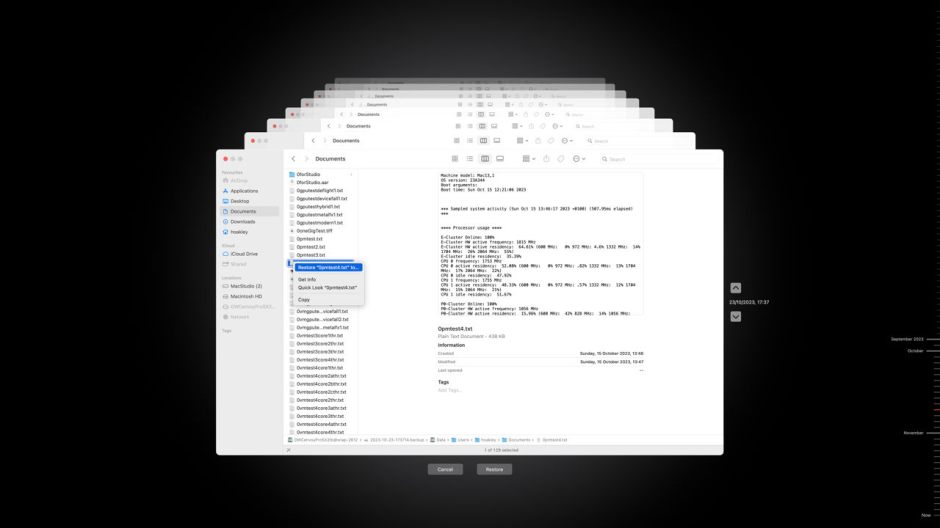
For greater flexibility, don’t use the Time Machine app to restore, do that using the Finder instead.
With your Time Machine backup storage mounted, and in between making backups, open the backup volume in a Finder window and look through the backups available on it. These are named using date- and timestamps to help you locate the one you want. For example, that named 2023-10-23-173714.backup was made at 1737 on 23 October 2023.

Within that backup, you should first see the volume name, then within that the directory tree you can navigate through to the items that you want to restore. It’s then just a matter of dragging and dropping them onto the desired location in another Finder window. When copying in Terminal’s command line, the simplest way to add the full path to the file you want to copy is to drag and drop it into the command line.
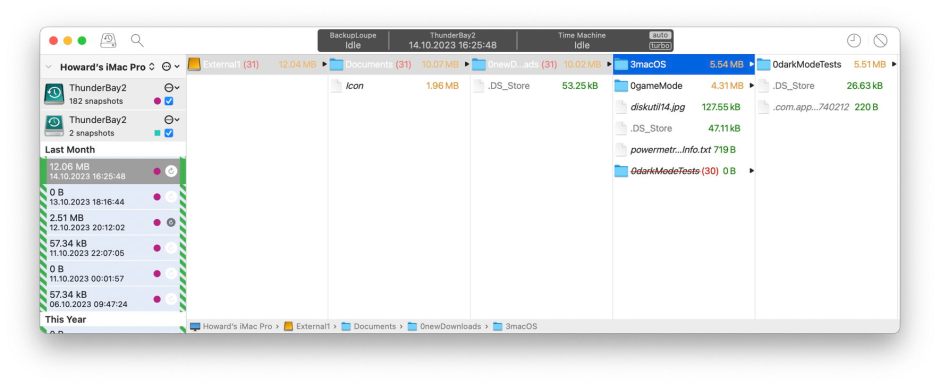
There are also third-party apps that offer more for your money. My favourite is BackupLoupe from soma-zone with its rich range of features.
Limitations
Because Time Machine backups do their best to copy everything in a file, what you should get when you restore is a faithful copy of the original. One exception to this is a document’s version history, normally accessed through the Revert To… menu command. Versions are stored in a hidden database on each volume; because that isn’t copied to Time Machine backups, it can’t be restored, and all previous versions are lost. If you want to preserve document versions, you’ll need to archive them using my free utility Revisionist before they’re backed up, and restore old versions from that archive.
All but the most transient of extended attributes should be preserved, and special file formats such as sparse files are also preserved, but clones necessarily become full copies.
When viewed in the Finder, each backup looks like a real volume, but because it’s actually a form of snapshot, the backup itself is read-only, and you can’t change or remove files from it.
Backup structure
The backup store has a distinctive volume structure, consisting of hidden Spotlight indexes, any mounted backup snapshots listed by their datestamp, a property list containing details of all the backups in that store, and an optional property list giving information about any inheritance of those backups.
Backup snapshots themselves contain a checkpoint file, a property list containing all the exclusions which applied to backups when that backup was made, and the backup itself listed by volume name.
Those are summarised in the diagram.
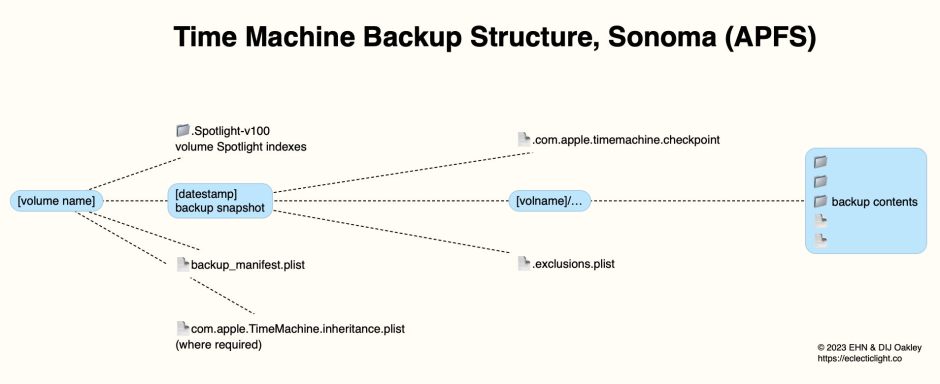
The Backup Manifest backup_manifest.plist is particularly interesting. It’s a persistently hidden file even when copied elsewhere, although its name doesn’t start with a period/stop. It contains an array of data about each of the backups in the store, marked by their datestamp, start date and an ‘xid’ which differs from the snapshotXID. Two dictionaries of data are provided for each backup: a statistical summary of that backup (key “stats”), including the number of items changed and those propagated from the previous backup; information about the backup in the Volume Store, including its UUID, the snapshotXID, and the name and role of each source volume. This appears to be the best way for apps to access backup information, prior to mounting any backup snapshot.
