
Shared Folders are one of the most useful features available in lightweight macOS virtual machines running on Apple Silicon. They’re not available in Monterey, but provided the VM is running Ventura or Sonoma on a host running Ventura or Sonoma, they’re supported by the VM’s runtime settings, for example in my own Viable and Vimy.
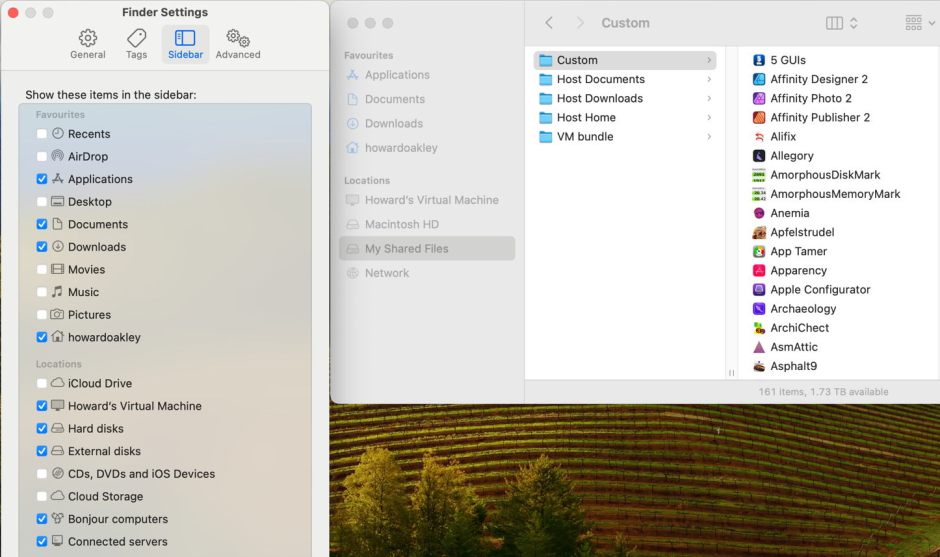
When you enable shared folders for your VM, once it has been started for the first time, undergone personalisation, and you have logged into it, open Finder Settings, select Sidebar, and ensure that Hard Disks is ticked in the Locations section. That should reveal a My Shared Files item in the Finder sidebar, where you’ll see all Shared Folders listed. Quite why this is set under Hard Disks I’ll never understand.
Sometimes the My Shared Files item becomes duplicated with use. To clear that, start that VM up with Shared Folders disabled, leave it to run for a minute or two, shut it down, and the next time you use it, those duplicates should have been removed.
What you can do
Set the host’s Applications folder as a Shared Folder, and you can run apps directly from that. This works fine with many apps obtained outside the App Store, which you can use to edit documents in a Shared Folder or locally in the VM, and save the results either locally or to a Shared Folder. If that app is quarantined on the host, then it will need to clear Gatekeeper checks on the VM.
Note that apps access local preference files, so in most cases the app will initially run with its default settings. Some older apps are still reliant on components stored outside their app bundle, for instance in Library/Application Support, and plug-ins folders, which can make this impractical. As an example, I’ve used Ulbow on the host to inspect the logs in the VM. Watch for any remaining Intel-only apps, which will need you to install Rosetta 2 on the VM, which may work best when performed manually before trying to launch the app.
You can run Pages, Numbers, Keynote, and GarageBand direct from the host, although GarageBand will need to download all its libraries to the VM before you can access them.
Use Shared Folders as high performance storage on the host. Their write speed is much quicker than using the VM’s disk image, and you can even run Stibium, my benchmarking utility, to demonstrate this. When used as a Shared Folder, any folder on the internal SSD should return read/write speeds of around 2.8/3.4 GB/s, compared to 2.3/0.5 GB/s to the VM disk image.

Shared Folders can also provide access to the host’s iCloud Drive folder. You can open documents within that, although apps aren’t aware that they’re accessing files stored in iCloud, so you should be careful how you use them. The VM doesn’t know that evicted files aren’t immediately accessible, and need to be downloaded before they can be opened, so there’s no warning that they are evicted. Trying to open an evicted file results in an error, that the file is damaged and can’t be opened, and that doesn’t trigger the file to be downloaded.
What you can’t
Spotlight search of Shared Folders isn’t supported on the VM. Spotlight stores its indexes at the root level of each volume. As Shared Folders are only folders, not volumes, and the VM doesn’t have access to existing Spotlight index data on the host, there’s nowhere for indexes for the contents of Shared Folders to be saved. At the same time, you can’t select a Shared Folder as the target of search, and Shared Folders can’t be added to the Spotlight privacy list to exclude them from being indexed.

It’s also worth noting that my new Spotlight utility Spotcord can’t look for keywords on a Shared Folder, as the VM doesn’t have access to the Spotlight index of host volumes.
If you’ve installed Apple’s Xcode from the App Store on the host, that version can’t be run from within a Shared Folder, as it fails to verify when run in the VM. You could try installing a standalone copy obtained from developer downloads, but it’s probably best to install Xcode inside the VM if you need it there. Without an Apple ID, though, you can only perform ad-hoc signing.
You can’t run iMovie on the host, or when copied across to the VM. When trying to start that app, it checks for hardware acceleration, can’t find in the VM, so quits as the VM doesn’t meet its requirements.
You can’t run any paid-for or third-party apps from the App Store, as they verify themselves before they can open, and will fail to achieve that because you can’t log in using your Apple ID in the VM. Apple has been asked to add that as a feature in virtualisation.
One final little oddity that has caught me out a couple of times now: you can’t use the Command-Option-Escape shortcut to open the Force Quit dialog, as that is always routed to the host and never the VM. That’s easy to work around in the VM, using the command in the VM’s Apple menu instead.
