When Apple releases Sonoma in a week’s time, one of the first questions many will need to answer is whether their Mac has sufficient free space to install the upgrade. If your Mac has more than 30 GB available, then you should be able to proceed to download and install the upgrade successfully. But what if it has less than that? It’s all very well trying to free up space, but what should your target be?
Give it a whirl
Apple’s answer is simply to try upgrading, and if it fails because there isn’t sufficient free space, then work out how to free up more.
You may also find this approach frustrating: it’s quite common for Software Update to ask for another 500 MB, say, then when you free up 600 MB and try again, it asks for more; on a bad day it can just give you the runaround. When I was testing this in macOS virtual machines, I grew irritated with this behaviour.

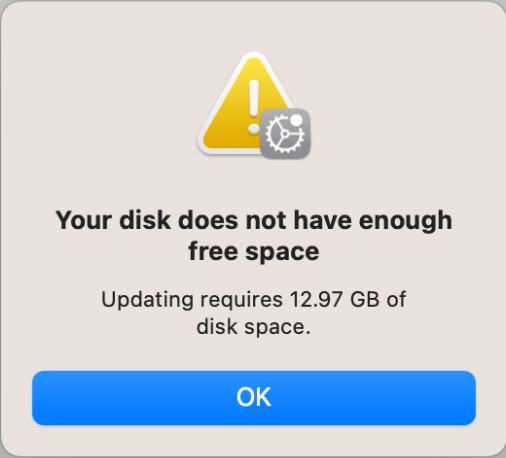
With a total VM boot disk size of 30 GB, there was only 11.19 GB of free space before downloading the update from macOS 13.0 to 13.1. That was cancelled before it began, with the message that “updating requires 12.97 GB of disk space”. I was foolish enough to believe that, so in the next run I tried a boot disk size of 32 GB, providing 13.32 GB of free disk space, as Disk Utility assured me.
I then had two failures on 32 GB boot disks, the first paradoxically complaining that “updating requires 13.22 GB of disk space” when Disk Utility had just assured me that there was 13.32 GB available. The second attempt failed with an indicated free space of 13.22 GB, this time with the reason that “an additional 340.9 MB of space is needed to install on this disk.” I don’t understand why that message went on to advise me to check my Internet connection either, given that it was Software Update that cancelled the download.

Update
If your Mac is currently running Ventura 13.5.2 and you’re upgrading to Sonoma 14.0, then you may well be offered this in the style of an update rather than a full upgrade, with its Install macOS Sonoma app. That will save a great deal of disk space and installation time. When Apple did this with Ventura, the update weighed in at little more than 6 GB, and should be able to install when there’s less than 20 GB free space on the startup disk.
Installer app
The alternative is the traditional Install macOS Sonoma app, which itself requires at least 12 GB before it’s even run. That’s likely to require a total of more than 20 GB, quite possibly 25 GB, which is why Apple is likely to prefer the update style instead. There is a reward, though, in that you can save a copy of the installer app, while the update approach leaves you with nothing that can install Sonoma.
Data volume snapshots
If you do need to free up space on your current boot volume group to accommodate the Sonoma upgrade, whether or not it comes in update style, remember that if Time Machine or another backup utility makes snapshots of your Data volume, you may not realise the gains you had expected. While macOS can sometimes remove snapshots to free space, it generally won’t do that automatically when you’re trying to upgrade macOS.
Open Disk Utility and select the Data volume in the list of volumes at the left. Then, if you haven’t already set the app to display them, use the Show Snapshots command in its View menu. You can then identify large, older snapshot(s) in the list, select them, and click on the – tool below to remove them. Alternatively, Carbon Copy Cloner and other third-party utilities provide similar features.
When you’re checking how much free space is available on the boot volume group including that Data volume, trust the figures shown in Disk Utility, as the Finder may take some time to update those it shows, but Disk Utility is overall the most timely and accurate.
Evict iCloud files
Another popular and effective measure to free up space quickly is to select folders in iCloud Drive and evict them from local storage. This doesn’t alter their space requirements in iCloud, but can return the space they occupy locally on your Mac, at least until you need to download them for access again. This is now quick and easy to do: select the items you want to evict, and in the contextual menu select the Remove Download command.
