

In the previous article I explained how LocalPolicy provides the boot process of an Apple silicon Mac with the settings it needs to be able to boot from a Boot Volume Group (BVG). LocalPolicy files are stored in the iSCPreboot volume in the hidden Apple_APFS_ISC container of the internal SSD. LocalPolicy for the intended BVG is validated by LLB early in the boot sequence, before it hands over to iBoot on the BVG. LocalPolicy can be viewed in full using the command tool bputil (with extreme caution) with -d or -e options.
Multiple boot disks
Because LocalPolicy is validated and loaded by LLB running from Flash storage on the logic board, there is only one source, the iSCPreboot volume on the internal SSD. However, you might be confused into thinking that it’s copied to external disks, as that volume mounts in /System/Volumes of the current system, and appears to be an empty folder on other BVGs. Thus, to view LocalPolicy folders for all BVGs, you need to look in the path /System/Volumes/iSCPreboot/[BVG UUID]/LocalPolicy of the current system, not the BVG on the internal SSD (unless booted from it).
Multiple LocalPolicy
LocalPolicy folders for BVGs accumulate in iSCPreboot, as more BVGs are used with any Mac. As far as I can see, LocalPolicy for every single external boot disk that my Mac Studio has ever booted from is still stored there, and no housekeeping takes place with major macOS upgrades. Unless you are a prolific user of different external boot disks, this is unlikely to ever become a problem.
The only way to inspect LocalPolicy for an external BVG is to connect and mount the disk containing that BVG. The command
sudo bputil -e
will then list full details for the current BVG and any others mounted at the time.
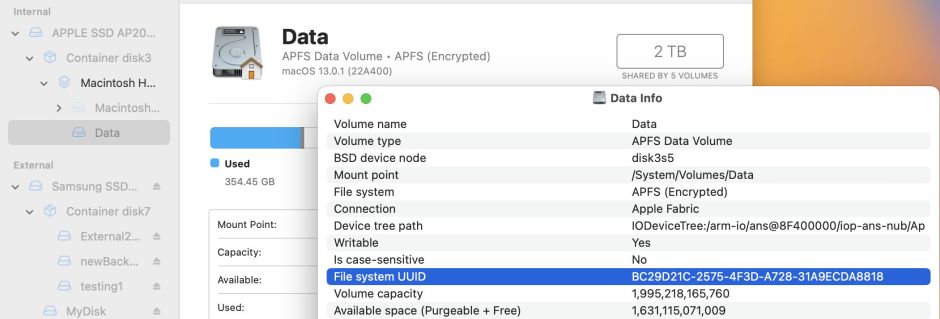
If you’re unclear which BVG any given LocalPolicy is for, read the APFS file system UUID for the Data volume in each mounted BVG, which is given as the Volume Group UUID in the LocalPolicy. As the list will invariably contain LocalPolicy for the primary BVG on the internal SSD, this isn’t usually a problem unless you have a disk with multiple BVGs, each of which will have its own Volume Group UUID.
LocalPolicy creation
When used with the same Mac, LocalPolicy should be created during installation of macOS to create the BVG, and updated during subsequent changes such as installing macOS updates.
When using a macOS full installer app, LocalPolicy appears to be created at the end of the first phase of installation, shortly before rebooting. This most probably happens during the final minute or so of that phase, when the progress window may report that there’s only a minute to go, but pause there for many more minutes.

This relies on the user assigning an Owner to the new BVG during initial setup for that installation.
LocalPolicy also has to be created when a disk with a BVG created on another Mac, or whose previous LocalPolicy has been deleted, is selected as the next boot disk in System Settings > General > Startup Disk. LocalPolicy isn’t created until the user has authenticated for that BVG.

Even then, an Owner still has to be assigned in a subsequent sequence of dialogs. Although it should still be possible to boot from that BVG without successful assignment of an Owner, some important features, including macOS updates, aren’t available unless Ownership is established successfully.
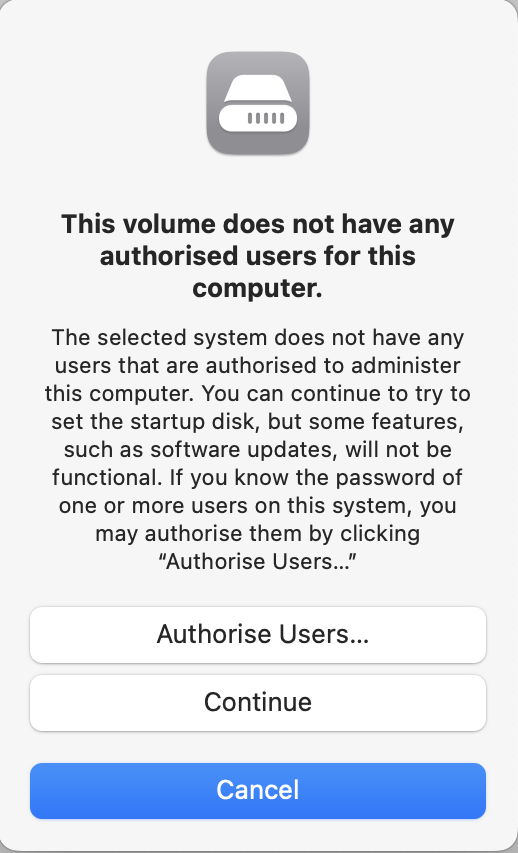
In this dialog, you must click on the top button, to Authorise Users….
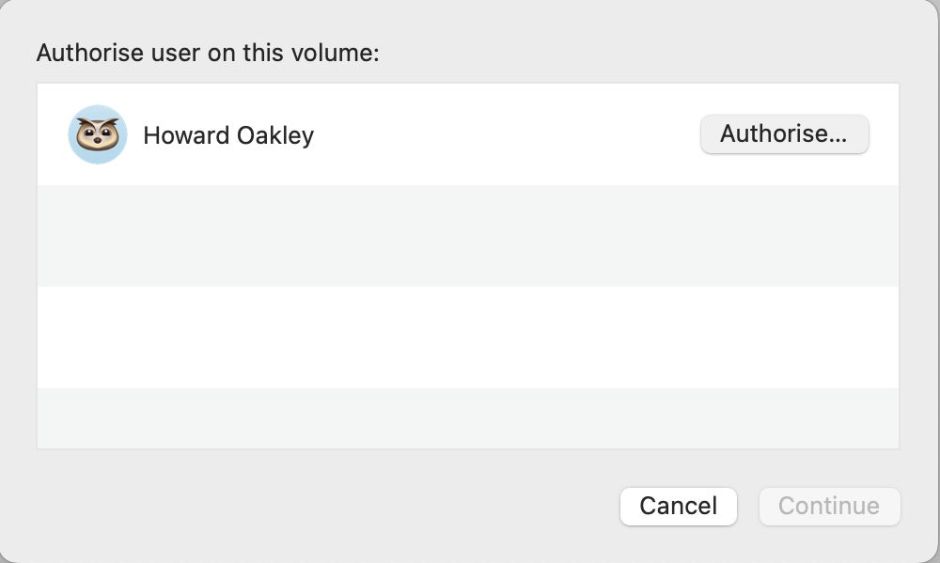
You’re then presented with a list of users. Click Authorise… for the user to be designated as Owner.
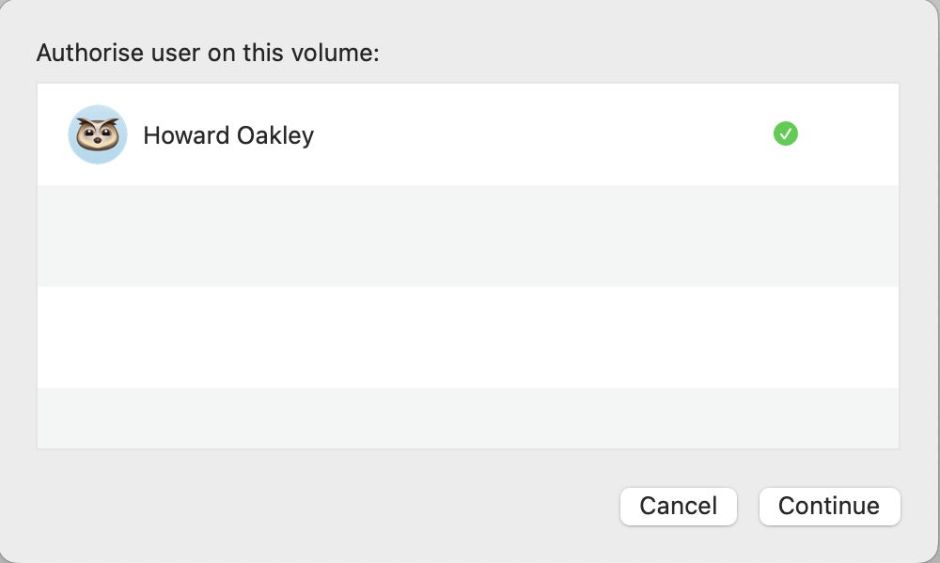
A green tick should appear, to confirm success, and you can click Continue.
Checking the LocalPolicy system
If creation of a bootable external disk fails, or in the event of any problems that could be related to LocalPolicy, the following checks would appear useful in identifying the failure or error.
- Ensure the Mac is started up from the primary BVG on its internal SSD.
- Connect the external disk containing the failed BVG (if on an external disk).
- In Disk Utility or Terminal, select mounted Data volumes in each BVG and record their file system UUID, hence their Volume Group UUID.
- In the Finder, inspect folders named by Volume Group UUID in the path /System/Volumes/iSCPreboot. In each, view the contents of the LocalPolicy folder. Record which LocalPolicy .img4 files are present, and how they match known Volume Group UUIDs.
- In Terminal, use the
sudo bputil -ecommand, with extreme care, to list LocalPolicy for all mounted BVGs. Pipe the output to a file, or copy and paste it into a text document for retention. - For each BVG, inspect and verify key items in its LocalPolicy. For convenience, I have repeated my list in the Appendix at the end of this article.
- Although it would be valuable to perform Ownership checks, I’m not aware of any that might prove useful.
Installing older macOS
Normally, macOS is happy to run and install an older minor version of the same major version of macOS. If your primary BVG is running macOS 13.0.1, the 13.0 full installer app should work fine when installing a second BVG. It should also be happy with a newer version of macOS. However, trying to create a new BVG for Monterey 12.6.1 could fail, as that’s a whole major version older than 13.0.1.
The best solution then is to create an external bootable macOS installer, as detailed here for macOS 11 and 12.
The failed BVG
In the worst case, creation of the BVG fails during installation, typically at the end of the first phase, immediately before the reboot. If the reboot does occur, it returns the user to the original system, rather than proceeding with the installation as expected. Later failures also occur, again resulting in rebooting back into the original system.
Because creation of the BVG has been abandoned, it’s unlikely that any LocalPolicy for that has been created. This means the only checks that can be made are on LocalPolicy on the primary BVG on the internal SSD. These are still worthwhile, though, for establishing that the LocalPolicy system is functioning correctly.
Completely reformatting the external disk in APFS, erasing the container, or deleting all volumes created for the new BVG, should enable a fresh attempt to create a new BVG with a different Volume Group UUID. Leaving remnant volumes, particularly Data volumes, isn’t advisable, unless they’re part of a BVG with a successful LocalPolicy.
Because events during the first phase of macOS installation are still recorded in the Unified log on the primary BVG, failure prior to reboot should be recorded there. When reporting this to Apple, a sysdiagnose made soon after the failure should capture full details suitable for engineering investigation.
The faulty BVG
One of the most common problems reported for external bootable disks is that, while they appear to work fine, they’re unable to install macOS updates. To update macOS on any BVG, you first have to boot from that BVG, then use System Settings > General > Software Update. Even using a fast Thunderbolt 3 SSD, updating macOS is far slower than on the internal SSD, and the second half of preparation, from when time remaining falls to 15 minutes, can take far longer.
If update fails, first follow the normal sequence for difficulty updating macOS: if you haven’t just booted from that BVG, restart from it and try again. If that fails, shut down, start up in Recovery mode, in the first screen select the BVG, hold Shift and click the button below to start up in Safe mode.
The fallback is to install macOS, either in Recovery mode, or from the primary BVG using a full installer app for the correct version. However, with ownership established correctly, that should never be necessary.
The vanilla Mac
Creating and manipulating BVGs can be easy, or can prove impossible. They definitely work best with plain or vanilla Mac setups, and the more your Mac deviates from this, the more likely you are to experience problems. However, once created with a successful LocalPolicy they should be less influenced by other factors, at least until you try to install macOS updates.
On a vanilla Mac:
- There are no third-party kernel extensions, and it’s running in Full Security.
- The user is the primary admin user, who will also be the Owner of the new BVG.
- The disk to contain the BVG is connected directly to one of the Mac’s Thunderbolt ports using a certified and branded Thunderbolt 4 cable.
- No software firewalls are filtering outgoing network connections.
- The Mac has a good and stable Internet connection.
- MacBook Pro and Air models are connected to mains power throughout.
Appendix: Key fields in a LocalPolicy
- OS Type: given as macOS, macOS (overriden) for a VM, or one true recoveryOS when in Recovery
- OS Pairing Status: Not Paired, except when booted in a paired recoveryOS or a VM, when it becomes Paired
- Pairing Integrity: Valid
- Signature Type: BAA or Other for a VM
- OS Version: this is given as an internal version number based on Darwin, but extended with the build number, e.g. 22.1.400.0.0,0
- Volume Group UUID: the APFS file system UUID for the Data volume in the BVG
- Cryptex1 Image4 Hash: given for Ventura, otherwise absent
- Cryptex1 Generation: 3 or 4 in Ventura, otherwise absent
- Security Mode: Full, Reduced, Permissive
- 3rd Party Kexts Status: by default Disabled
- User-allowed MDM Control: by default Disabled
- DEP-allowed MDM Control: by default Disabled
- SIP Status: by default Enabled
- Signed System Volume Status: by default Enabled
- Kernel CTRR Status: by default Enabled
- Boot Args Filtering Status: by default Enabled.
