
We all want, and need, backups, but we also need the space for them. If your backups get cluttered with ephemeral files which you’ll never want to restore, then they’re just wasting space. With Time Machine it’s so tempting just to let it back up your entire Data volume, and be done with it. This article explains how you can do better than that, and exclude items from that backup which would merely waste space.
You may be surprised to learn that there are four different ways to exclude items from Time Machine backups:
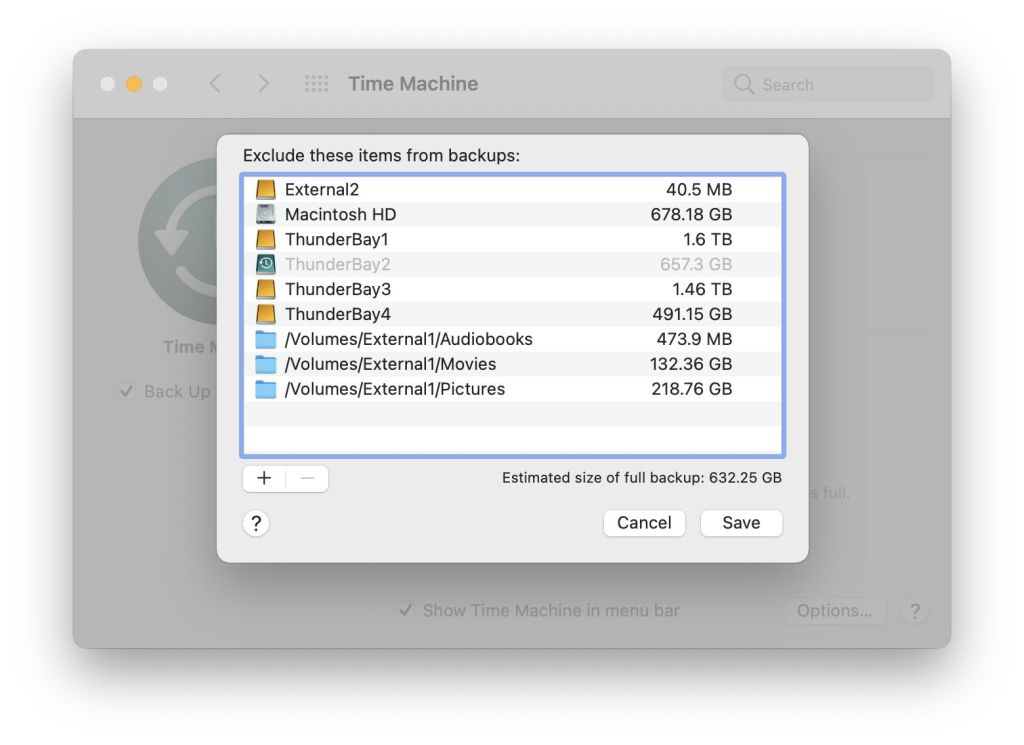
- add them to the list of exclusions revealed by clicking the Options… button in the Time Machine pane;
- use the
tmutil addexclusioncommand to exclude whole volumes by their UUID, with the-voption; - use the
tmutil addexclusioncommand to exclude folders and files by their path, with the-poption; - use the
tmutil addexclusioncommand to exclude individual folders and files, which is the default.
I’ll explain them in that order, and add a fifth.

When you use the Time Machine pane’s list of exclusions, it automatically excludes any volumes as if you’d used tmutil addexclusion -v, and other items are excluded as if you’d used tmutil addexclusion -p.
tmutil addexclusion -v is only used to exclude whole volumes, and recognises them by their UUID rather than volume name or mountpoint, to ensure this is most reliable. To do this in Terminal, you’ll need to give the tmutil command or Terminal Full Disk Access in the Security & Privacy pane, and run the command using sudo. If you erase the volume, its UUID will change, and any existing exclusion will no longer apply.
tmutil addexclusion -p shouldn’t be used to exclude volumes, but is intended for folders and individual files. It recognises them by path, so when the item moves it’s effectively removed from the exclusion list. It too requires Full Disk Access and sudo.
tmutil addexclusion without any options is intended for use with files and folders, and works very differently. Rather than adding an exclusion path, it attaches an extended attribute (xattr) to the item, which ensures that Time Machine ignores it when making backups. The xattr is of type com.apple.metadata:com_apple_backup_excludeItem, and consists of a property list containing one item:
<string>com.apple.backupd</string>
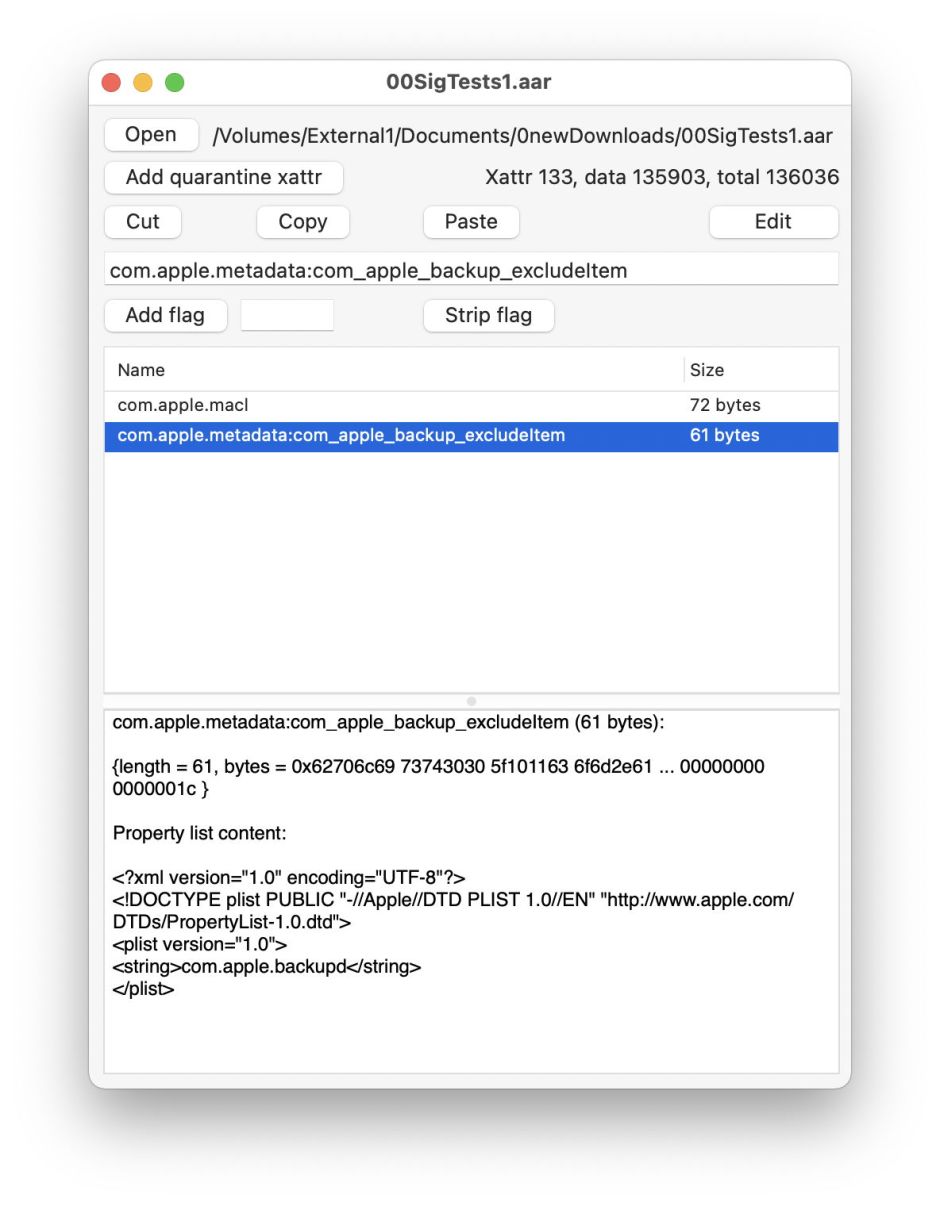
Because of that, you don’t even need to use the tmutil addexclusion command to exclude items: you can add the xattr using a utility such as my free app xattred. If there’s sufficient interest, I’m sure that I could come up with a little app which just adds and removes this xattr, to make it even simpler.
The com.apple.metadata:com_apple_backup_excludeItem xattr is sticky too: tag an item with it, and it remains attached when you copy or move that item around, including to a different volume. To remove that exclusion, all you have to do is delete the xattr, and Time Machine will then back that item up normally again.
tmutil also provides the removeexclusion command to remove any of its three different classes of exclusion. You’ll need to use the same option that you invoked when you created the exclusion – -v for volumes, -p for paths, and no option for the xattr. To query whether a volume, folder or file is excluded from being backed up, use the command tmutil isexcluded followed by the path.
So what should you exclude?
If you’re still running Catalina or earlier, one important hidden folder on every volume which you should exclude is .DocumentRevisions-V100. That contains the versions database, which can’t be restored anyway. It often contains a very large number of small items (probably hard links) which are painfully slow to back up too. One major improvement in Big Sur is that these folders have been added to the system exclusion list.
Another almost inevitable item to exclude is any Virtual Machine (VM). These are huge files, often many GB, which change a great deal when in use, and which can quickly devour all the free space on your backup storage. They need to be copied when they’re shut down, so are static, and you’re almost certainly not going to want them backed up hourly, or possibly even every overnight.
Large Photos libraries and any massive media files should also be candidates for exclusion, especially when they’re undergoing considerable change. If you’re going to do housekeeping on a 10 GB Photos library, temporarily exclude it from backups until you’ve finished, or perform manual backup using a different tool such as Carbon Copy Cloner.
There are also circumstances in which you might want the active files in an important project backed up frequently while you’re working on them, but don’t want all those files permanently backed up. An excellent solution to that, suggested here by Duncan, is to create a new APFS volume to contain them, then include that in your backups while you need them. When the project is finished and you only want to back up its key files, move those to another volume which is fully backed up, and delete the working volume from your backup storage. You’ll then be able to reclaim a lot of free space. This is the only way in Big Sur’s Time Machine to APFS that you can do this, as its snapshot backups don’t allow you to delete individual files or folders, only complete backups, or volume backup sets.
Those com.apple.metadata:com_apple_backup_excludeItem xattrs look ideal for attaching to larger files which can readily be downloaded again, such as movies and big PDFs, as they will remain attached wherever you choose to relocate or copy them.
To get the best out of Time Machine’s backups, be prepared to adapt the exclusions as your needs change. Thankfully, Time Machine offers different ways of achieving that.
