
My recurrent theme for the moment is checking and maintaining the integrity of important documents in macOS. Following discussions, I’m delighted to offer a new version of my free utility for this purpose, Dintch version 1.1.
Several of you pointed out that timestamps are valuable in audit and forensic analysis. So Dintch 1.1 now gives you the option of adding a timestamp to every file that it tags with a SHA-256 digest, which in turn enables you to check at any later date whether the data in that file have changed.
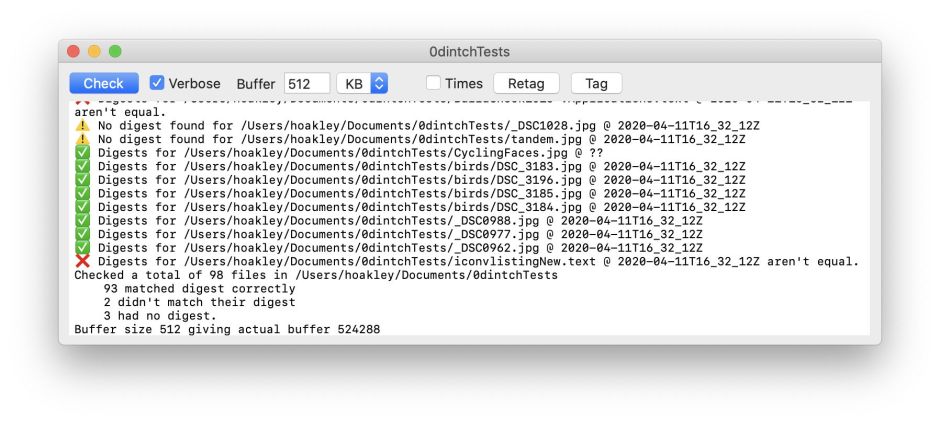
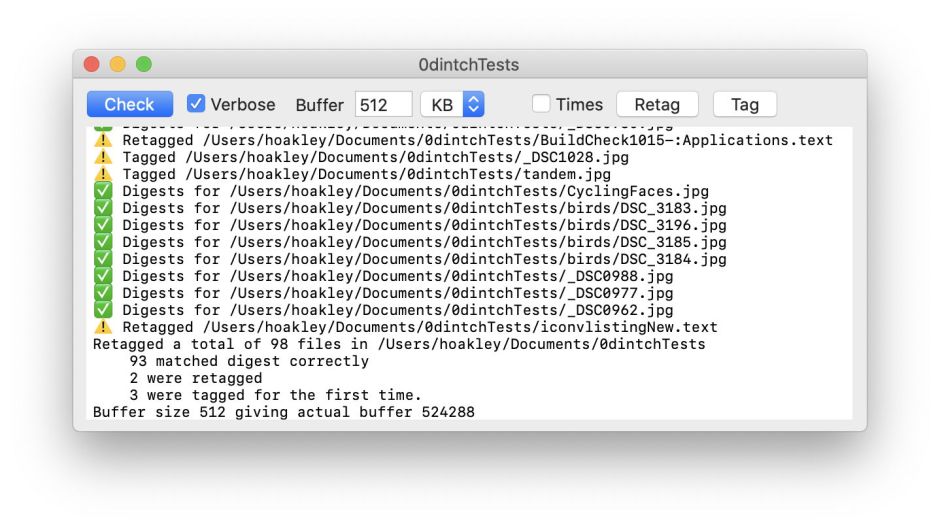
If you decide to add timestamps, I recommend that you keep them turned on at all times, as that will ensure that whenever Dintch writes a new digest to a file, its timestamp will be correctly updated. When you turn Verbose mode on and run a check on tagged files, Dintch now tells you the date and time of any timestamp which it finds, so you can check when each file was last tagged.
Unlike the digest, timestamps are saved in text format, which enables you to read them at the command line or using my extended attribute utility xattred, as well as with Dintch. Unfortunately, this also makes it easy for other software to tamper with them, but that would be true of any type of timestamp unless it was encrypted.
In order to maintain good performance, if you tag files with timestamps disabled, there’s no overhead added in this version: Dintch is only slowed when the timestamp option is enabled, or it’s running in verbose mode.
Several users have asked how they might usefully couple Dintch’s integrity checking with their backup systems.
If you’re using Time Machine, which normally detects Dintch’s digest tags, I recommend that you tag files whenever they’re in a state which you want to preserve. Let’s say that you’ve just completed work on a long document, and want to ensure that your local copy and its backup remain undamaged. That’s the time to run Dintch and attach a tag. At the next backup, Time Machine should save a complete copy of that document with its tag, which you can check whenever you wish.
If you’re not using Time Machine, chances are that your backup software won’t make a fresh backup when you’ve tagged the document, as it won’t see that it has changed. In that case, keep a folder aside which isn’t backed up. Move the finished document to that folder, and wait for the next backup to complete. Once that’s done, tag the file where it is, and move it back to the location where you want to keep it. It should then be copied afresh, complete with its tag, to the next backup.
Another trick which can be useful when tagging files is knowing how to defeat the APFS system of ‘cloning’ files. Normally, when you’re working with files on an APFS volume, if you make a copy of them, macOS doesn’t actually make a fresh copy of the file at all. Instead, it makes a link to the data in the original file, a bit like a ‘hard’ link. It’s only when the data in the copy starts to change that APFS stores those data separately.
Where a document is important enough for you to want to check its integrity, one question which needs to be answered is what you do when a file fails that check. The trite answer is to replace it with a copy which passes checking, but that begs the question of where you get that from. A classic solution to this problem is to save two tagged copies of each important document. On optical media, these should be on two different storage disks chosen from different batches; on writeable media like hard disks and SSDs, these should be physically separate devices. To be pernickety about this, those saved copies should be made from different copies of the original file, both of which match their digest at the time that they’re copied – something that APFS confounds by ‘cloning’ copies on the same volume.
One simple way to stop ‘cloning’ from happening, and ensure that the data in a copy of a file are stored separately from the original file, is to copy the original to a different volume. As APFS doesn’t share cloned data across volumes, that copy is written to separate space in storage. When you then copy it back (using a non-conflicting name), macOS sees that as a separate file and keeps its data apart from the original. Another useful trick which has the same effect but only in High Sierra or Mojave is to put the file in a folder of its own, and copy or duplicate that folder: unfortunately that no longer works in Catalina.
I’ve said before that Dintch is but the start of a suite of utilities to check the integrity of files. The next apps which I will be developing, using Dintch’s code base, so hopefully with greater speed and less effort or trauma, are:
- Fintch, which will be a drag-and-drop app primarily for tagging and checking individual documents rather than whole folders;
cintch, a command tool which provides tag, retag and check features in Terminal’s command line, and can be used in automation, e.g. to scan and tag designated folders.
I am also looking in detail at whether I can provide an error-correcting code format in macOS. This would enable you to create archive files which had inherent resistance to corruption. The first step in this development is to create an app which can generate test files and deliberately apply controlled amounts of corruption to their data. I doubt whether anyone else is interested in that app, but if you might be, let me know. I’m also keen to find anyone using ZFS with a Mac running a reasonably recent version of macOS, who would be interested in running tests using that tool to discover how much data corruption it can currently repair.
Dintch version 1.1 is available from here: dintch11
from Downloads above, from its Product Page, and through its auto-update mechanism.
