
If you have discovered or decided that you do need to sign an app, but don’t need a full Developer ID and signing certificate, one straightforward course is to create your own security certificate. This article shows you how to do that using Mojave’s Certificate Assistant.
Although you can open Certificate Assistant directly – it’s in /System/Library/CoreServices – as it is part of certificate management, it’s best to do so via Keychain Access, in /Applications/Utilities. You’ll find it listed in the main Keychain Access app menu, and from its bewildering list of options choose Create a Certificate… near the top.
This opens a long series of dialogs which I’ll step through in sequence.
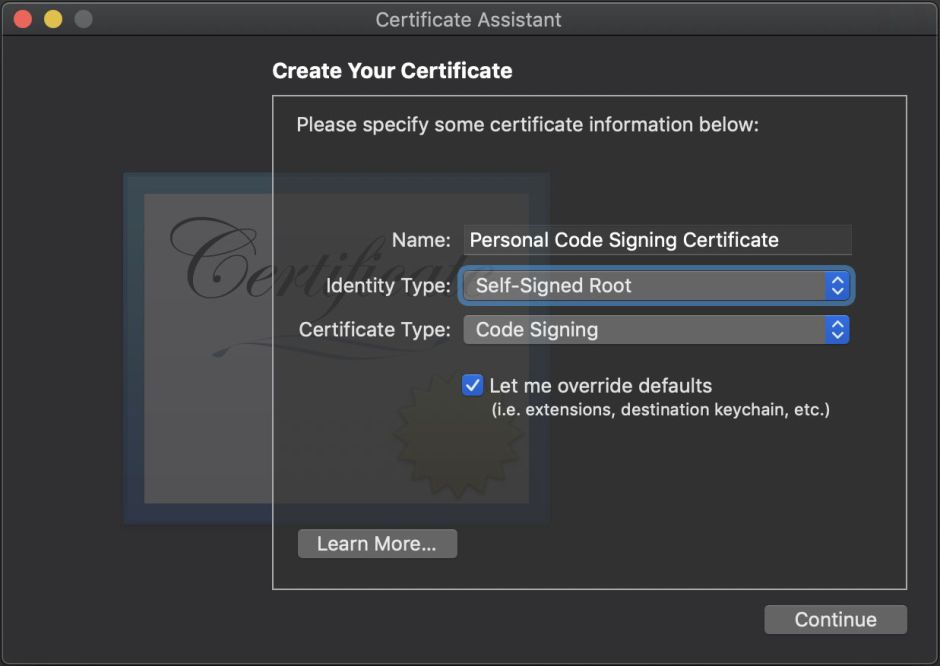
Give your certificate a meaningful name such as that here, select the Identity Type as Self-Signed Root, and the Certificate Type as Code Signing. If the box to override defaults isn’t ticked, tick it before clicking Continue.
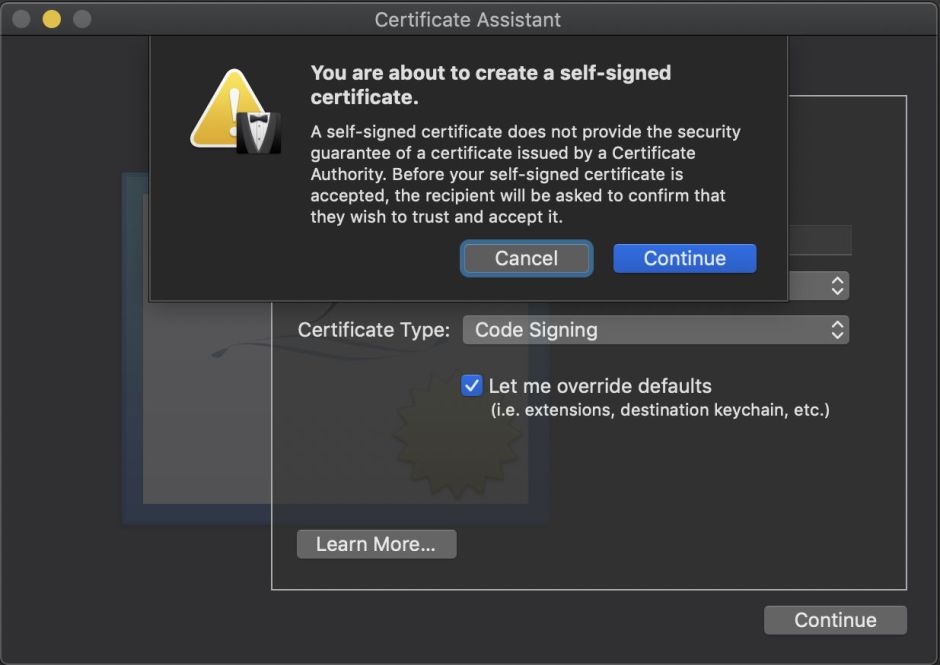
You will then be warned that your self-signed certificate won’t provide the security of a ‘proper’ certificate issued by Apple or another Certificate Authority. Click Continue.
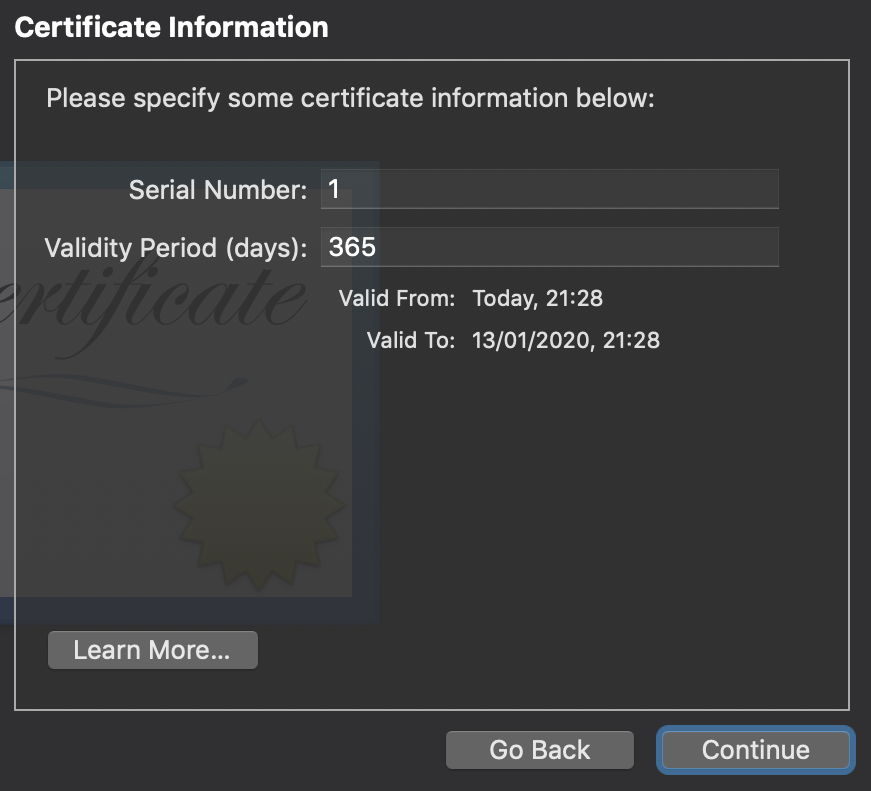
Give your certificate a serial number which is different to any others which you have created before, and set a validity period in days, which will determine its expiry date. I’ll discuss this in detail in another article, but for code signing purposes certificates are treated as valid so long as they hadn’t expired at the time that they were used to sign the app. A certificate doesn’t have to last forever and a day.
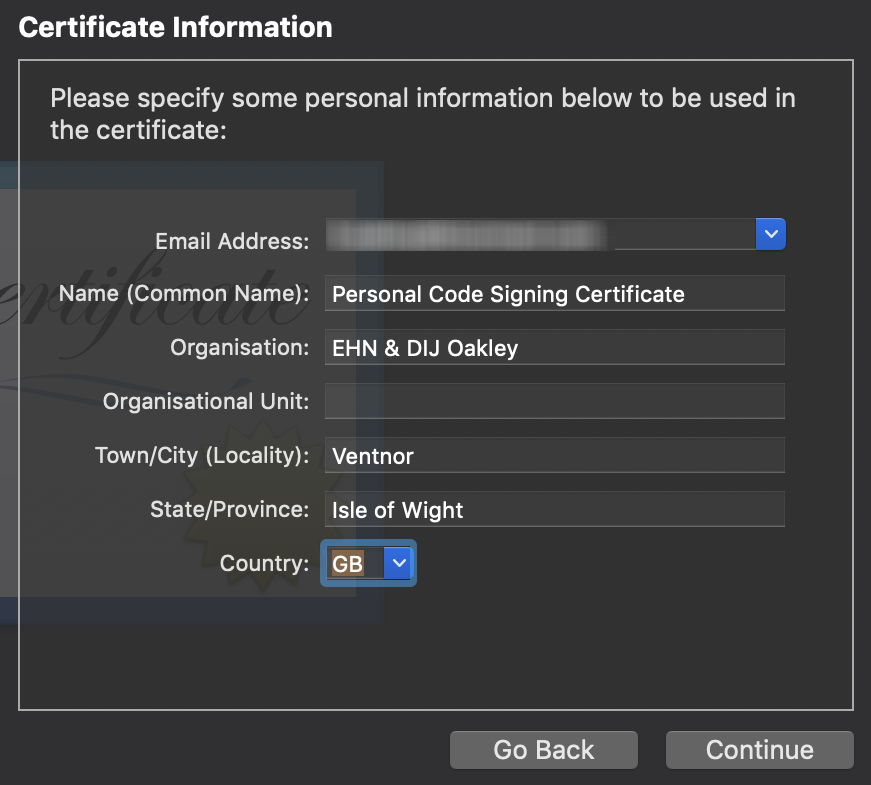
Provide an email address and other details which will allow you to be traced and contacted in the event that someone else ever comes into contact with your certificate.
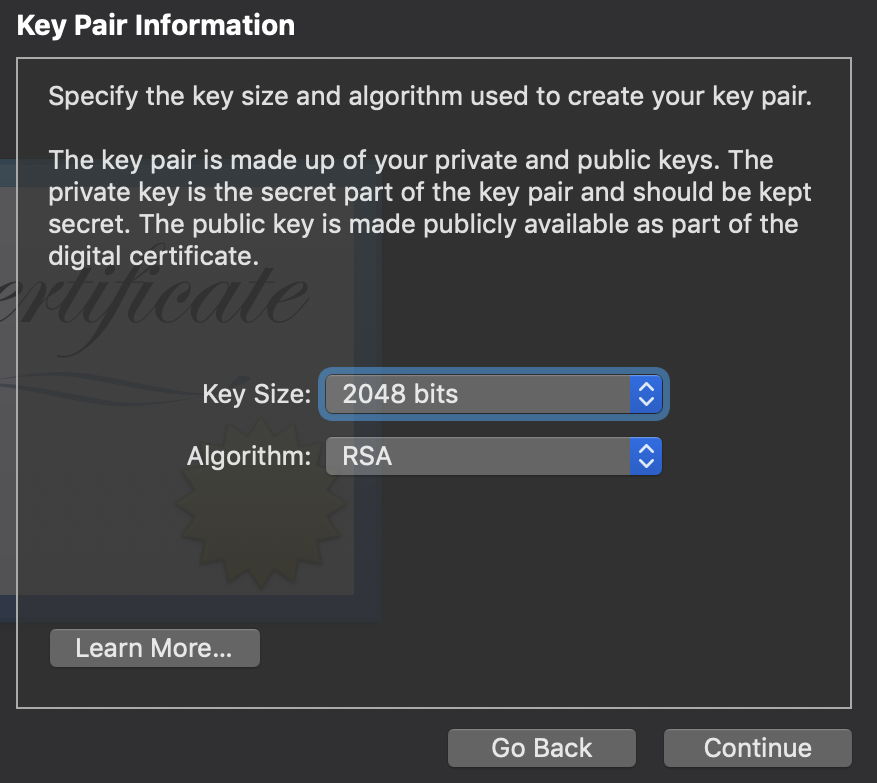
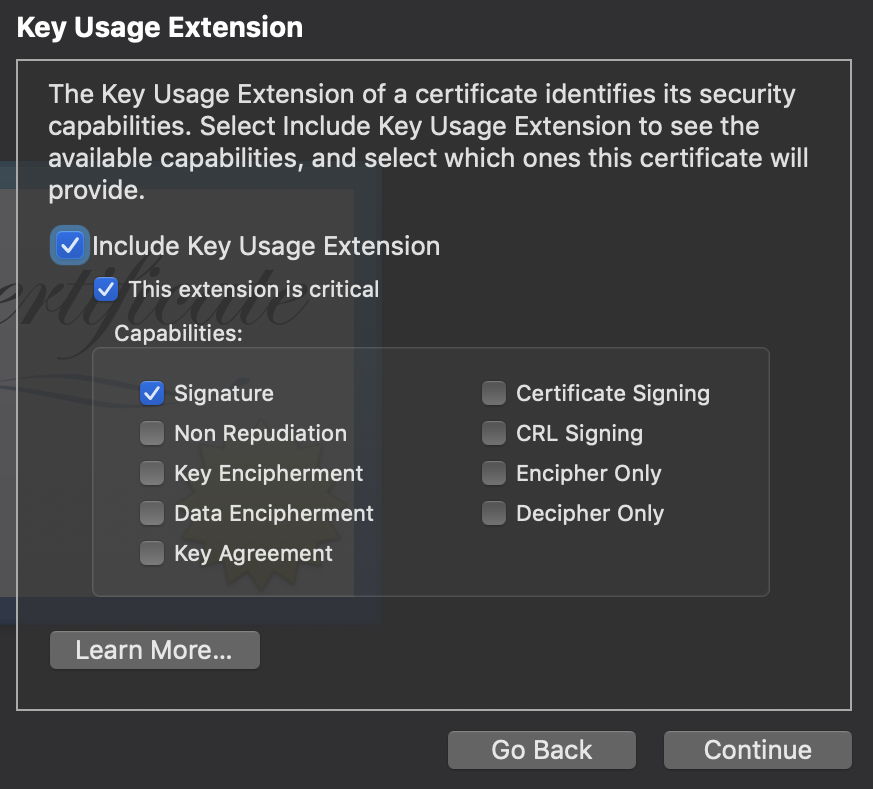
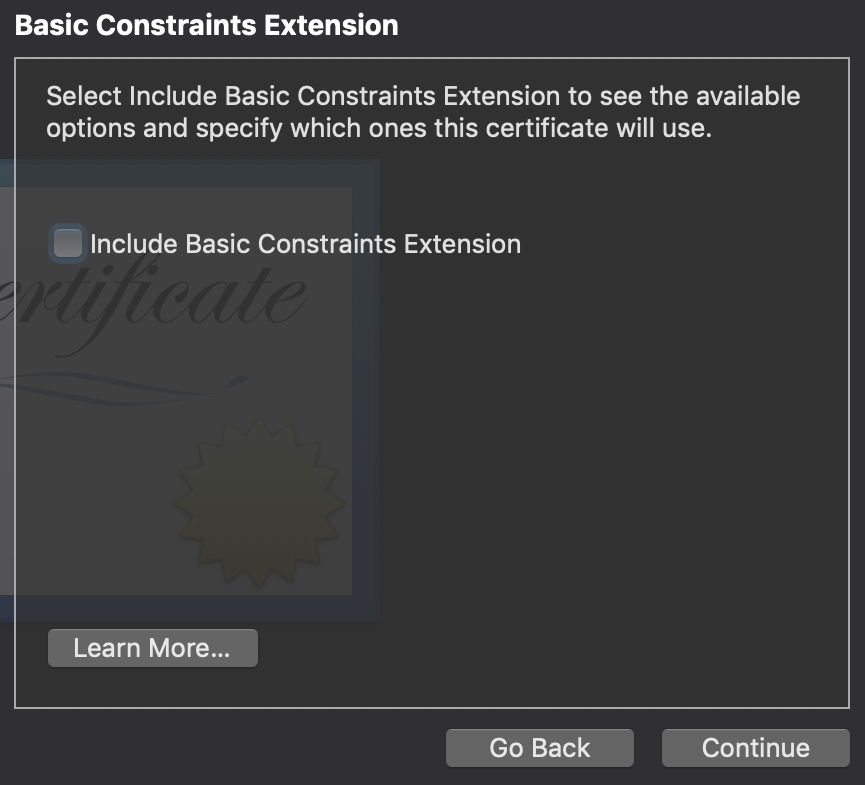
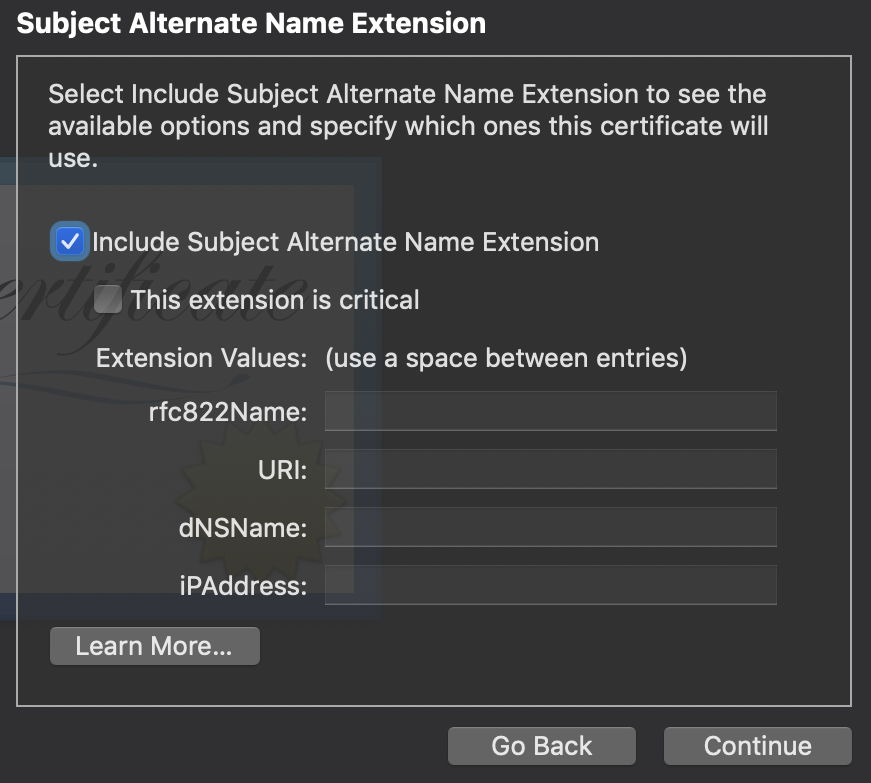
Although the remaining dialog panels are left at default settings, I show them here so that they don’t come as a complete surprise.
Although logically you might want to add Certificate Signing here, that is quite different: leave this set at these defaults.

It’s here that you should ensure that Code Signing is designated as the usage.

You should ordinarily add this certificate to your login keychain, which is the default opened when you log in.

The concluding dialog shows details for the certificate, and reiterates that it hasn’t been verified by a third party.
Your shiny new certificate should now be added to your login keychain, and will appear in the list of My Certificates. There remain a couple of tasks to perform before it’s ready to use. First, double-click on the certificate in the window listing to view it, and open its top Trust section.
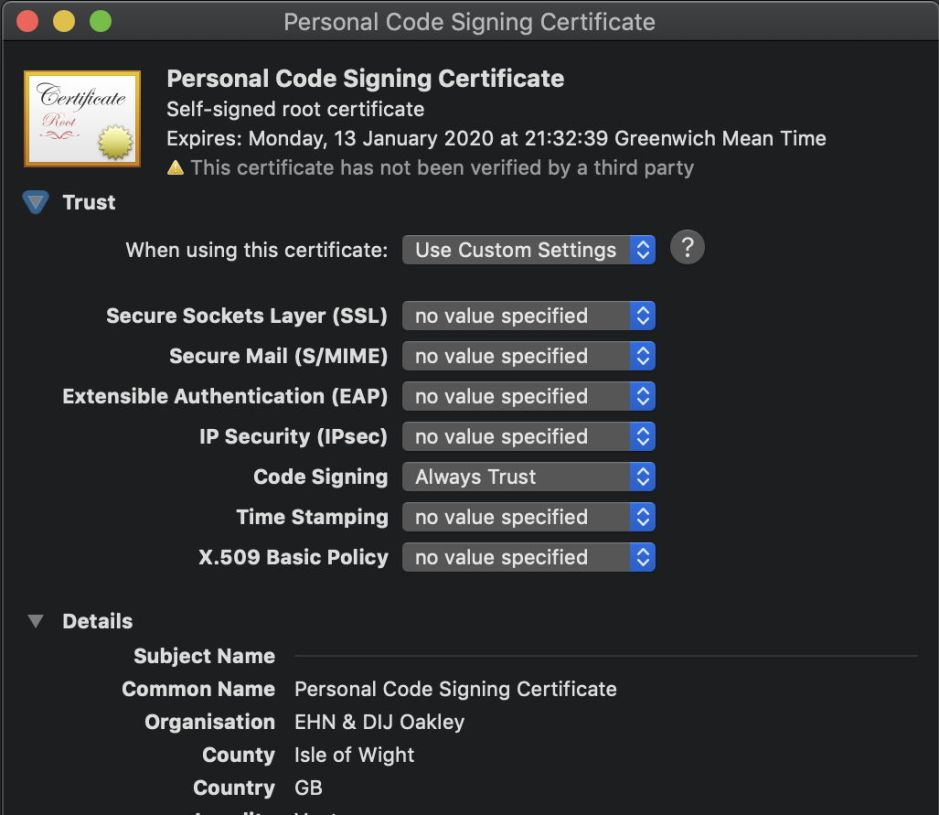
On that Mac, and any others to which you copy this certificate, you’ll want to set your certificate to always be trusted for Code Signing, or there is little point in doing all this.
You should also allow access to the certificate to the apps which will need to use it. To do this, open the Private Key section of your certificate to display this dialog, and select the Access Control tab.

Click on the + tool at the foot of the list, and add the Xcode app from Applications, and two tools from /var/bin: codesign and productbuild. If you find that you need to give access to others in the future, remember this is where you do that.

Close Keychain Access, as your personal certificate is now ready to use – which I will consider in the next article.
References
Apple’s Code Signing Guide
TN2206 Code Signing in Depth
