
You don’t get much for free these days, but if you’ve got an iOS device, Apple can turn it into a natty mobile Wi-Fi scanner at no extra cost.
In the iOS App Store, ‘purchase’ Apple’s free AirPort Utility. Don’t worry – although that app is primarily intended to configure Apple’s obsolescent Wi-Fi base stations, this Wi-Fi scanner is good for any device from any manufacturer.
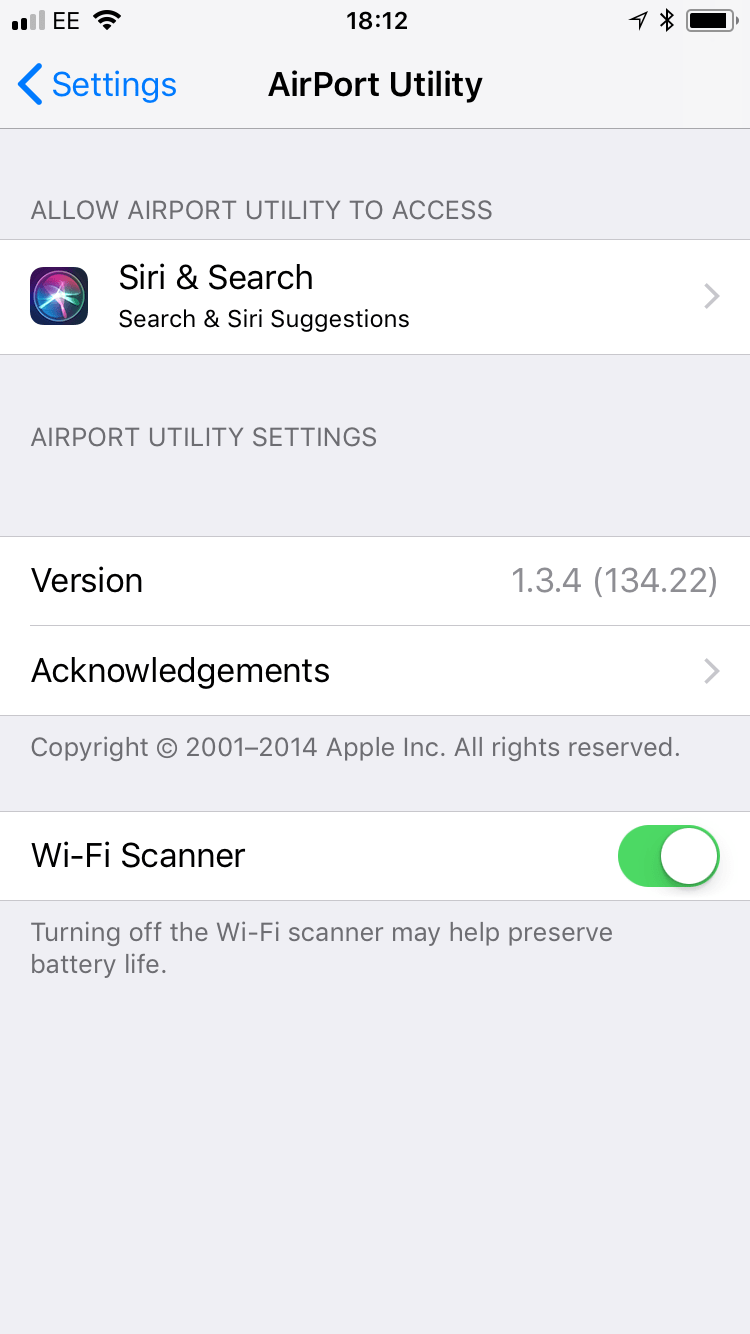
Once it has installed, open Settings, and locate those for your new AirPort Utility app. Inside you’ll find a switch for the Wi-Fi Scanner. Turn it on (green), and exit Settings again.
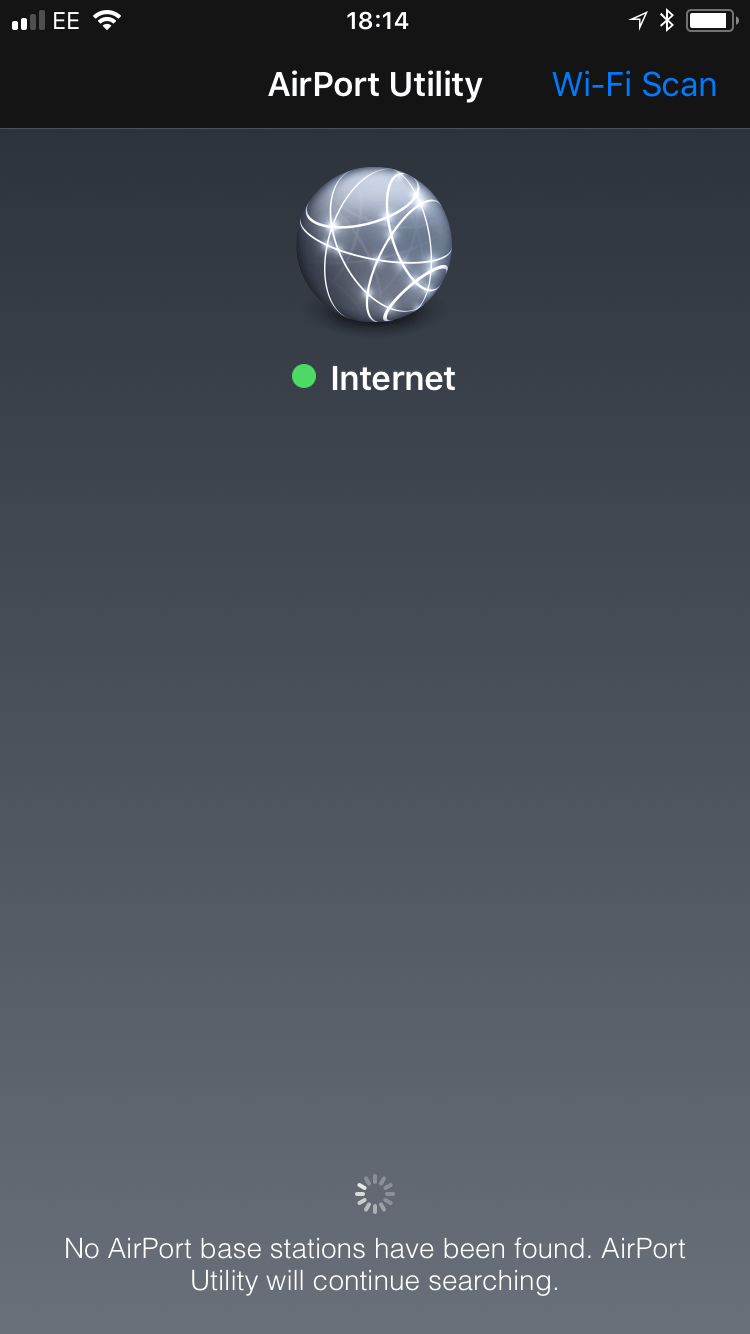
Locate your new app and open it. Unless you have an AirPort base station within range, its opening screen will stay almost blank. Tap Wi-Fi Scan at the top right of the display.
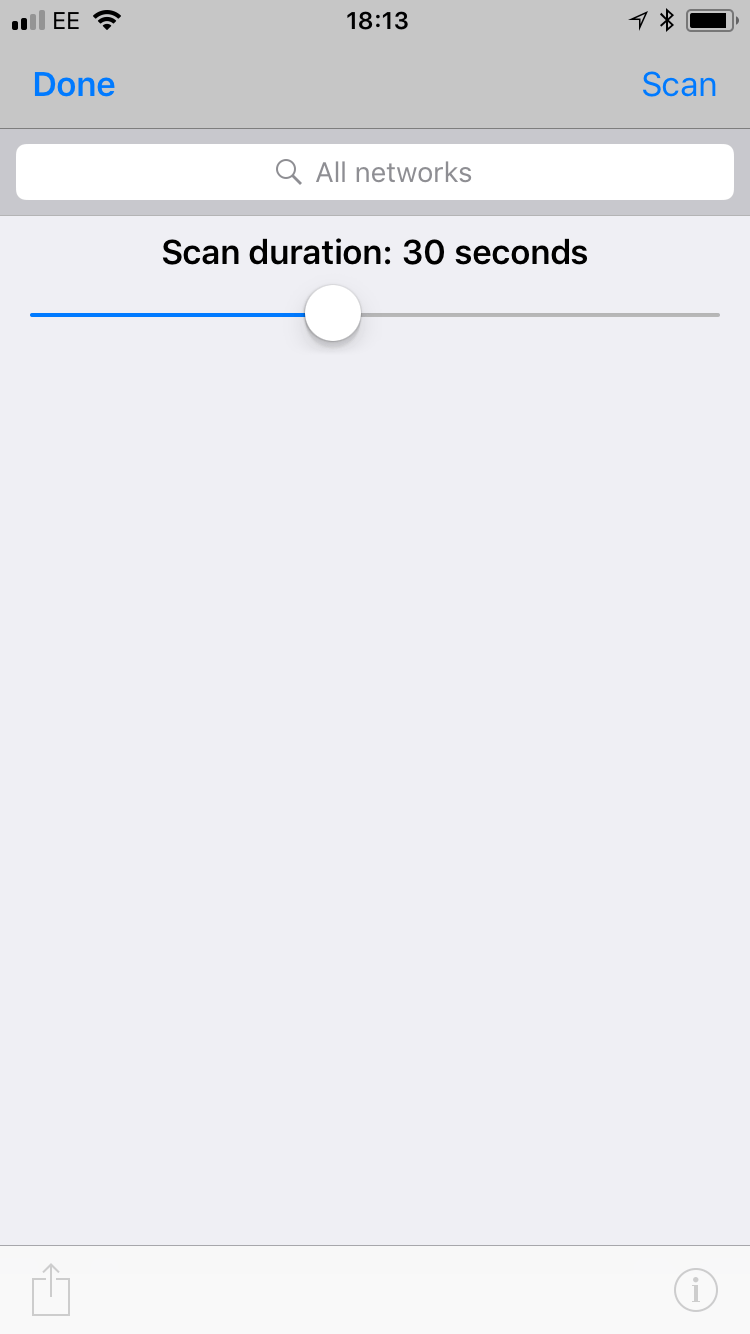
Then alter the period of the scan. As scans take a fair bit of battery power, make yours as short as you need. The maximum here is 60 seconds. Then tap on Scan at the top right.
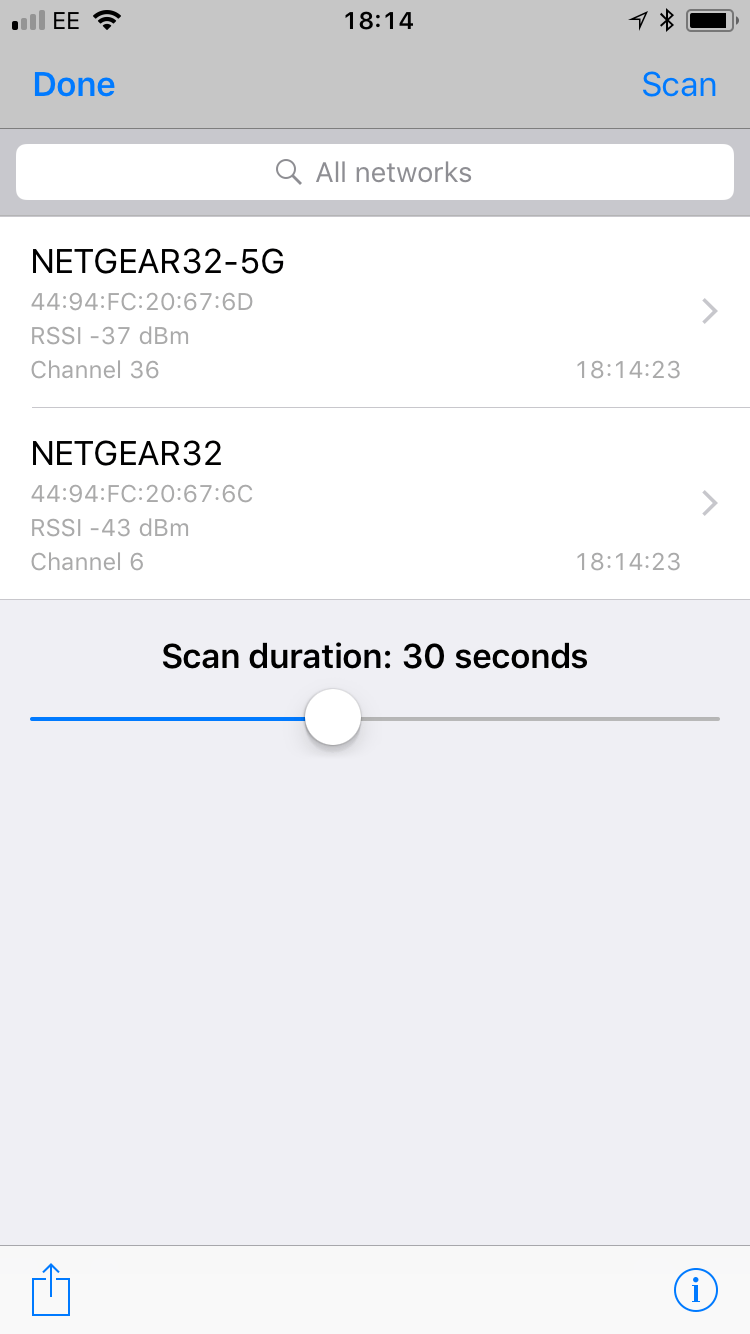
When the scan is complete, the app will show details of all the Wi-Fi networks which it has found. To view further information, tap the network in which you’re interested.
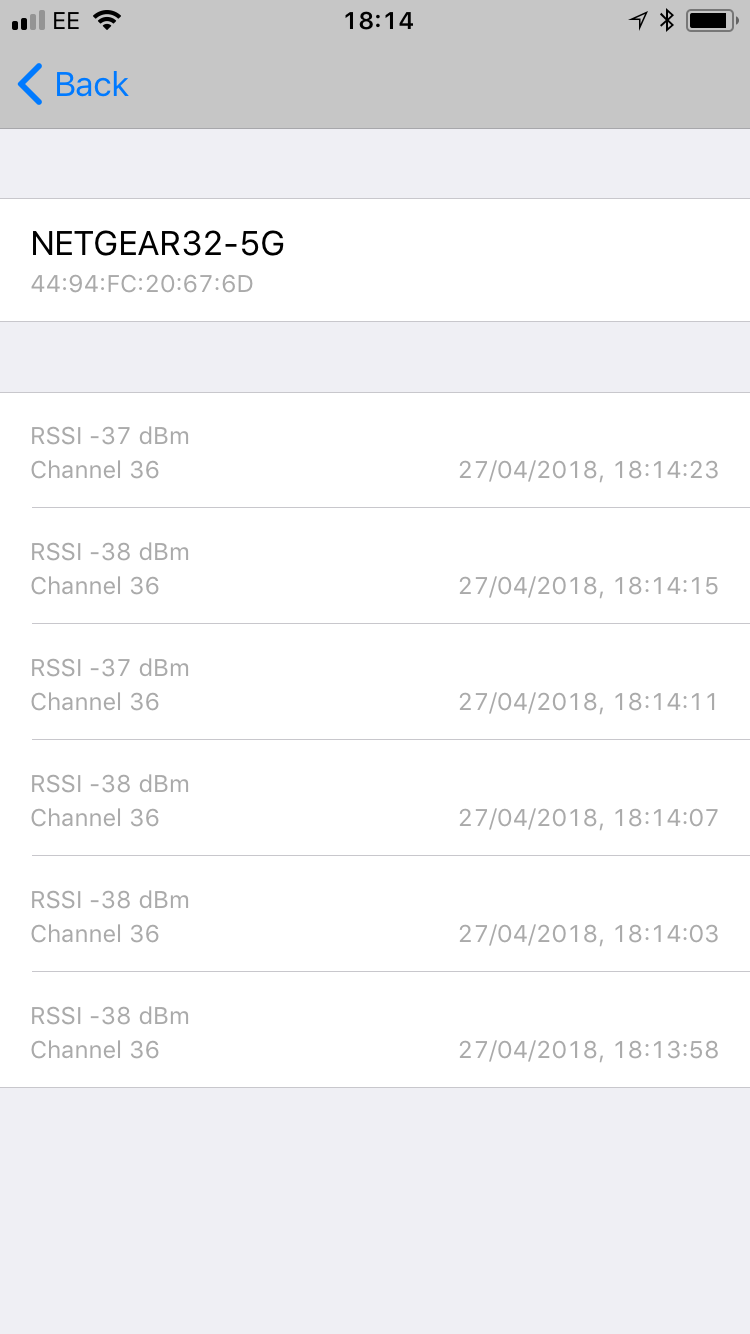
You’ll then see each set of measurements made on that network over the scan period. This gives the channel used and the RSSI values roughly every four seconds.
RSSI is the Received Signal Strength Indicator, a measure of the Wi-Fi signal strength of that transmitter. For an iOS device to start looking at a connection, this needs to be -70 dBm or more, but once made, a connection can be maintained below -75. Values above -40 are very strong, and should give rock-solid connections.
You can share the results from the previous screen in several of the usual ways.
Leaving the Wi-Fi scanner active is likely to impact on energy usage, so when you have finished using your new mobile Wi-Fi scanner, it’s worth going back into Settings and disabling it again.
Additional details are provided in this article, which also explains in detail how wireless roaming works in iOS devices.
