
Software installations and updates delivered via the softwareupdate service, or in Installer packages, include all the most important software which ends up on your Mac. Being the most important, it also tends to be that which can cause most trouble. At the first sign of trouble, you’re likely to ask just what was in that update. This article explains how to discover that.
By far the best way to find out exactly what was installed, where, and how, is using a copy of the Installer package itself. Unfortunately, that rules out most updates and installations which are delivered via the App Store and softwareupdate, which don’t leave convenient packages around for you to investigate.
Some macOS and other system updates are, though, available from Apple Support as separate Installer packages, or if you can locate and download them from Apple’s enterprise support servers you may also be in luck.
Each time that Apple releases a macOS update, it makes two standalone packages available slightly later, one of the Delta update containing only that update, and the much larger Combo update which includes everything since the last major macOS release. You’ll normally want the Delta update, unless you have a lot of time on your hands.
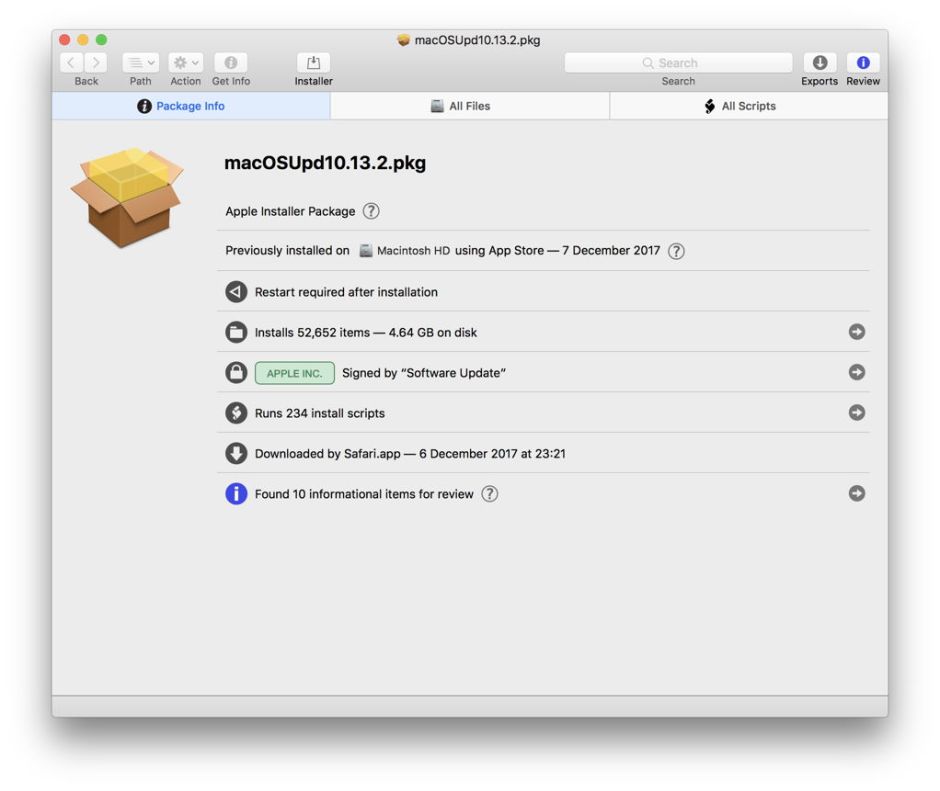
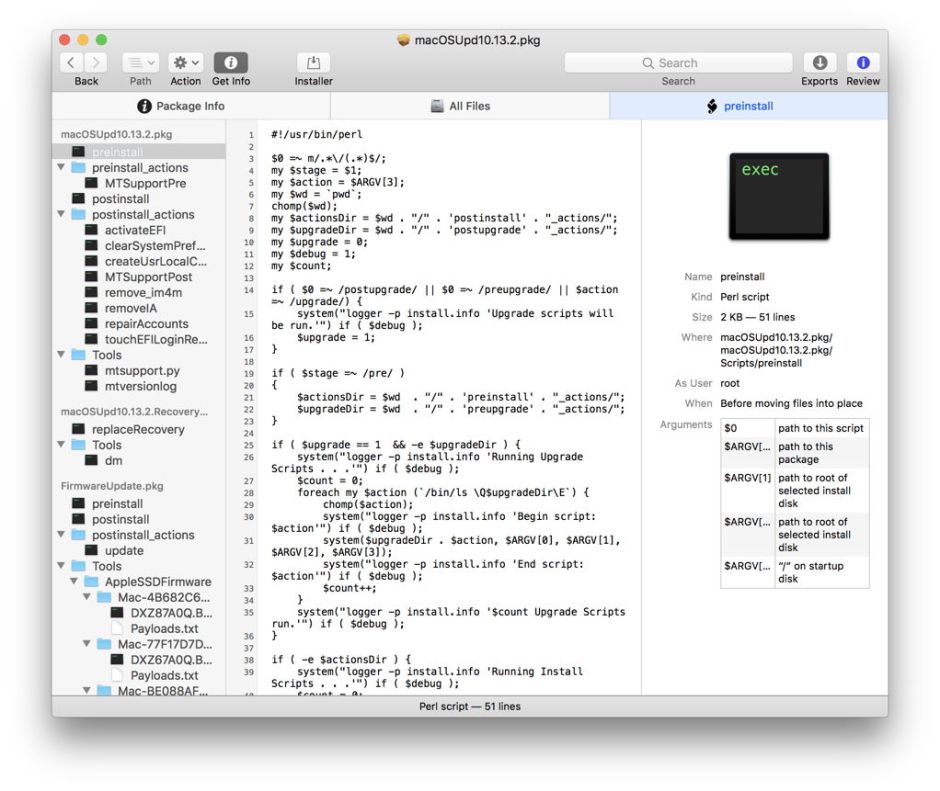
Several tools can open Installer packages. My favourite is the immensely capable Suspicious Package, which is free from here. Once it has crunched its way through a package, it can list every file included, extract individual components for you to study in detail, lets you browse version numbers, and reveals all the scripts used before, during, and after the installation. When examining third-party installers, you’ll also find its security auditing feature valuable.

If you can’t get the original installer, all is not lost: you will need to locate the installer’s ‘bill of materials’ (BoM) for it instead. BoMs are normally left after the Installer has done its job, and should be found in /var/db/receipts for all App Store installations and updates, and all other installations performed by the Installer app.
macOS system, security, and security data updates have their BoMs stored in /System/Library/Receipts instead, and you can use exactly the same techniques to study those. /Library/Receipts was used for BoMs prior to 26 June 2015, but now only contains the full install history in InstallHistory.plist, which doesn’t list the contents of individual installations.
The BoM format is not itself browsable, but needs to be converted into readable form using the command tool lsbom. Although that has a range of options, it is most useful without them. In Terminal, pipe the output from lsbom into a text file using (e.g.)
lsbom /var/db/receipts/com.adobe.pkg.FlashPlayer.bom > FlashPlayerBoMlist.text

To make this easier, you can reveal hidden files in the Finder using the shortcut Command-Shift-., locate the BoM in /var/db/receipts, select its filename, and copy and paste that into Terminal.

You then have a text file listing all the files and folders which were installed by that Installer package, together with their size, checksum, and other information. Now you can go in and check version numbers of components, in the Info.plist files, and so on, and you know what you might have to remove manually if you need to reverse the installation or update.
Sadly, none of these work for drag-and-drop installations, or third-party installers which avoid Apple’s Installer. For those, you will need to examine whatever you installed. If it’s a bundle, open it up and look inside – there will usually be excellent clues as to what it might have installed, and where.
