
macOS has long had powerful features to make it safer to allow your children to use their Macs unsupervised, with managed accounts and parental controls over them. This article explains how to set them up in macOS Sierra, although previous versions of OS X are very similar.
Kit required Mac OS X 10.5.x to 10.12.x
Time 5-15 minutes
Goal To set up a managed user account suitable for a child of any age, with full parental controls over application usage, website access, mail, privacy, and time limits
Skill level Beginner to intermediate
Every parent wants their children to get the best out of using a Mac, but also wants to protect them from the adult world. macOS provides a full suite of controls that parents (and others) can use to keep their children safe from the grooming chat of paedophiles, and protected from the explicit content available on many websites.
These features are in the Parental Controls pane of System Preferences, and can now be applied to any normal user account, which turns it into a managed account. If two or more children share the same Mac, as controls are applied to individual user accounts, you should set their accounts up appropriately.
Although macOS provides an extensive suite of different types of control, you do not have to apply every type to every account. Depending on their age, experience, and how much you feel that you need to protect them, parental controls can be tailored to the needs of the toddler or teenager. Indeed some of us could perhaps benefit from the time restrictions that can be applied to Mac use, to ensure that we get sufficient sleep.
Some controls, particularly those over email and chat, can be circumvented if you do not limit available applications: third party mail and chat clients may incorporate their own controls; if not, you should disable them to maintain control.

1. Configure the account. Logged in as an admin user, open the Users & Groups pane in System Preferences, click on the padlock and authenticate to make changes, then click the + tool to add a new account for your child. Set this to be a managed account with parental controls, and complete the other details for them. Ensure their password, whilst memorable to them, is still secure.
In Sierra, you can now select any normal user account and, by ticking the Enable parental controls item, turn it into a managed account with parental controls.

2. Create the account. Click on the Create Account button to tell your Mac to create the account and its home folder. Note that even as an admin user you will still not have access to the contents of their personal folder. Select the account in the list of accounts, choose a suitable picture, and click the Open Parental Controls… button.

3. Set application access. The pane now switches to Parental Controls. In the Apps tab, set access to the camera and Game Center. Most children will need access to selected applications: choose those that you wish to allow from the list shown in the view below. Using other apps will then require admin authentication.

4. Limit mail. If you want to restrict the list of mail addressees your child can contact, check the Limit Mail to allowed contacts box, and then click on the Manage… button. This pane will then drop down: ensure that you enter your mail address to screen requests, then add permitted addresses below that. Note that this only controls Mail behaviour, not that of webmail.
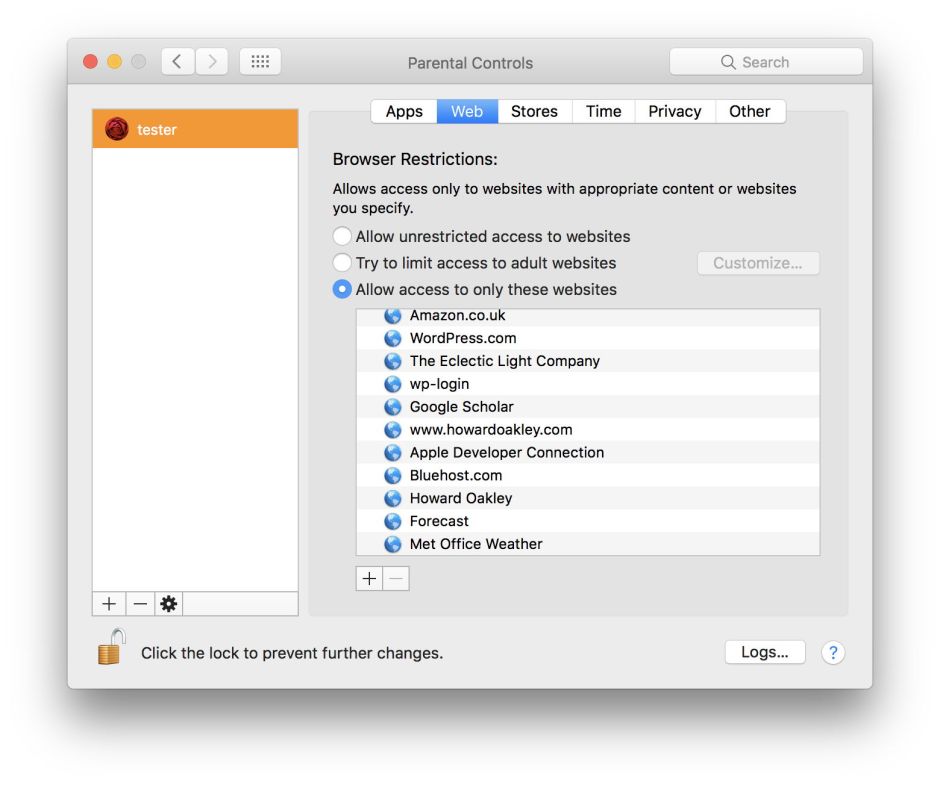
5. Set web content filtering. Click on the Web tab to determine how you wish to filter websites. Younger children are likely to be happy being limited to the suggested list, which you can edit to include other sites which are acceptable. Older children may need the second option, to try to limit access to adult websites, which you will need to complete by clicking on the Customize… button.

6. Configure content access. Click on the Stores tab to set whether they can access Apple’s content stores, and the restrictions which will be imposed on their viewing and purchases within those stores. Note that if you feel that any classifications are too liberal, you can set them individually.

7. Set time limits. Click on the Time tab to set any restrictions to the hours that your child can use the Mac. The upper two sections control the total number of hours in any given weekday or weekend day that they can use the Mac, the lower section imposes nighttime curfews, again by day of the week. Note the latter considers weekend nights to be Friday and Saturday.
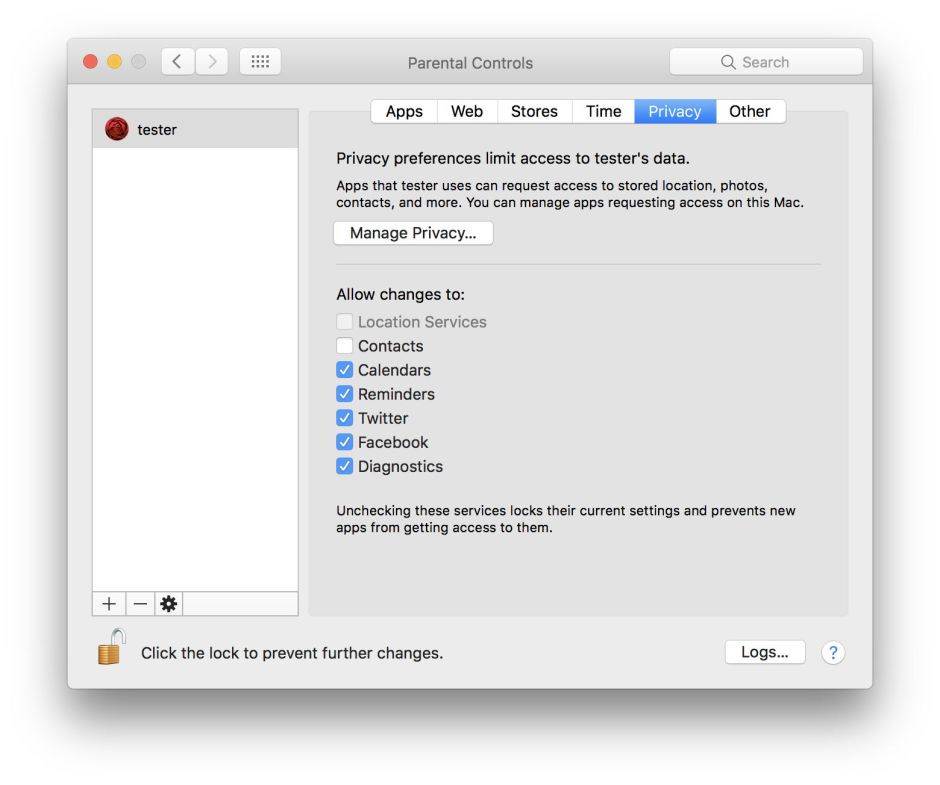
8. Manage privacy settings. Click on the Privacy tab to set which apps will have access to their personal data. Services which are left unchecked will be locked away from apps, ensuring your child’s privacy. Click the Manage Privacy… button at the top to switch to the Security & Privacy pane for your child’s account.
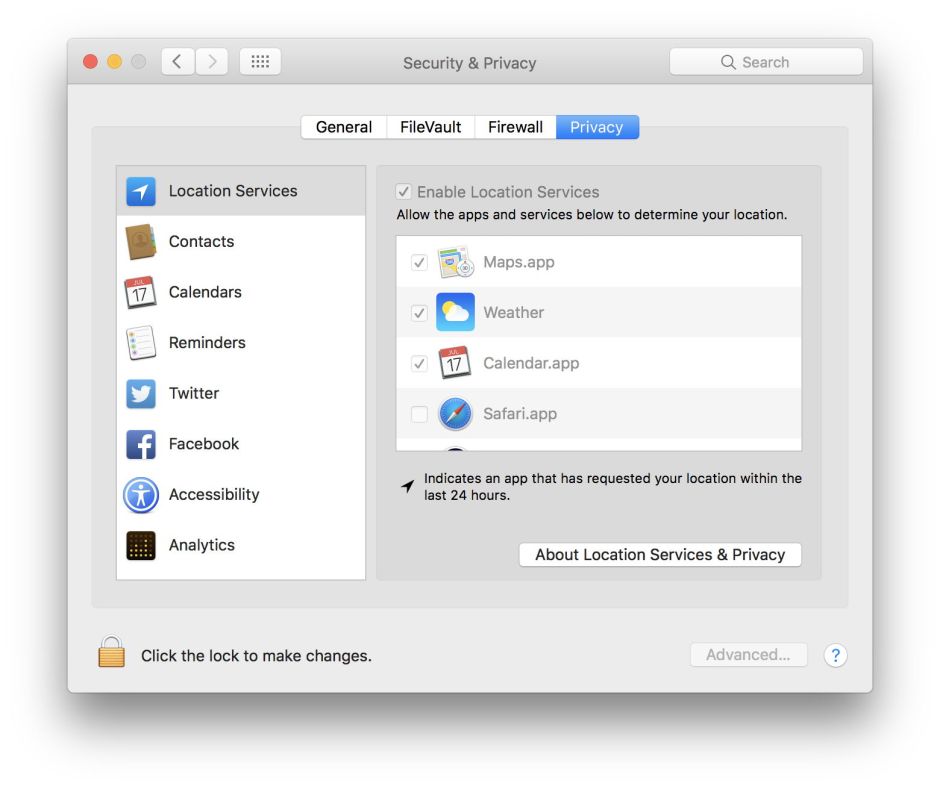
9. Set app privacy access. Just as you have done for your own account, you should now set up individual app access to private information, such as location, calendars, and reminders. Once you have completed those, click on the back arrow (at the top) to return to the Parental Controls pane.
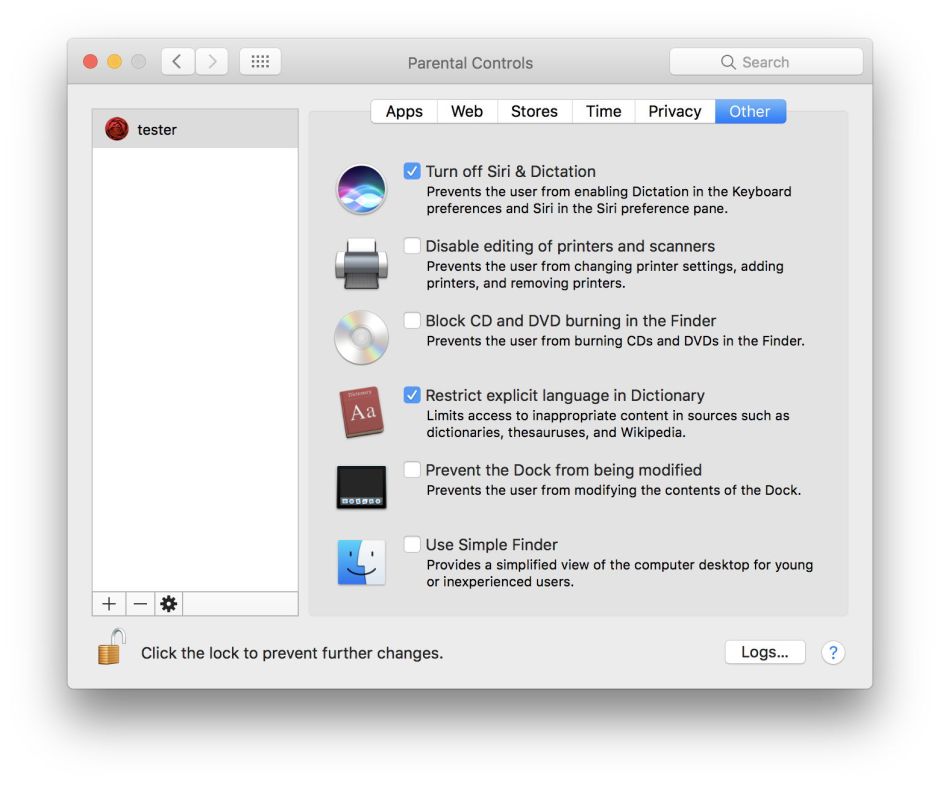
10. Set miscellaneous controls. Click on the Other tab to complete setting up Parental Controls. Most of these are simple and self-explanatory. This is where you can now opt for your child to use the Simple Finder, which is intended for younger children. If you want to hide ‘naughty’ words in the system dictionary you can check the box here, but third party applications which use their own dictionaries may be unaffected.
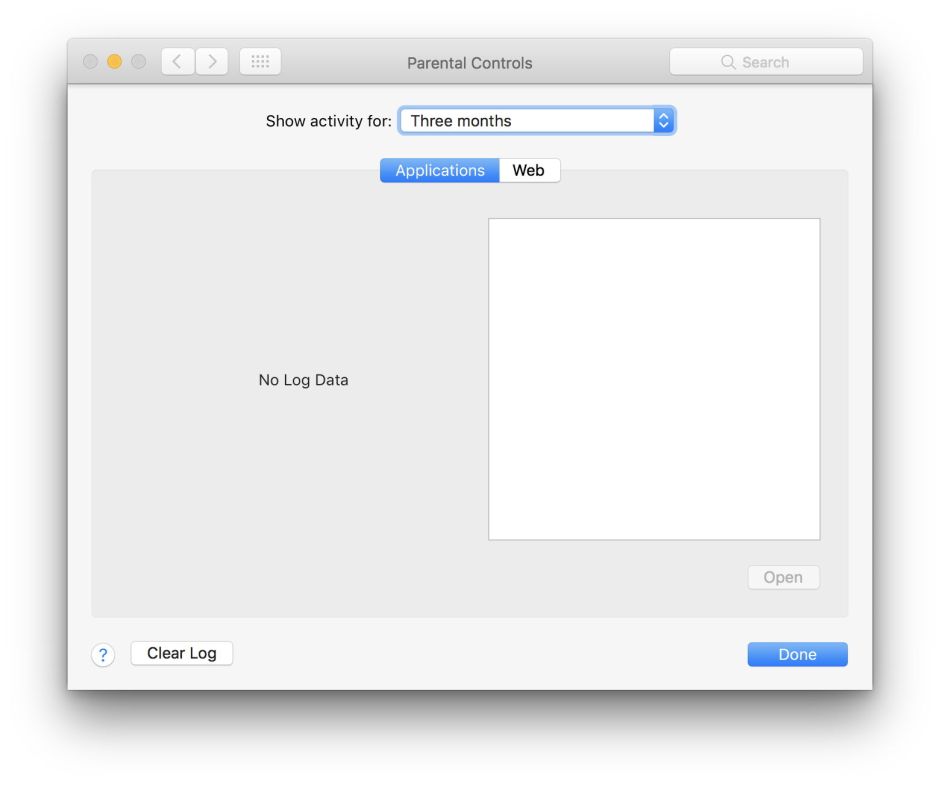
11. Check content logs. In any of the tabs, clicking on the Logs… button allows you to view logs of app usage, permitted and blocked sites and features. Once your child is using their managed account with parental controls, enter this tab periodically to check that the controls are working as intended, and neither being too restrictive nor too lenient. In the Web tab, select a logged site and you can add it to the restricted list, or check it yourself.
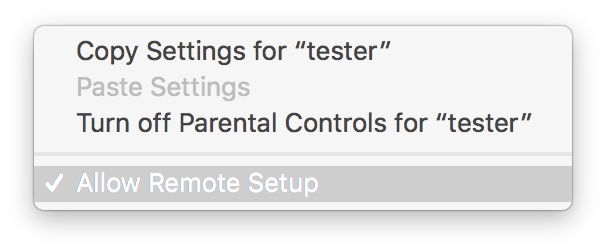
12. Manage remotely. If the child is using a Mac on your home network, you may find it simplest to manage their controls remotely, from your own networked Mac. Select the user account in the Users & Groups pane, then use the popup tools menu from the cog at the lower left to enable remote setup.
Updated from the original, which was first published in MacUser volume 24, 2008.
