

It is so easy to turn up at a critical meeting, or for an urgent task, only to discover that important documents are on the wrong system. Now that many of us have Mac(s), iPad(s), and an iPhone (or two), you can waste a lot of time and effort moving documents between them, and still not get everything that you need.
This article considers some of the many ways in which you can make this quicker and better.
Sharing docs between your own devices, locally
 The standard and long-established way to share documents between computers, Macs or others, within a single local network is using File Sharing, in the Sharing pane. This supports AFP (for Macs) and SMB (for Windows and others), according to how you configure it, and how you make the connection. You normally enable this on the (server) Mac which contains the documents which you want to copy to another system.
 By default, File Sharing in El Capitan is limited to the Public Folder in your Home folder, which you probably do not use. You can add the whole of your Home folder, or just part of it, e.g. Documents, by clicking the + tool at the bottom of the list of Shared Folders. You can also add other users, using the + tool at the bottom of the list of users.
On the other (client) Mac, use the Finder’s Go… menu and enter the AFP path stated in the File Sharing pane, such as afp://192.168.63.3, then log on using the user name and password for the (server) Mac on which you are running the sharing service – something which can catch the unwary or rushed. If you have a desktop and laptop Mac, you may wisely have set them up so that your account on each has the same user name and password, to save any confusion.
Unless you use File Sharing a lot, it is good practice to leave it turned off except when in use. That ensures that anyone who gains access to your network, from inside or outside, cannot sneak in to shared folders.
Another very popular way of moving files between computers uses removable storage, such as a USB ‘thumb’ drive or ‘memory stick’, or a removable hard disk. Simply hook up the storage to the Mac which contains the documents which you want, copy them across to it, eject the drive, then connect it to the other computer, copy from the storage to that computer, and eject the drive again.
Removable storage is far quicker than a network when you have to transfer many gigabytes of documents, and a quick and dirty way of moving the odd file too, which works well between any computers. You must, though, be mindful that memory sticks are potential security risks: they can readily transfer malware, and leaving sensitive documents on them can result in breach of their privacy. Even deleting the files from the stick still leaves traces which could be used to recover their contents.
 OS X also offers several newer and nattier ways to transfer files, using wireless connections, such as Bluetooth Sharing (in the Sharing pane, again) and AirDrop.
AirDrop only works between relatively recent Macs and iOS devices running recent versions of OS X or iOS. Wi-Fi and Bluetooth are both used, so must be turned on, and the devices need to be within 10 metres of one another. AirDrop also uses Bonjour, and can be fragile to the point where it is very tricky to get it to work.
Apple details its use from Macs here, and from iOS devices here. Because this is a dropbox system, you need to use it the other way around from normal sharing: to transfer documents from your Mac to your iPhone, run the process from your Mac, for instance. Although its protocols are intended to be thoroughly secure, leaving AirDrop active is a potential vulnerability, particularly if you allow access to all-comers and not just those in your Contacts.
If you have a great many files or a large amount of data to copy, even wired networking is painfully slow. An excellent solution which achieves highest transfer rates is to connect the Thunderbolt ports on the two Macs, and put the Mac containing all the documents into Target mode. You can then perform disk-to-disk transfer between them.
The snag with these methods, apart from AirDrop, is that they do not generally work with iOS devices. You can always sync documents using iTunes, but that is a long and unnecessarily messy business. Even when both the Mac and iOS device are next to one another, it is probably simplest to put them into iCloud, however inefficient that is.
Sharing docs between your own devices, remotely
iCloud comes into its own (as might any other accessible cloud service, of course) when you need to share documents with a remote system. Provided that you have already copied all the documents that you might need, have the same iCloud account on each, and have a decent Internet connection, it is probably the preferred way for remote access.
Dropbox is a very popular substitute. It offers different amounts of storage according to your subscription: a free account gives you only 2 GB, but upgrade to a Pro subscription for £7.99 per month and you can use 1 TB, and gain additional sharing controls.
Making a direct connection over the Internet is a more serious proposition than using a remote storage service. Whatever method you use to work through your firewall remains a vulnerability which others will try to exploit. Accordingly, VPN is the only safe way to make the connection; once that is established, you can use any protocol appropriate to transfer the fles.
Sharing docs with others, locally
Any of the methods which allow you to share locally between your devices will also, of course, work with the computers of others, although you will have to negotiate the issue of user accounts and permissions. For example, you should not give your account details to a colleague so that they can connect using standard networked File Sharing in your account. This makes you reliant on Public or Shared folders, which quickly becomes tedious and messy.
A much better option for all but occasional use is OS X Server‘s more sophisticated file sharing, which also now extends to iOS devices.
 You do not have to run other services in OS X Server to be able to take full advantage of its enhanced file sharing: simply select the File Sharing service, and turn it on.
 If you want to support iOS devices, it is useful to enable Create personal folders when users connect on iOS in the main pane, and to enable iOS access to each sharepoint which you wish. The latter is easily accomplished by opening the sharepoint (double-click it in the Shared Folders list), and enabling iOS access there.
 Connecting your iOS device to that sharepoint is then very simple. In Settings, open the Mail, Contacts, Calendars item, then at the top of the next view, open Add Account. At the foot of the list of options, tap on Other. You will then see the option to Add OS X Server account, which you should tap.
 Select the server, and log into it using one of its recognised account names and passwords.
 You will then be offered the enabled File Sharing service, which should be turned on.
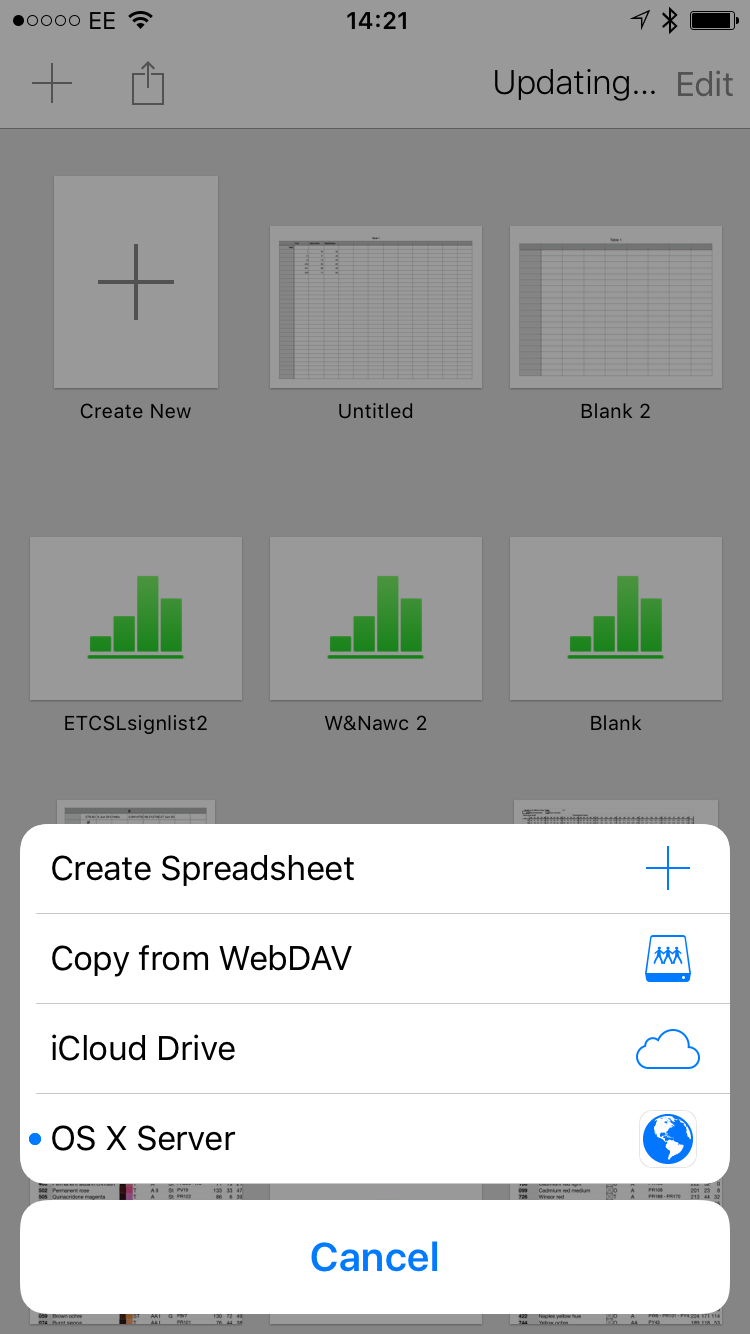 When you next open an app which supports file sharing on a server, such as Apple’s Numbers or Pages, tap on the + in the top left corner, and select the server which you logged into.
 You can then navigate the folders in your sharepoint to locate a document to open. It really is as simple as that.
Sharing docs with others, remotely
Think very carefully indeed before you decide to give others remote access to your documents, unless in the very limited way offered by services such as Dropbox. If you really must, it is much better to do the job properly, using VPN access into OS X Server. Unless this is going to be a regular service, consider using an external server as an intermediary.
