
Maintaining backups with Time Machine or third-party software over a WiFi network is very convenient, but when it goes wrong can be a devil to repair. Here’s how to unravel these problems.
Backing up and disaster recovery have changed greatly during the last major releases of OS X. Time Machine has become more robust and reliable, and has proved itself as an excellent way of ensuring that your documents and other key files are kept safe. At the same time the App Store, and online delivery of OS X, has reduced the need to keep local recovery disks: OS X and many of your critical applications can now be restored from their online source.
This makes it much easier to maintain good backups for laptops and other lighter-weight systems on home and business networks. In the past these might only have been backed up every week or two, sometimes not at all, making them vulnerable in the event of hardware catastrophe, loss, or theft. More and more Mac users are now safeguarding their work by letting Time Machine make backups over their WiFi network, either to a volume shared from a desktop system, or network-attached storage (NAS) such as a Time Capsule.
When this works, it is almost effortless, and for long periods you can rely on your work being tucked away safely on the networked drive. However when it does go wrong, because it relies on several complex components in OS X, it can appear impossible to diagnose and repair.
Furthermore if you have developed a network fault, the errors reported may appear too vague and diffuse to help you pin the problem down. Too many internal complexities are carefully hidden from you, and trying to understand what has broken can become impenetrable and inscrutable. The temptation to carry on without the safety net of good backups is often great.
Just as when your Mac refuses to start up properly, the best way to tackle backup failure is to take your complex system back to basics, and check that each component in turn is working correctly. Shotgun approaches can sometimes be inspired or lucky, but more often than not lead to frustration and welling panic.
Network problems
The first causes to eliminate are network problems. If your Mac cannot connect properly with the shared volume, backup is doomed from the outset.
Something as simple as putting a new WiFi router on your network could mess the whole thing up if it also provides a second DHCP server, which hands out a different IP address to your laptop, putting it on a separate subnet that cannot see the backup volume. It helps, as in any network problem, if you have turned all DHCP servers off and rely on fixed IP addressing, but that prevents you from clagging on passing laptops, tablets, and phones. It also helps if the connection from your laptop (or other Mac) to the backup volume is conducted over Ethernet cable rather than WiFi, as that will eliminate WiFi connection problems.
Further help on diagnosing and fixing network problems is here.
So if you can, take your network back to running fixed IP addresses over only wired connections: robust networking. If that enables Time Machine to work properly again, you know where the fault lies and can focus on tracing the network problem.
Access problems
Once you are happy that the cause does not rest in your network connection, turn your attention to ensuring that your laptop (or other Mac) has sufficiently privileged access to the backup volume.
If you are backing up to a volume shared by another Mac, you will need to open the Sharing pane on that Mac and check through its settings meticulously; for NAS systems you should open their settings through the browser or app interface provided.
When you are happy that your client should have full read and write access to the backup volume, check that that volume is in fine fettle, and does not need repair. For Time Capsules and volumes shared by a Mac, that will require the use of Disk Utility; for other NAS you will need to refer to the documentation provided to engage its repair tools.
By this stage you should be confident that the infrastructure required by Time Machine is working properly, and configured correctly. Your client Mac should be able to connect normally to the backup volume, and have full access to it. The backup volume should also have ample free space to allow Time Machine to continue to back up to it, and its directories and other internal information should be in fully usable condition.
You are now ready to re-connect Time Machine and check whether it works again.
Time Machine
Of all the different systems involved in your backup scheme, Time Machine is outwardly the simplest, but internally can readily get into difficulty. Because it either works or it doesn’t, and the errors that it reports are not always easily understandable, fixing problems may seem an impossible task. This becomes more possible when you understand how it makes each backup.
Every hour (by default), Time Machine’s backup service backupd identifies where it is going to back up to, checks when the last backup was made, then scans all the files and folders which you have not excluded from backup, to discover which have been written or changed since that last backup.
It works out how many files thus need to be copied across to the backup, how much space that requires, and checks that there is sufficient space on the backup volume to do so. If there is insufficient space on the backup volume to perform that operation, it reports an error and halts, leaving you to work out how to provide the space required.
If there is sufficient space on the backup volume, backupd then creates a new folder appropriately datestamped, then within that it creates a complete image of the folders and files to be backed up, using a combination of fresh copies of those files that have changed since the last backup, and hard links to the other files within the backup.
If a folder being backed up contains two files, one.text and two.text, of which only the latter changed since the last backup, when you browse that latest backup you will see the folder as if it contained those two files. However, whilst two.text will be a real copy of the currently modified file, one.text will actually be a hard link back to that file when it was last fully backed up.
Hard links are wonderful as they create the illusion that every backup is complete and entire, but do not waste vast amounts of space by storing multiple identical copies of files that have not changed. However this illusion shatters when there is a problem on the backup disk, which can result in some or all of the hard links failing.
Hard links also require entries in the directories maintained on the backup volume, and maintaining those millions of different links can be too stressful for a hard disk that is teetering on the brink of failure, using a flawed implementation of the Mac Extended (HFS+) disk filing system, or an imperfect kludge to use a different type of file system.
Once the backup is complete, backupd inspects old backups to see if any old backups can be removed, according to the rules it uses for ageing them, and strips them out when it can.
Technique: Robust Networking
The simplest network configurations are the easiest to debug, and once set up you can have complete confidence in their operation. To avoid disturbing other components and their configurations, you can put the backup client and the backup volume onto their own local private network, isolated from DHCP, external routers, and other complications. Ideally you should do this over wired Ethernet, to eliminate WiFi complications.
Open the Network pane, and in the Location pop-up menu select Edit Locations… to create a new suite of settings. Configure IPv4 to Manually, and assign an IP address in a different sub-net from other systems on the network, such as 192.168.10.1. Put the Mac sharing its drive or NAS into that same sub-net with a fixed IP address of 192.168.10.2. Remember to click on the Apply button to put these settings into effect.
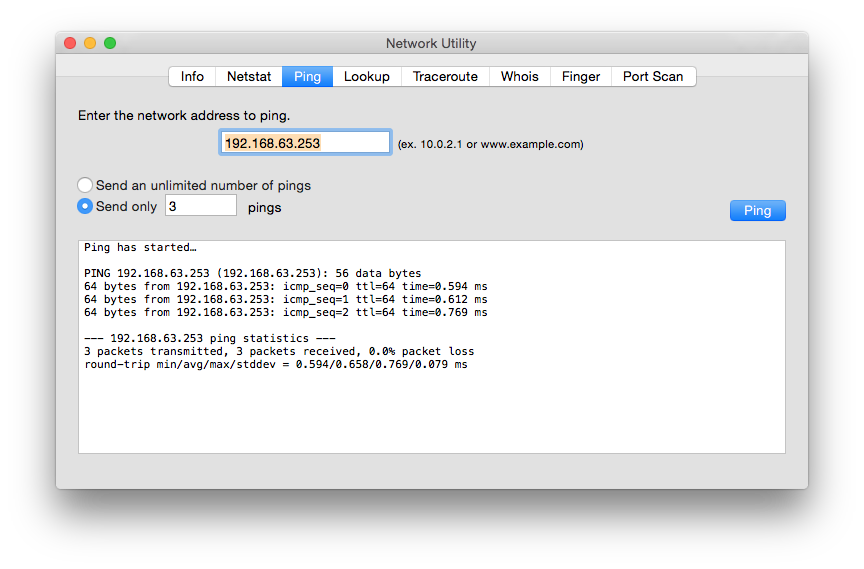
To confirm that the two can see one another, open Network Utility (either in the Utilities folder in older versions of OS X, or hidden in /System/Library/CoreServices/Applications if more recent), switch to its Ping pane, enter the IP address of the other system, and send three ‘pings’. Move to that other system, and repeat the pinging to the IP address of the first system. You have now proved the integrity and connection of your network within a network, and can proceed to eliminate other potential causes of your backup failure.
Once you have restored your Time Machine backups to normal, think seriously about staying with fixed IP addresses, and doing without a DHCP server as much as possible: networking problems will be far less frequent, and much easier to solve. Most DHCP servers, including those in Apple’s Airport devices, can be configured to work with fixed IP addresses over part of the subnet range, say from 192.168.1.1 to 192.168.1.50, and then to assign dynamic addresses to mobile devices, from 192.168.1.51 up. That gives you the best of both worlds.
Technique: Time Machine Tweaks
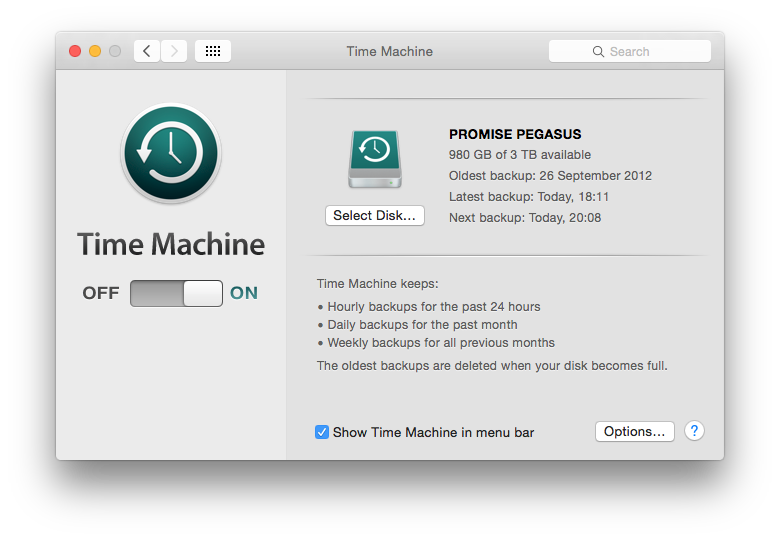
You can reset Time Machine by opening the Time Machine pane and turning it off, once any running backup has completed. Click the Options button and record all exclusions carefully, to restore them later. Eject the external hard disk, power it down, leave for 30 seconds, and power it back up. Locate /Library/Preferences/com.apple.TimeMachine.plist on your startup volume, and move it to a different folder such as Documents in your Home Folder.
Then open the Time Machine pane again and set it up as it was before, to back up to your external drive, with the same exclusions and options that you recorded. After you have turned Time Machine back on, there will be a 120 second countdown before a new backup is attempted. This should be accompanied by re-loading of the details of existing backups on your external drive; this does not force a new backup series to be started, nor are your existing backups trashed.
If you need to access Time Machine’s inner power, then you will need the command shell tool tmutil. Most of its features need root privileges, so you may as well preface each with the sudo command, which will prompt you to enter an admin username and password.
Immediate actions include:
tmutil startbackupis the same as the Back Up Now command in the Time Machine menu,tmutil stopbackupcancels the current backup when in progress,sudo tmutil inheritbackupand the path to the Backups.backupdb folder on that drive will inherit a backup from another Mac,sudo tmutil associatedisk -a /and the path to its latest backup will associate a volume,sudo inheritbackupand the full path to the folder containing all the backups for a particular computer will claim that machine directory for use by the current Mac, so can be used to associate a backup set with a different computer,sudo associatedisk -a /and the full path to the folder inside a snapshot that represents a single backup from one source, will bind the snapshot volume directory to the specified local disk, reconfiguring the backup history.
Full details on using tmutil are revealed by typing man tmutil in Terminal; Apple’s troubleshooting page is here, and James Pond’s is here.
Updated from the original, which was published in MacUser volume 29 issue 09, 2013.
