
Network problems are most common when something comes along and upsets a network which previously seemed to work well. You might have just bought yourself a WiFi router/extender or an AirPort Time Capsule, or replaced your modem-router. The next event is that something which always used to work fine – printing over a wireless connection, perhaps – doesn’t work any more.
If you can recall what seems to have upset the network, it will give you clues as to what is wrong. However networks quickly become complex, so it is often best to start from the beginning: it is quite possible that this recent event has unveiled a problem that was waiting to happen, and quite unassociated with what you just did. If you just try to fix the symptoms, you can end up going round and round in circles. You need to find and fix the cause.
1. Check the physical connections
Before you start messing around with any settings, you must check that your wired network is properly connected. If one cable has come adrift, or is connected to the wrong port, your network has no chance of functioning in the way that you expect it to. Even if you are certain that you have not tampered with anything, someone else may have done: this most commonly happens during cleaning. Someone else may have inadvertently misconnected a cable dislodged then. Whilst you are about it, take the opportunity to replace any cables which are dodgy, perhaps distorted or with worn sheaths or connectors.
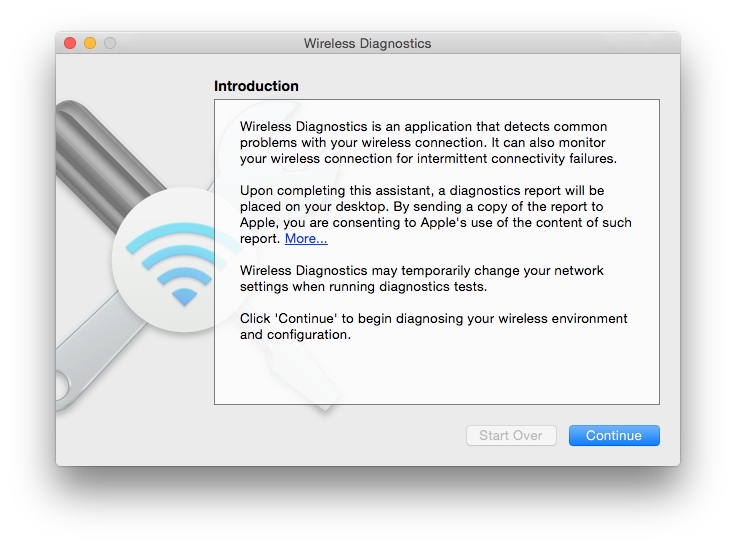
Wireless connections are far more difficult to deal with. Even if you had a wireless packet sniffer, it would still be little more than educated guesswork. Your best tool is Wireless Diagnostics, hidden away in the /System/Library/CoreServices/Applications folder.
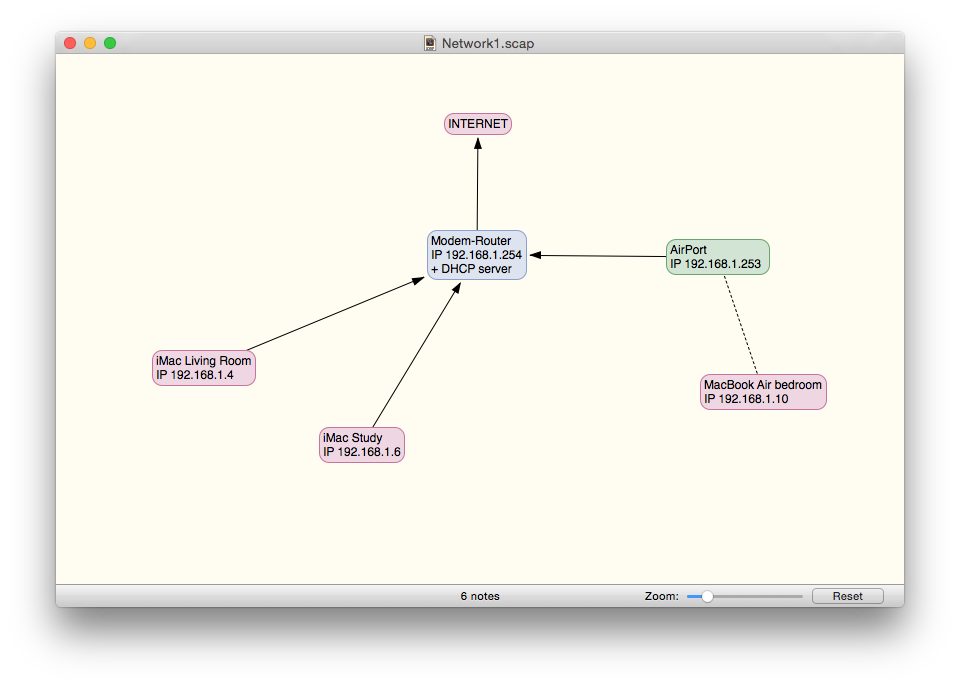
Whilst you are doing this, if you do not have an up-to-date map of your network, make one using a graphics app such as Scapple or OmniGraffle (both from the App Store). You will use this throughout the rest of your troubleshooting, as it is an essential tool.
2. Map IP addresses
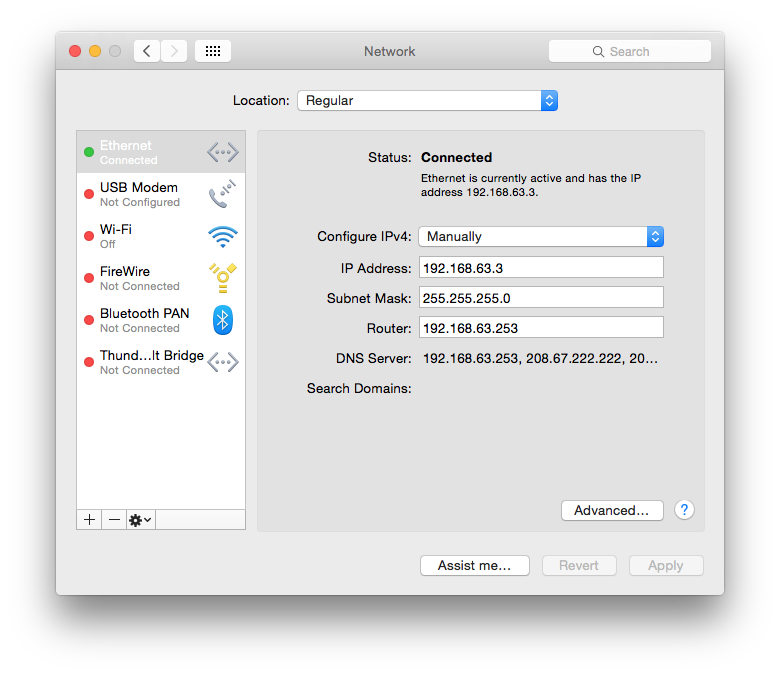
Your network map shows you what is physically (and wirelessly) connected, so what you need to add to it now is the IP address of each of those devices. On Macs, that is straightforward to obtain from the Network pane in System Preferences, which will also tell you how that address was assigned, another important piece of information. Note that each network port has its own IP address; if you have inadvertently left wireless and wired network ports active, they should have different IP addresses, and that can cause much confusion too.
Armed with that map and IP addresses, you should now be able to diagnose many problems relating to duplicate IP addresses and unreachable subnets.
In a single un-bridged network, all IP addresses should be unique within that network, and should all be on the same sub-net. The default mask setting is 255.255.255.0: under that, a device with an IP address of 192.168.1.1 will be able to see and connect to all devices with IP addresses starting with 192.168.1. It will neither see nor be able to connect to a device with an IP address of, say, 192.168.2.1, unless there is a device such as a bridger (or bridger-router, or ‘brouter’) which connects the two sub-nets.
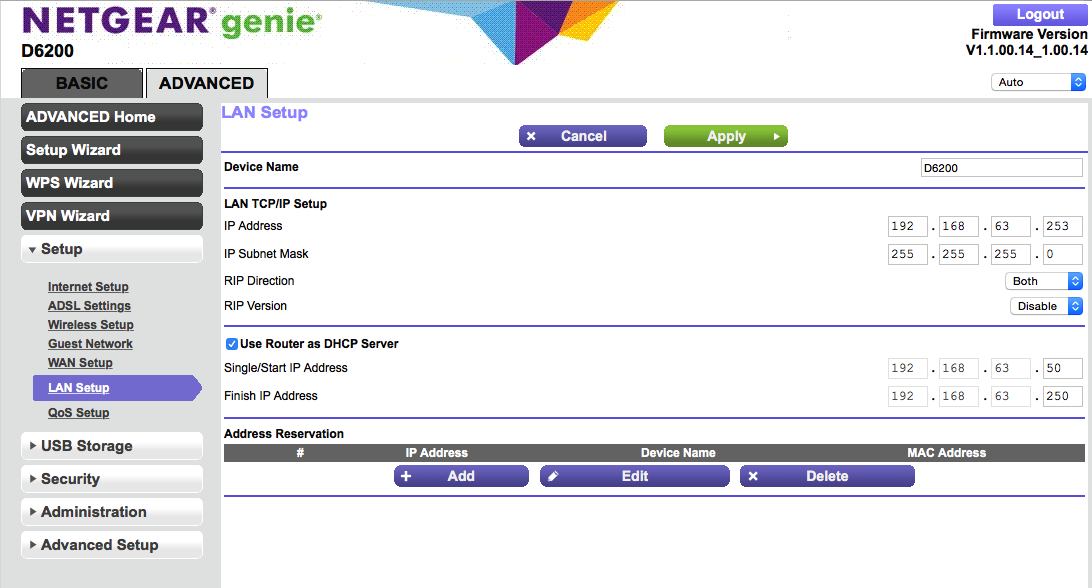
On the other hand, if you have two devices which have the same IP address, such as 192.168.1.10, on the same network, mayhem will ensue because they will both try responding to messages sent to that IP address, and other devices will not know which is which. Although you may not set such duplicate addresses, if you have two DHCP servers active on the same network, that is quite a likely outcome.
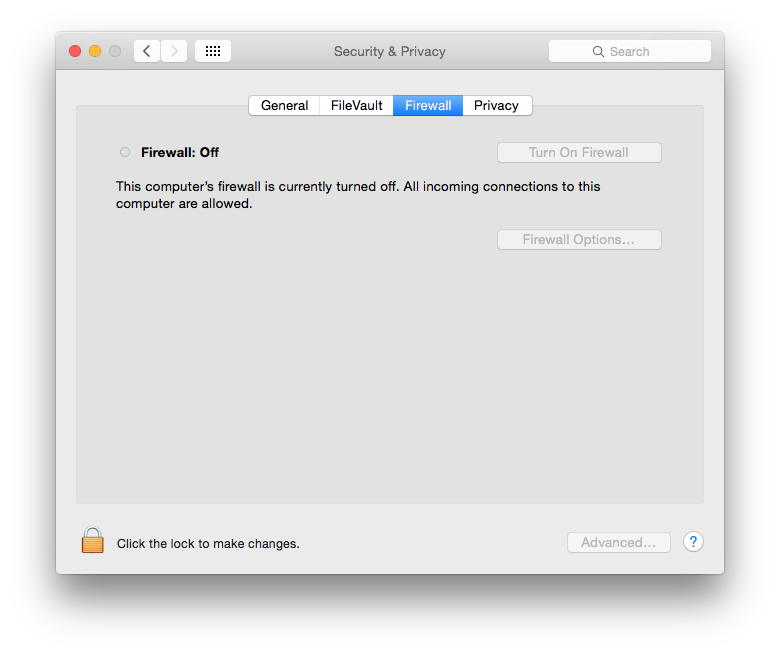
Before you do any further testing, you should check on each device that it does not have a software firewall configured which is set to block pings or any other port or service, or not to respond to them; the latter is sometimes called ‘stealth mode’. Unfortunately commercial network protection software can be quite tricky in this respect, but it is worth taking the time to ensure that pinging will work.
If you had third-party software installed but removed it, you might find that remaining components are still active and blocking ports. Sometimes the only trace of this is when the software is loaded after startup, or when it writes information to your logs that it has blocked incoming packets: you may need to search the logs using Console to find these. Some also seem to worm their way past a Safe Boot. If you are unsure whether a firewall is still blocking a port, you can try a Port Scan (using Network Utility) from another Mac on the same network. Never perform such a scan on any remote system or you could be deemed to behave offensively.
3. Confirm connections using Ping
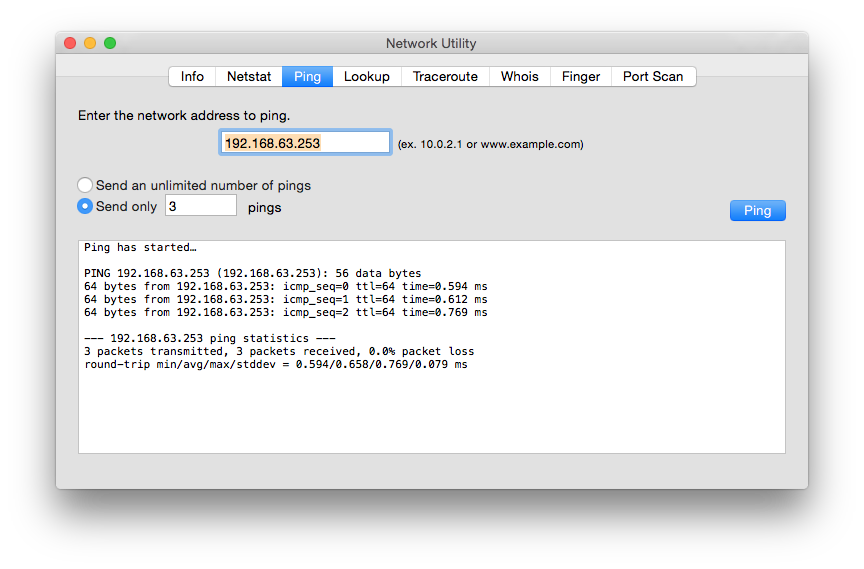
Once you are happy that all your devices have unique IP addresses which you have recorded on your map, and that they should all be able to see one another, now is the time to test their connectivity using the Ping tool. The easiest way to do that is to open Network Utility, hidden away in the /System/Library/CoreServices/Applications folder, select the Ping tab, then enter the IP address of another device and send it three pings.
Once you know that you can ping each device from any other device, you have proved the hardware and software configuration of your network. You will also in all probability have discovered the cause of the problem which has been troubling the network, and found its solution. If all the above work correctly but the problem remains, now is a good time to start searching for postings in Apple’s support forums and elsewhere in case someone else has encountered the same – if not, the diagnostics start getting more complicated.
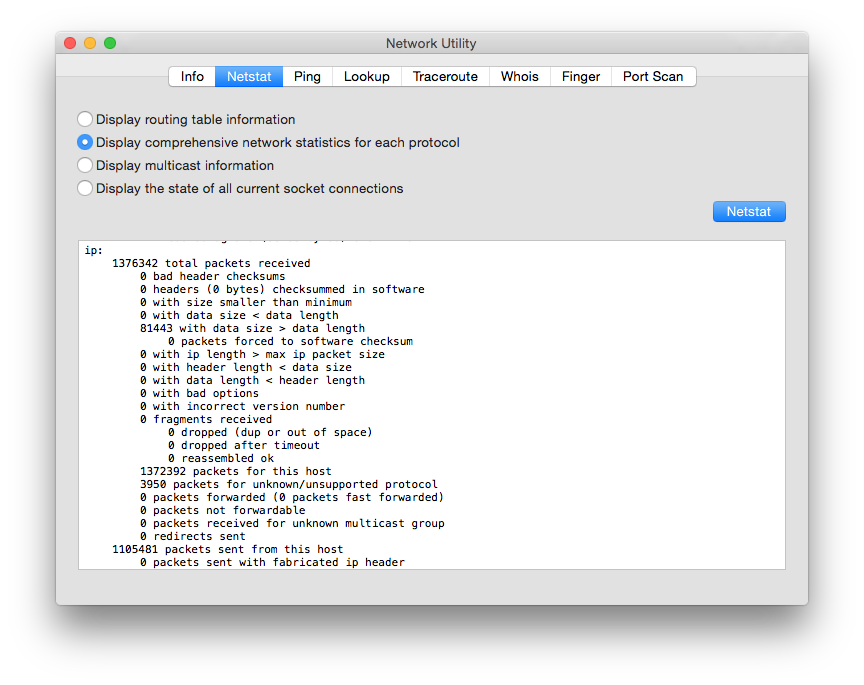
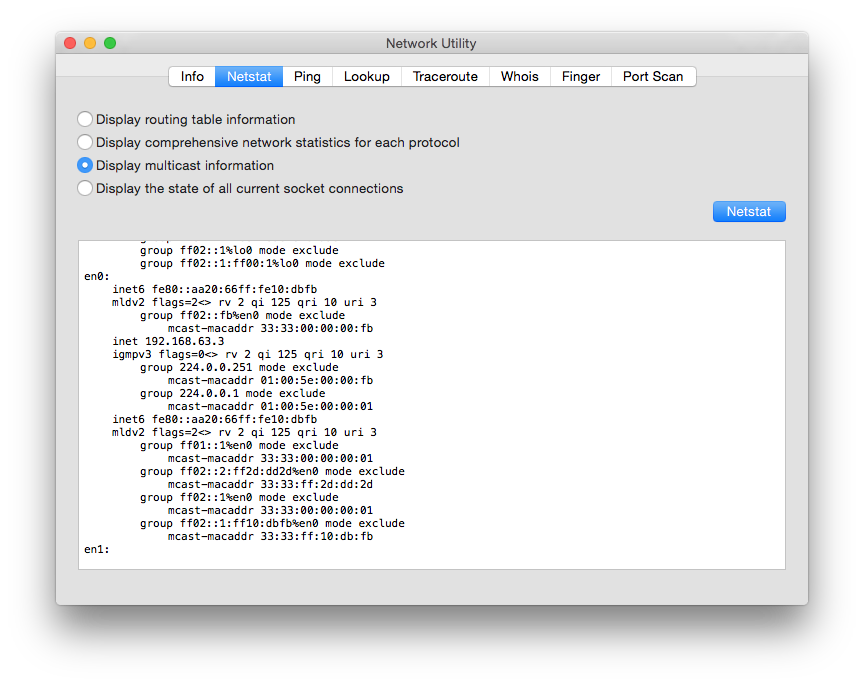
4. Survey services

You now know that some network protocols, notably Ping, work fine, but the service which you want still does not. Now is the time to check the ports used by the service(s) which no longer work. Apple provides a list of its well-known ports, and third-party products should document their usage where it differs. Your next port of call is to the Netstat tab in Network Utility, where you will need to browse network statistics for each protocol, and possibly routing table information.
Remember that any service or other exchange takes place over one or more of the numbered ports, and uses a protocol. Its usage specification therefore consists of both protocol and port. For example, sending iCloud mail uses the SMTP service, which is implemented as TCP to port 25. Some ports, such as 514, can be used by two or more protocols, depending on which service is running through them. Some services, notably HTTP, can run over a wide range of different ports, and not just port 80.
There is a lot of information available here, and you will probably find the worst problem is trying to interpret it all. You are looking for clues at each of the connections as to why one device is unable to connect reliably to the other. Console is also very helpful, as you may see informative error messages in the logs when you try to connect.

5. Sniff packets
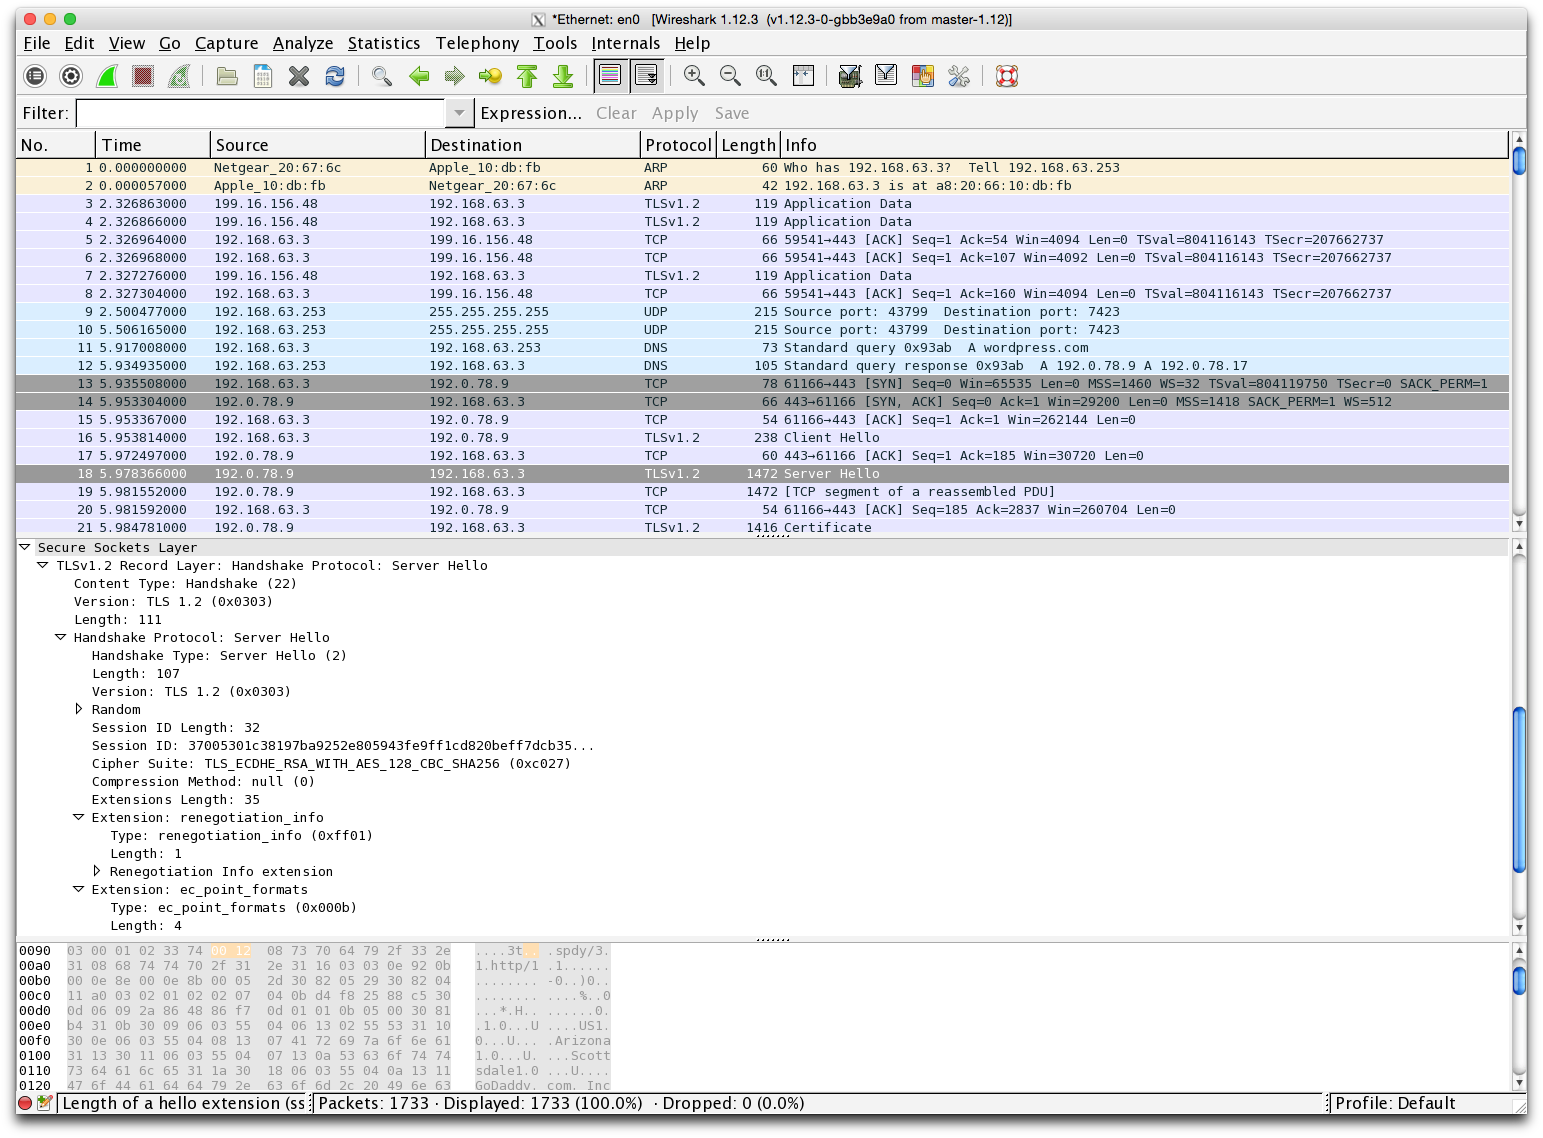
If you have the intestinal fortitude, and have reached this stage without any clues to the nature of the problem or its solution, you now need to arm yourself with a packet sniffer, and see what is actually taking place on your network. My tool of choice is Wireshark (which runs under the X11 windowing system, so requires the likes of Xquartz), although there are alternatives.
A packet sniffer intercepts all the packets which pass through the nominated network port, and allows you to inspect the information which they contain. For example, if you run a local mail server and one Mac appears unable to connect to it, once you have eliminated all other potential causes (as above), you will need to read the messages that your Mac sends to the mail server, and the responses that it receives. Some of the contents will already be available in the mail server logs, but by inspecting the packets themselves you could discover that your mail client is fluffing the process of logging onto the mail server.
One vital piece of information which you will need before sniffing any packets is a description of the service protocol(s) concerned. These are normally contained in standard references, Wikipedia articles, and of course the original RFCs published on the Internet. You can browse the latter here. You will then turn packet capture on, try to connect, turn if off once that has failed, and browse the intercepted packets to trace what happened. It is slow and painstaking until you know a protocol inside out, but ultimately is the only way of finding out exactly what went wrong.
