

Over the last few years, Macs, macOS and their security have undergone great change. While SilentKnight started off checking which Macs hadn’t updated their firmware correctly, and installing updates to the now-disused Malware Removal Tool, MRT, and Gatekeeper data, since then checks and updates have become completely different.
SilentKnight 3 is therefore fully redesigned to focus on the needs of modern Macs with Apple silicon chips, mBoot firmware, weekly XProtect updates, and the complexities of Secure Boot. Its purpose is to help you ensure your Mac is properly protected from changed threats to its security, and to do that as cleanly and efficiently as possible.
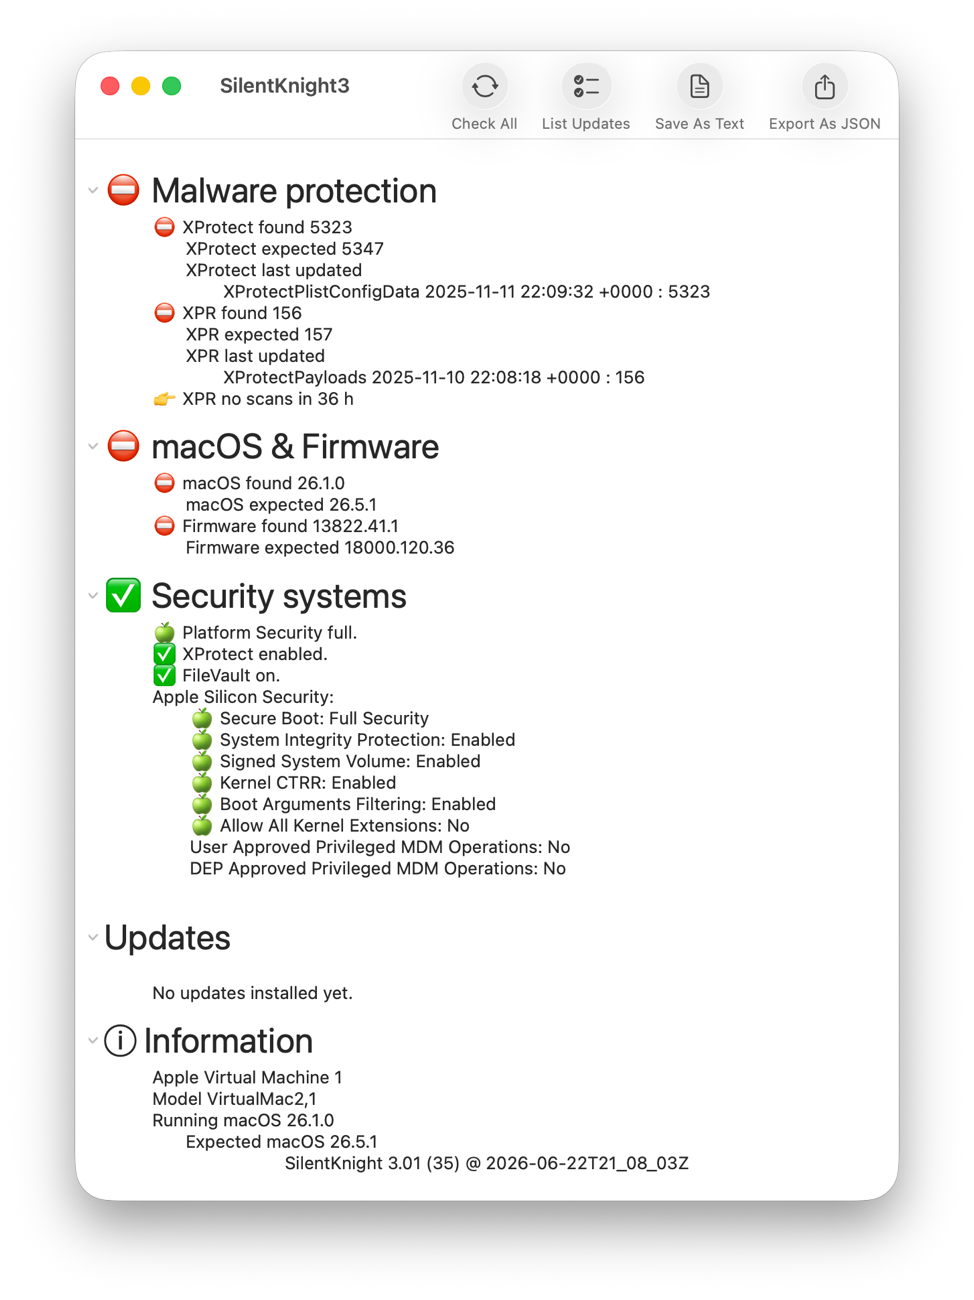
When you open SilentKnight it immediately runs its full set of checks, the same as those run by its Check All tool, and displays the results in the first three sections below. You can collapse and expand those sections by clicking on the small chevron at the left of each section title, such as Malware protection.
Malware protection
This checks the installed versions of XProtect and XProtect Remediator against the current version, and has here discovered that both are out of date. It also reports when the last version of each was installed locally, and gives a summary of XProtect Remediator’s malware scan results over the last 36 hours: in this case, no scans at all in that period.
Each result is distinguished by an appropriate emoji, with the section summary drawing your attention to any fixes needed, in this case by installing updates.
macOS & Firmware
This checks the current major version of macOS running, and whether that’s up to date for security and firmware updates. This respects your choice as to which major version you want to run. If you’re still running an older major version, it doesn’t nag you to upgrade to the current one. It also doesn’t report the firmware is wrong if your Mac is running a beta-release of macOS with a more recent mBoot firmware version, but simply reports their versions.
In this case, both need to be updated by installing the latest update to Tahoe, a task requiring Software Update, not SilentKnight.
Security systems
These report the state of your Mac’s most important security systems in detail. They include:
- XProtect/Gatekeeper, ensuring new software is checked for malware before it’s run the first time;
- FileVault encryption of the active Data volume;
- Secure Boot, which should normally be at Full Security unless there’s good reason for its reduction;
- SIP, System Integrity Protection, additional protection for many security features;
- Third-party Kernel Extensions, only allowed when essential.
Macs running with a primary language other than English are more difficult to report here, as Apple Silicon Security is only available localised to the primary language, so SilentKnight can’t check each item, and just delivers the report available. I’m afraid there’s no way it can do otherwise.
List Updates
Unlike previous versions, SilentKnight 3 doesn’t automatically check to see if there are updates, and when it does it separates out macOS updates from the rest.
Since Big Sur, macOS updates and upgrades work differently from others, and need to be managed by Software Update settings. You can’t download an Installer package, and macOS has to decompress and prepare the components required. That’s not something that SilentKnight can try to take on. This also means that you get to choose the macOS updates you install, and when you do so.
Click on the List Updates tool and SilentKnight now informs you of non-macOS updates available, and those for macOS that it will leave well alone.
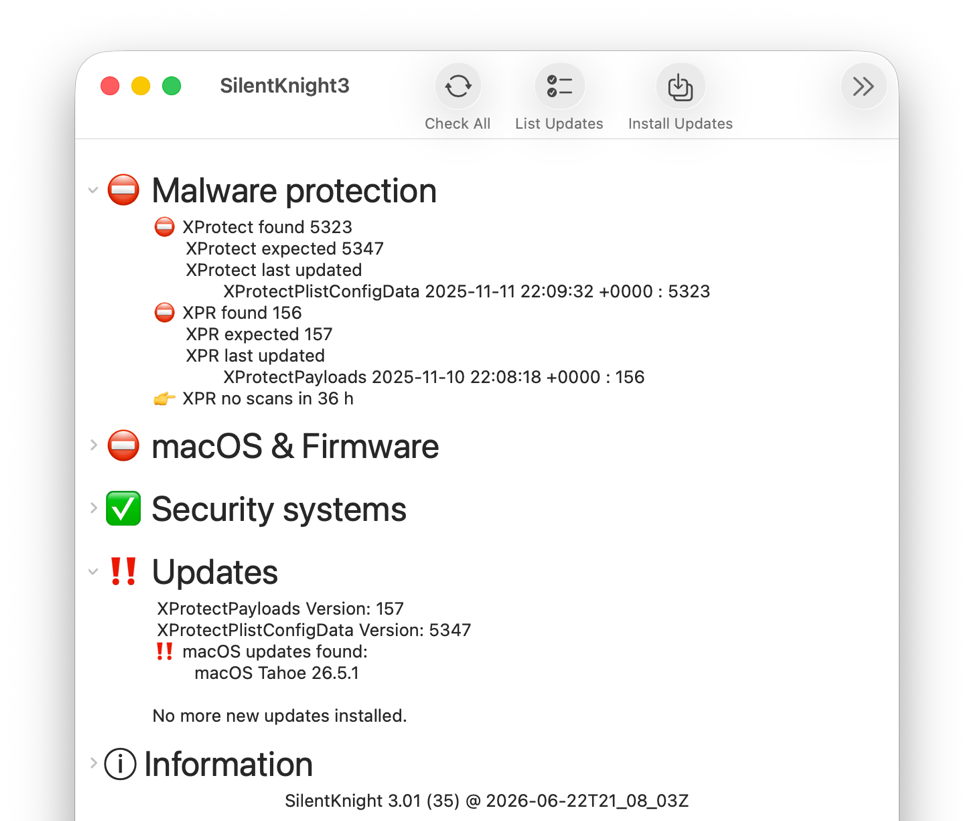
It here reports that it can download and install pending updates to XProtect and XProtect Remediator, and there’s also a macOS update you can choose to install separately using Software Update. It now offers its Install Updates tool to do that for you.
Install Updates
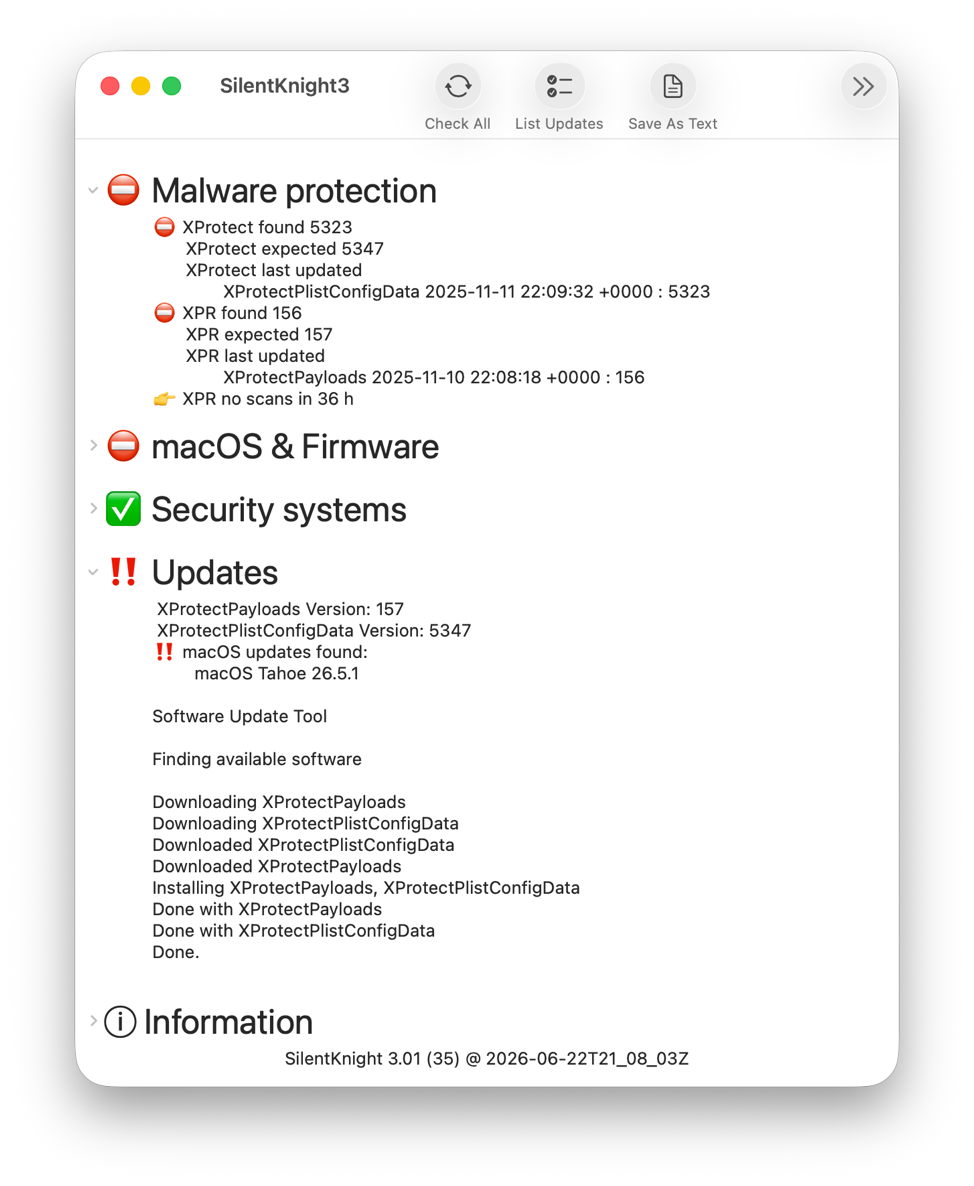
A little while after you’ve clicked on the Install Updates tool, SilentKnight will report the outcome of doing so. Here it has successfully downloaded and installed the updates to XProtect and XProtect Remediator as expected.
Unfortunately, updating XProtect is still a bit more complicated, as that update is installed to the old location, that is no longer used as the primary location. So before going any further, you should open Terminal and type
sudo xprotect check
to check whether the update is available from iCloud. If that returns the new version number, here 5347, you can then download and install that using
sudo xprotect update
If that new version isn’t yet available from iCloud, then you can only wait until it is, or XProtect updates itself. A future version of SilentKnight 3 will handle this better, by performing those checks for you, but still won’t be able to force an update that isn’t yet available from iCloud.
In case you’re wondering what the point is in downloading and installing XProtect to its old location, it can be used from there to update the new location as well. There are currently two known ways for XProtect to be updated in its new location:
- When the update is made available in iCloud, it can be downloaded from there and installed directly.
- Once a day, or so, a background updater process runs, and checks whether XProtect in the old location is a more recent version. If it is, it may then use that to automatically update it in its new location.
Final confirmation
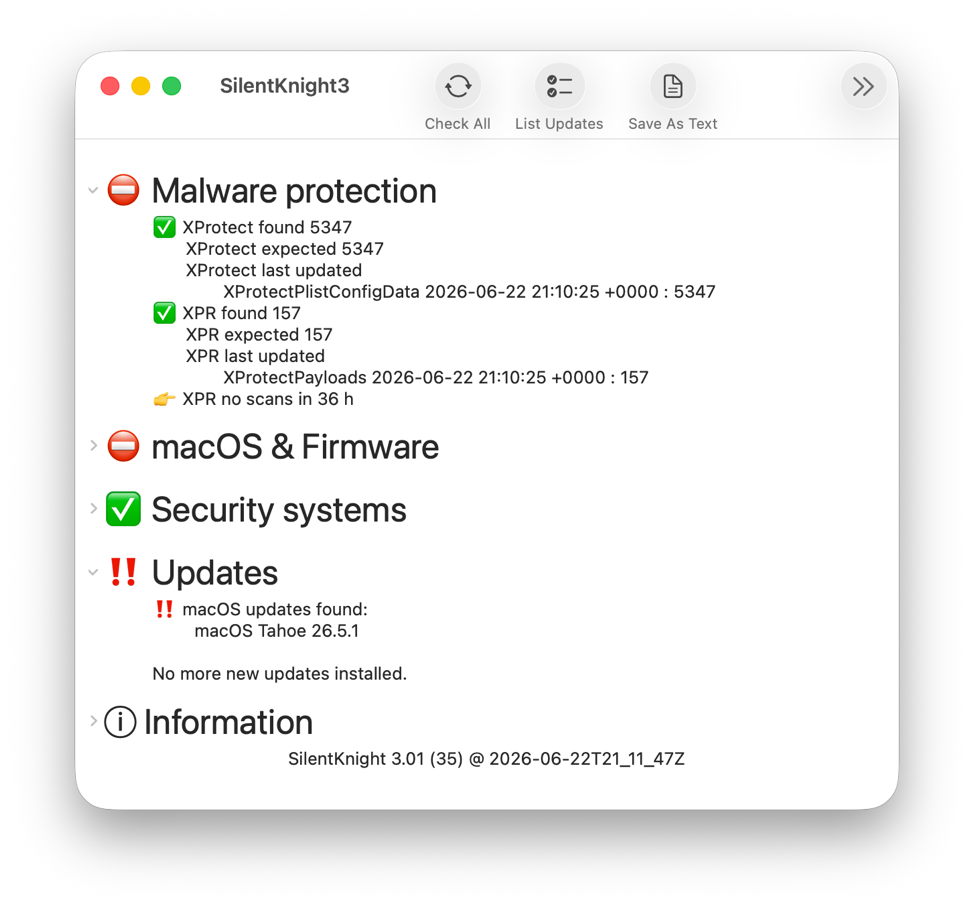
If you want to confirm that those updates have ‘taken’ correctly, and your Mac’s protection is complete, click the Check All tool again. You can then confirm that there are no further updates, apart from macOS, using the List Updates tool again.
Sequoia can be sticky
In macOS Tahoe and Golden Gate the disclosure chevrons at the left of each section heading should work fine. They are a bit small and fainter than I might wish, but work as well as those in the Finder’s Get Info dialog, for example.

Sequoia isn’t as obliging, though, and sometimes you may click on a chevron and nothing happens. Rather than clicking again, use an addition provided for Sequoia only, the Refresh tool. That should unstick the disclosure and make it behave as expected. You’ll find that using other tools has a similar effect. This appears to be a bug beyond my control, I’m afraid.
Reports and help
Finally, SilentKnight 3 offers a choice of two reports it can save to files. The Save As Text tool writes a text file containing the contents of the window, complete with its emoji. For those who want to keep a database record, there’s a tool to export the data in JSON format, and a file in the SilentKnight download folder gives details of its keys and values.
If SilentKnight does reveal a problem that you want to fix, its extensive Help book explains its significance and how you can fix it.
If you have an Apple silicon Mac running macOS Sequoia 15.6 or later, Tahoe or a beta of Golden Gate, I recommend you take this new version of SilentKnight for a spin. I hope you like it, and find it a better way to ensure your Mac is kept up to date and fully protected.
This latest version is available from here: SilentKnight 3.01.
