
Erasing the contents of the internal SSD in an Apple silicon Mac might seem a simple task, until you consider what’s on it in addition to the user files in its Data volume. Not only is that paired with the System volume, a mounted snapshot, but there are two additional containers that you don’t normally see.

This article explains how you can erase the following:
- the Data volume, shown in blue
- the Boot Volume Group, consisting of the Data and System (pink), and their accessory volumes (green)
- all volumes in the Apple_APFS container (red)
- the entire SSD, including the other two containers (pale yellow).
Assuming that you’re going to install something in their place, it’s up to you to choose, and that will in turn determine how you can install macOS and anything else required to allow your Mac to start up and run again.
Before you try any of these, you should de-authorise that computer in one of Apple’s media apps, and ensure you have a thorough and reliable backup of all the user files.
Data volume
Erase the Data volume by destroying its encryption key using EACAS, Erase All Content and Settings. This doesn’t so much delete anything, as render it inaccessible, so is most economical on SSD use, and quickest without compromising on security. This affects all user accounts with Home folders stored on the internal SSD.
Open System Settings, General, Transfer or Reset, and click Erase All Content and Settings.

If you continue, you should see one final warning before the contents of the Data volume are blown away into the great bit-bucket in the sky.

When that has completed, your Mac will start up for personalisation, configuration, and creation of its new primary admin user, just as it did when it was new. However, it will still be running the same macOS installation as before you used EACAS.
Boot Volume Group
Erase the current Boot Volume Group using Disk Utility in Recovery. Put your Mac into Recovery by starting it up with the Power button held, select Options, select a user and authenticate as that user to display the Recovery window. There select Disk Utility and click Continue.
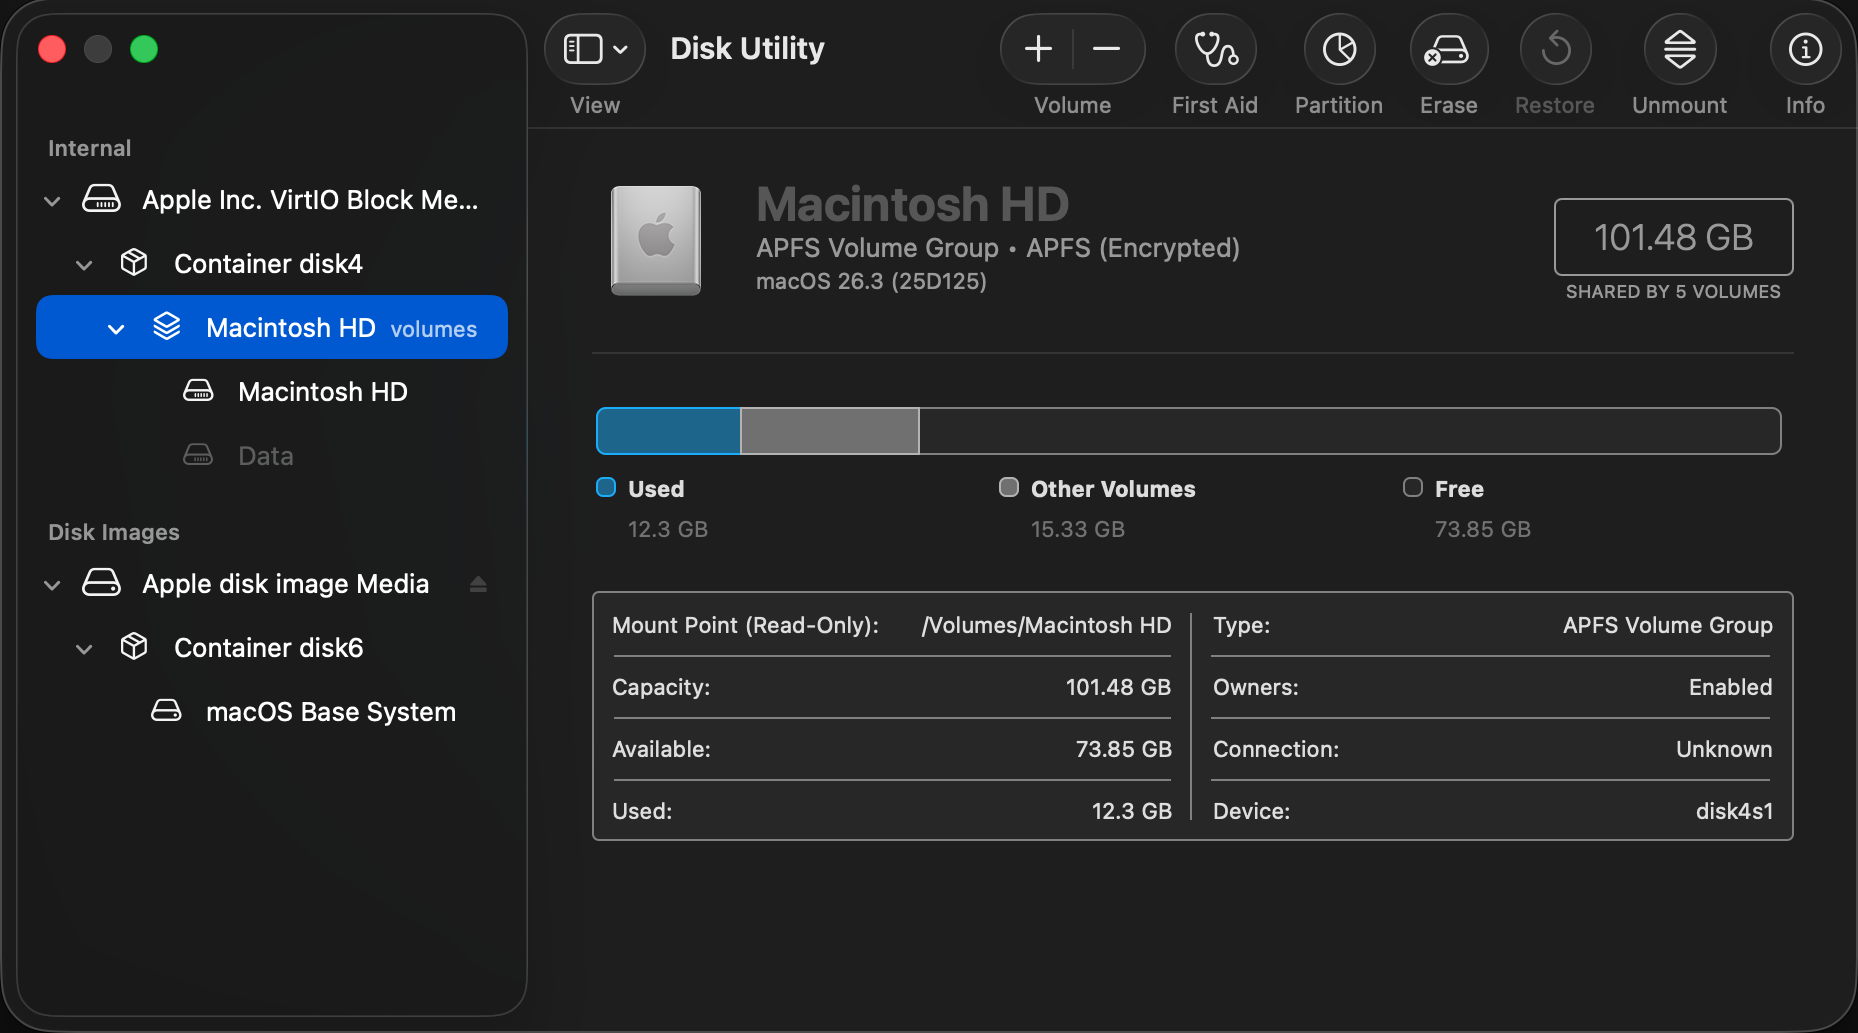
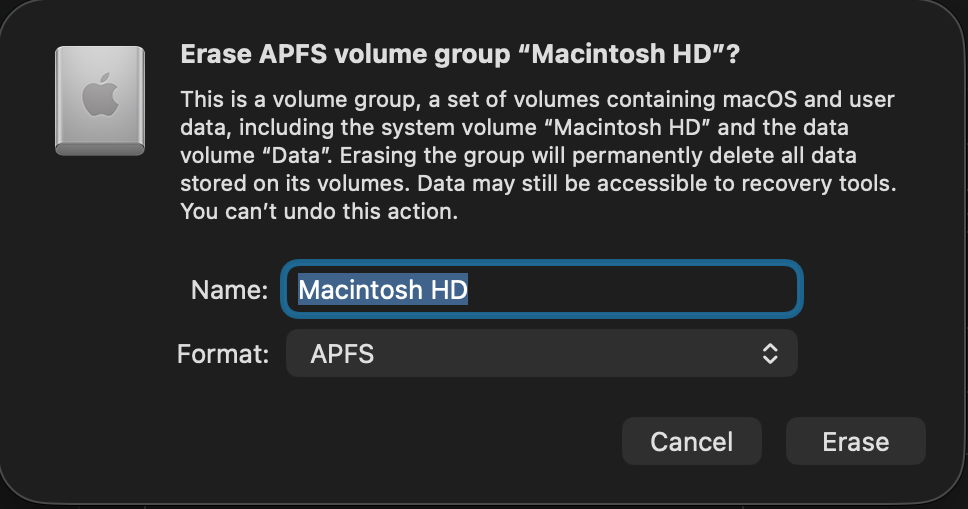
Select Macintosh HD at the left and click the Erase tool at the top of the window. Enter a name for the volume such as Macintosh HD, select APFS as the format, and click the Erase or Erase Volume Group button.

You might be asked to Erase and Restart, which will lead to a restart and following that your Mac will try to activate over a network.
On completion, quit Disk Utility, select Reinstall macOS if necessary, click Continue and follow the instructions to download and install fresh macOS. Note this procedure doesn’t wipe and reinstall the Preboot or Recovery volumes in the Boot Volume Group.
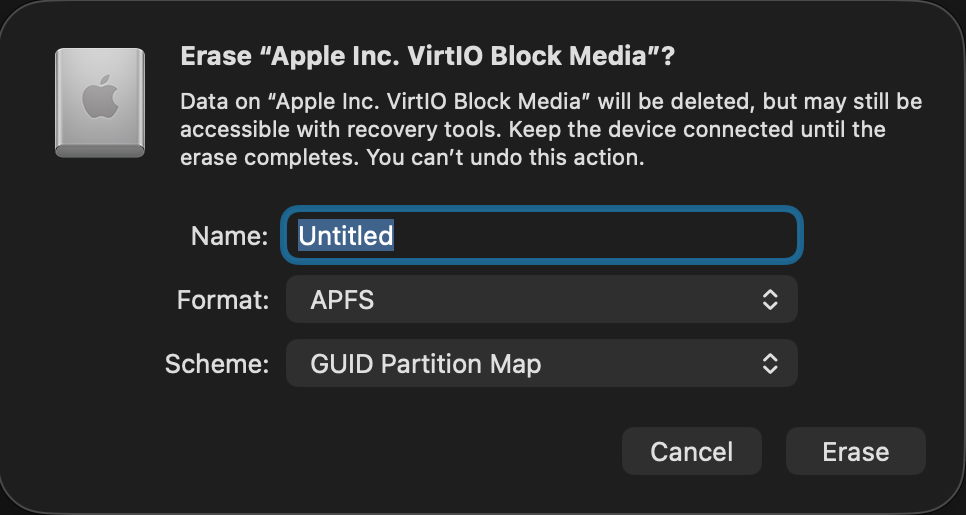
Some instead select the disk at the top of the list at the left, here named Apple Inc. VirtIO Block Media because it’s running in a VM. In theory that should completely reformat the internal SSD, wiping all three of its containers, and so require a more extensive reinstallation. In many cases, it’s preferable to Restore in DFU mode, to ensure the whole of the firmware is replaced at the same time.
Apple_APFS container
Erase the whole of the Apple_APFS container using Erase Mac in Recovery, which should erase all Boot Volume Groups within that container.
Enter Recovery as normal using the Power button, select Options, and click Continue. Then instead of selecting a known user, use the Erase Mac command in the Recovery Assistant menu. This completely erases all Boot Volume Groups in the Mac’s internal SSD, ready to reinstall macOS, for which it requires an internet connection.

This has the advantage that it can be performed when you don’t know the password to unlock the Data volume (FileVault).
Entire SSD
Erase the entire contents of the internal SSD by formatting it and installing its contents afresh from another Mac, using Restore in DFU mode.
This is described here. Apple has improved that from Sonoma onwards, as it’s no longer necessary to use Apple Configurator 2 on the Mac that’s performing this, but it can all be done in the Finder. To do that, you’ll need another Mac to perform the restore process, and a USB-C data cable to connect the two of them. Don’t try using a Thunderbolt cable, though, as it won’t work. Another secret for success is to plug that cable into the target Mac’s DFU port, that designated to support DFU connections, as detailed here.
Restoring in DFU mode replaces the Mac’s firmware, erases the boot volume group, and installs the bundled version of macOS, leaving that Mac in the same condition in which it was delivered to its first user, with a fresh copy of macOS ready to be personalised and set up. Although that part of the process is fairly quick, full migration is then required before user applications and documents are available. The great advantage of restoring is that you can pick which version of macOS and its firmware are installed.
Which version of macOS will be installed?
When restoring in DFU mode, you can choose which version of macOS will be installed according to the IPSW image you use, making it the method of choice when you intend downgrading that Mac to an older version of macOS.
Methods that obtain new macOS from Apple should install:
- the current version of the most recently installed major version of macOS
- if you have just upgraded macOS, then erased the Boot Volume Group in Recovery, Apple warns that “you may get” the version of macOS that was running before that upgrade.
