
The time had come to hand on my original Mac mini M1 16/500, but when I tried to deauthorise it, it just threw an error.
Like Intel Macs with T2 chips, Apple silicon Macs have the time-saving feature that you can instantly Erase All Content and Settings (EACAS). What used to take a long series of delicate and error-prone manoeuvres has been reduced to a single command. But before I used that, I wanted to deauthorise that Mac for iTunes, in the Music app. As I have a few Macs, housekeeping which are authorised is important, to avoid having to deauthorise them all and reauthorise those still in use. But Music stubbornly wouldn’t let me, claiming there was an iCloud server error.
Preparing this Mac had otherwise been straightforward: it was going to my son, so I brought it fully up to date with macOS and its security software first. Whether that had put it out of sorts, I’ll never know, although I suspect the cause lay in an out-of-date software firewall on it. As it had only just been updated, my next step was to restart the mini, but that didn’t charm iCloud into helping.
My next step was one of the most useful in dealing with any macOS problem: start it up in Safe mode and try there.
Accessing Safe mode on an Apple silicon Mac is a tad more fiddly, in that you have to shut it down and start it up in Recovery before you select the boot disk, hold the Shift key and click on the button to Continue in Safe Mode.
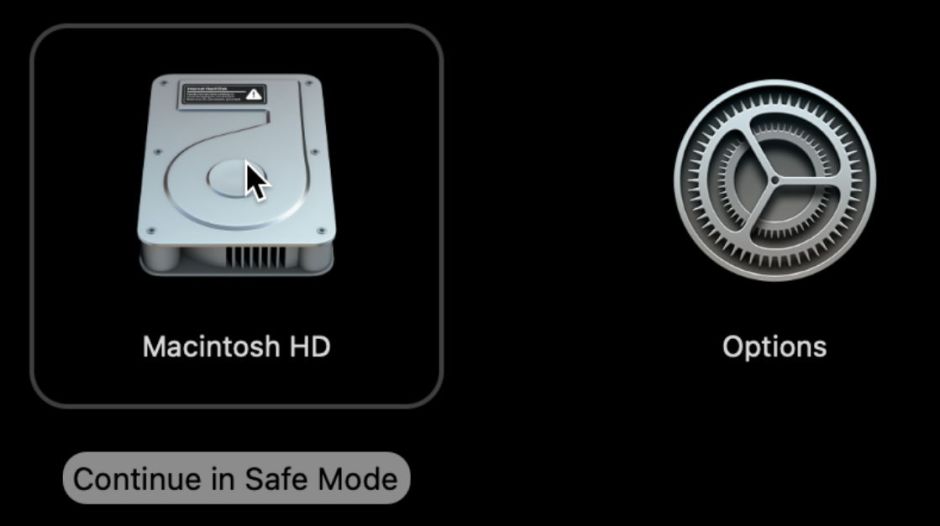
Your Mac will then restart, and you should confirm in System Information that it’s in Safe mode. Open System Information, click on Software at the left, and the line Boot Mode should say Safe rather than Normal.
Safe mode is my favourite panacea when something still doesn’t work after restarting in normal mode. It can let macOS updates install without trouble, it flushes font caches so can unscramble their problems, and much more. Leave the Mac in Safe mode for a couple of minutes. In this case, I opened Music and deauthorisation worked perfectly. I then restarted back into normal mode ready to use Erase All Content and Settings (EACAS).

This sleight of hand works on T2 Intel and Apple silicon Macs because of encryption of their internal disk. You don’t have to be using File Vault for it to be available in System Settings > General > Transfer or Reset. Once your Mac has automatically disabled Find My Mac and Activation Lock and signed out of everything else, it simply throws away the encryption keys that it used to protect your files on its internal storage. That makes their contents totally unrecoverable, and is far better than trying to zero-erase an SSD.
At the end of EACAS, you simply restart your Mac so it can activate, and once it reaches the start of the personalisation process, press and hold the Power button to shut it down. When my son powered his ‘new’ Mac mini up, it thus looked just like a brand new Mac, fresh from unboxing. The last step for me was then to remove my former mini from the list of Apple devices in System Settings.
The old multi-step sequence of
- disable Find My Mac and Activation Lock
- deauthorise that Mac for iTunes
- sign out of iCloud
- sign out of iMessage
- disable any firmware password
- reset NVRAM
- unpair Bluetooth devices
- erase the Mac and install macOS
- remove that Mac from your account in the Apple ID pane
has been streamlined into
- deauthorise that Mac for iTunes
- run EACAS
- remove that Mac from your account in the Apple ID pane.
Safe mode and EACAS: they make life so much simpler.
