
Stage Manager is one of those features in Ventura that you either love or ignore. I’ve been using it almost full-time for the last four months, and am surprised that there don’t appear to be many good tutorials available yet. This is my attempt to help you get to grips with what Stage Manager has to offer. If you find it helpful, I will extend it into a series going deeper.
Set-up
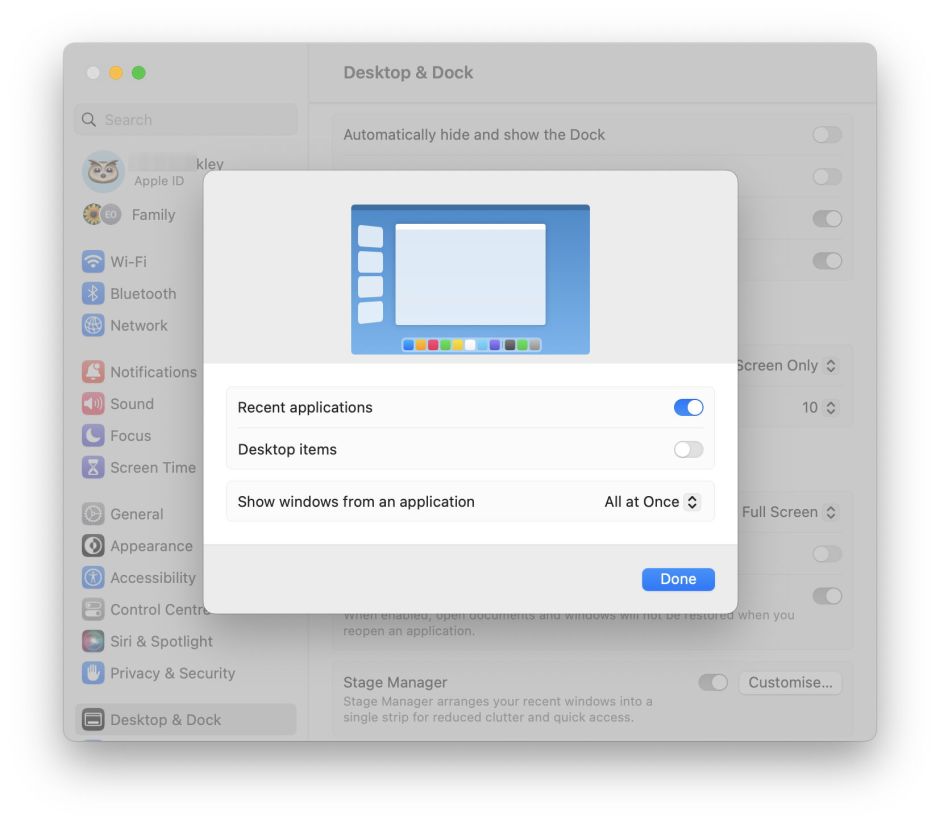
To start with, set up Stage Manager in System Settings > Desktop & Dock as follows:
- Recent applications on
- Desktop items off
- Show windows from an application set to All at Once.
In Control Centre, show Stage Manager in the Menu Bar, so you can turn it on and off easily.
There are two other important controls that are often ignored:
- in Desktop & Dock, on smaller displays you may want to set Automatically hide and show the Dock, to give you full access to the display area;
- in Accessibility > Display, you may prefer to turn on Reduce Motion to eliminate Stage Manager’s motion effects, which some find distracting or even nauseogenic.

Stage Manager is designed to work well with Spaces, but when you’re first getting started I recommend that you don’t combine them, at least until you’re fluent with Stage Manager alone.
Stage Manager’s parts
Stage Manager arranges apps and their windows in two areas. To simplify description and instructions, I’ve named those the Cast and Stage.
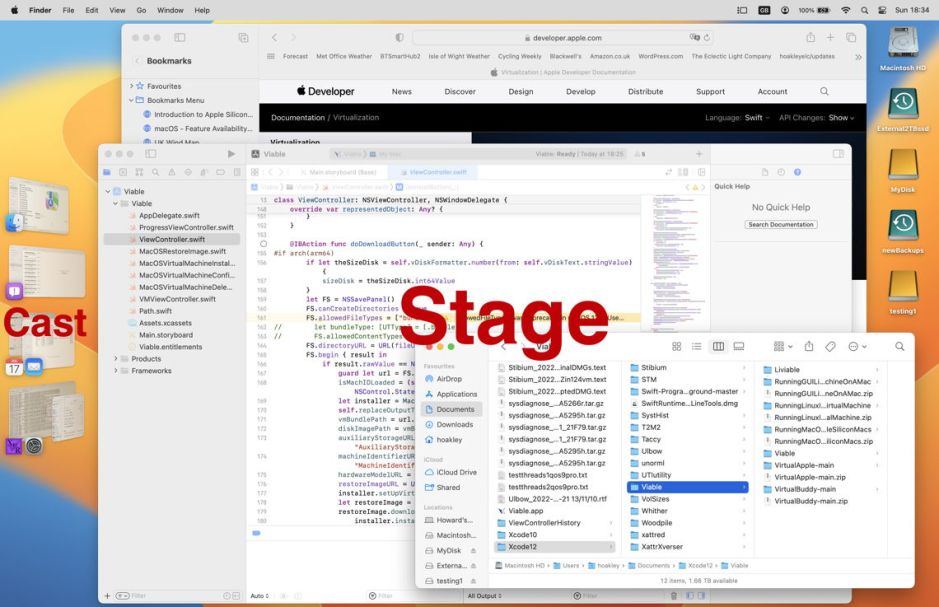
The Cast is the column of miniature windows on the left, holding up to six items. These apps and windows remain active and will update during use. That gives useful information: when my Twitter client is in the Cast, I notice when new tweets are added. Stage Manager’s working area is its Stage, where you bring active apps and windows to work with.
At present, Stage Manager offers no flexibility in layout: the Cast is always on the left, and contains up to six items. If you want to use Stage Manager, you’ll almost certainly want to arrange your Dock across the bottom of the display.
First steps
If you like diving in at the deep end, and want to launch half a dozen apps and see how you get on, please resist the temptation. It’s easy to get confused and frustrated if you take on too much at first.
Stage Manager is intended to help you simplify what’s on your display, to help you navigate and use many open windows in several apps with clarity and order. If you like a physical desktop strewn with hundreds of papers, then you won’t like Stage Manager. If you just want to get on with your work without having to rummage through all those apps and their windows, or get distracted when mail arrives, then Stage Manager offers you a convenient solution.
Start by quitting all open apps, leaving just the Finder open, with two windows. Click on the Desktop to see how that puts both windows together into a single item in the Cast, and clicking on them in the Cast puts both windows back on Stage.
Next open a single-window app like Calendar, which is then put straight on Stage. From the Cast, drag from the Finder pair of windows and drop that window onto the Stage. You now have two windows from different apps on Stage, one of the most valuable techniques in Stage Manager.
Drag the Finder window back to the Cast and drop it back onto the other window already there. That returns the Finder itself to the Cast, leaving just Calendar on stage. Drag that Finder window back onto the Stage, and this time drag the Calendar window and drop it onto where the single Finder window was. That Finder window is displaced from the Cast and put on Stage, so you now have both Finder windows on Stage, and Calendar in the Cast.
Now drag the Calendar window from the Cast and drop it on Stage, giving you three active windows there. You can then drag and drop any of those three back into the Cast as you wish, one at a time.
Extending the basics
With these basic actions, you can now start to assemble apps and windows to support simple workflows.
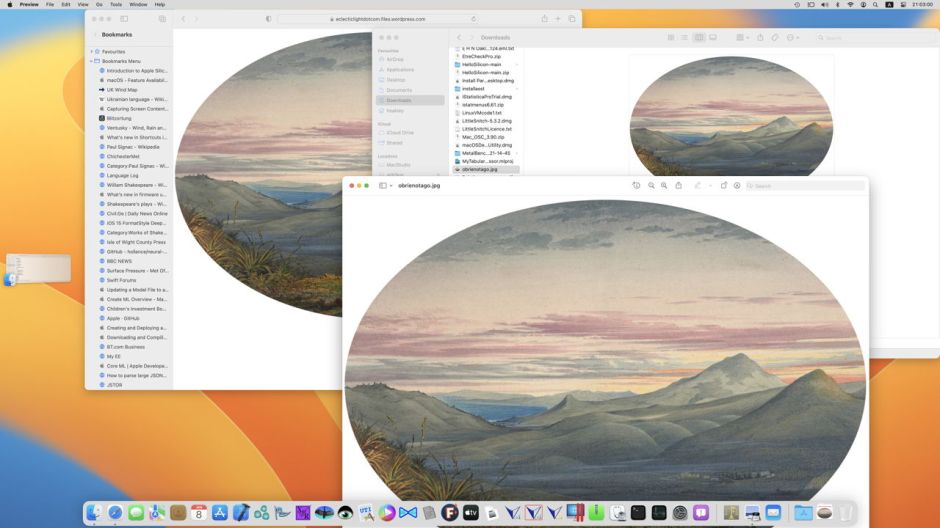
With both Finder windows open on Stage, and any other apps in the Cast, select an image like a screenshot and double-click it to open it using Preview. That puts the open Finder windows back into the Cast, opens Preview on Stage, and opens the image in Preview. Drag from the Finder in the Cast to drop one of its windows on Stage. This will only bring one window from the Cast, the one that was in front when the Finder was put into the Cast, thus the same window that you opened the image from.
In that Finder window, double-click another image to open it in Preview, on the Stage. You should now have two images open in Preview and one Finder window, all on Stage. To clear the Finder window from the Stage, drag and drop it on the other Finder window in the Cast.
Click on the Desktop to put all windows away into the Cast. It’s worth taking a few moments to look more closely at members of the Cast and how you can use them.
Thumbnails shown there group apps and windows in their current arrangements. In this case, the Finder has two windows open, and Preview has two, and they’re each separate members of the Cast.
When you want to pick one of the windows within a single member of the Cast, click on the tiny app icon in the thumbnail. This splits the windows to make it easier for you to select and drag one on Stage. Click on the Desktop to return it to a normal thumbnail.

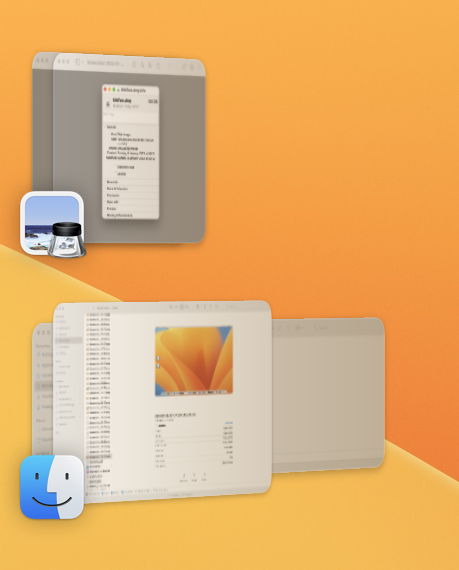
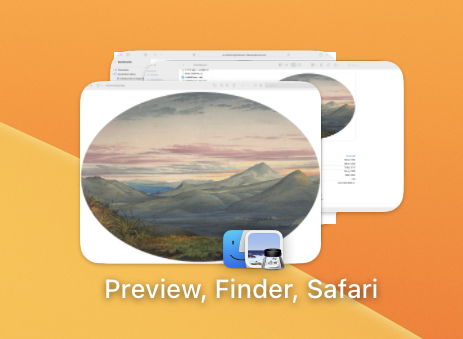
Here is a composite Stage containing three windows from different apps in a workflow. Assemble this by opening Safari, which puts it on Stage. Then drag in a Finder window in which to preview downloaded images in your Downloads folder. Finally, open a downloaded image in Preview, switch back to Safari and the Finder, and drag the Preview window from the Cast onto the Stage.
Put those into the Cast, and the three apps and their windows are squished together into a group.
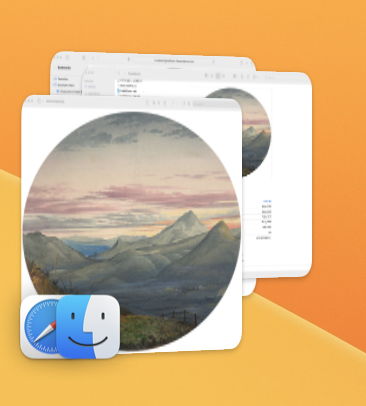
When you click on their app icons, the windows aren’t separated, but the apps are named. If you try dragging from this app group to the Stage, you will always get the frontmost window, in this case Preview.
Now you can practise building your own workflow groups. Some of these may be static, as I have a constant group consisting of my Twitter client and main Safari window. Stage Manager will restore those when you next open apps from within that group, for instance when you set up your Mac at the start of the day.
Other groups are more dynamic, and come and go as you need them. I do this with BBEdit, MarsEdit, and Safari when I’m writing articles for this blog. When I need a Finder window, I’ll drag it in from the Cast, and drop it back out once I’m finished with it. With a little practice, this becomes second nature.
I hope this whets your appetite to experiment with your own apps and their windows, without getting frustrated.
