
If you want to store substantial archives of important files, the only affordable option is to burn them to Blu-ray disc. This article steps you through how to do this in Monterey, here running on a Mac Studio M1 Max.
Equipment
There’s a wide choice of Blu-ray burners claiming to be compatible with Macs. I selected a Pioneer BDR-XD07S for the following reasons:
- support for a wide range of BD media, particularly M-DISC, which is intended to be archival in quality;
- single USB connection. Some older drives require two USB-A ports, this model only requires one. I would have preferred USB-C, but currently that appears too difficult;
- tray- rather than slot-loading;
- longstanding and reputable manufacturer.
It cost around $/€/£ 150. Unfortunately, manufacturers often offer a bewildering variety of models which appear very similar, with only subtle differences in their model numbers. You will need to check specifications carefully to ensure that your criteria are met.
If the last blank optical discs you bought were DVD-R, you’re in for a shock over the price of BD media, particularly M-DISC, which cost around $/€/£ 4 for 25 GB, and $/€/£ 20 for 100 GB. You’ll not want to waste any! I chose Verbatim branded discs, again a longstanding and reputable manufacturer.
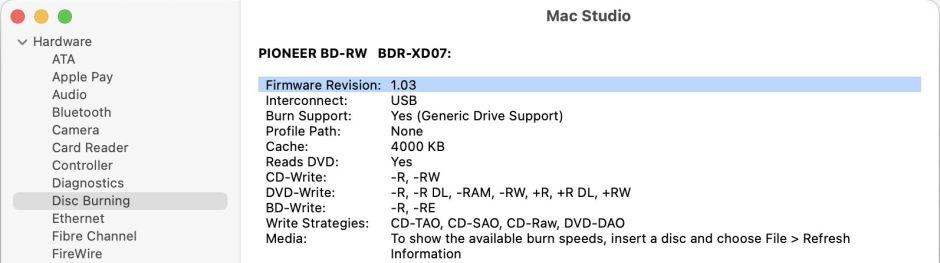
Once you’ve connected your drive, check that its firmware is up to date. The version installed should be displayed in System Information, in the Disc Burning section. Pioneer and other manufacturers provide downloadable updates together with utilities to update firmware. In my case, this wasn’t necessary, and the drive proved completely compatible with my M1 Mac and Monterey.
Burning
Assemble the folders containing files you want to burn to BD. As this process can take a while, I did this in a folder which I had already added to my Time Machine backup exclusion list. This ensured that duplicated files there wouldn’t take space up in any backup made while burning the BD archive disc, although it’s a bit more complicated to keep them out of local snapshots, which would require a temporary volume excluded from backup.
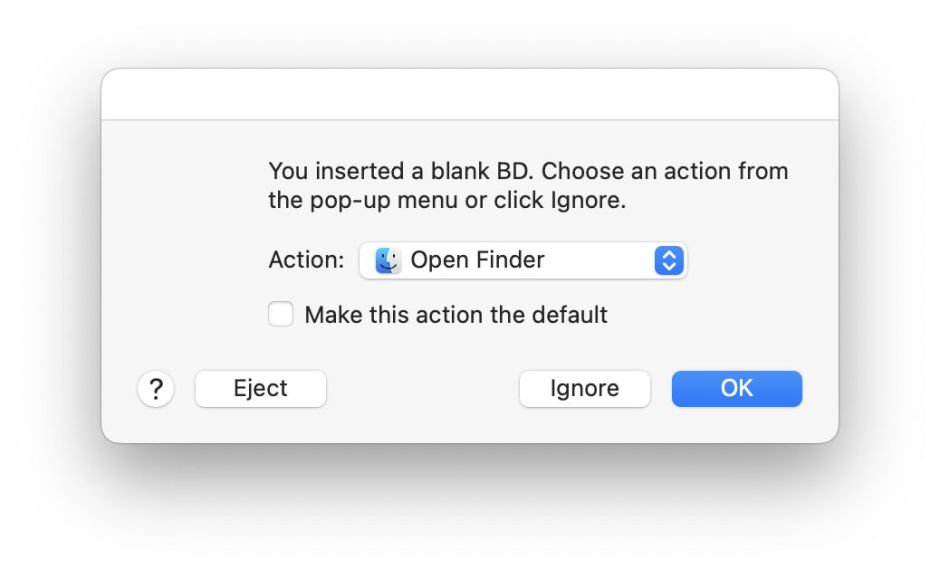
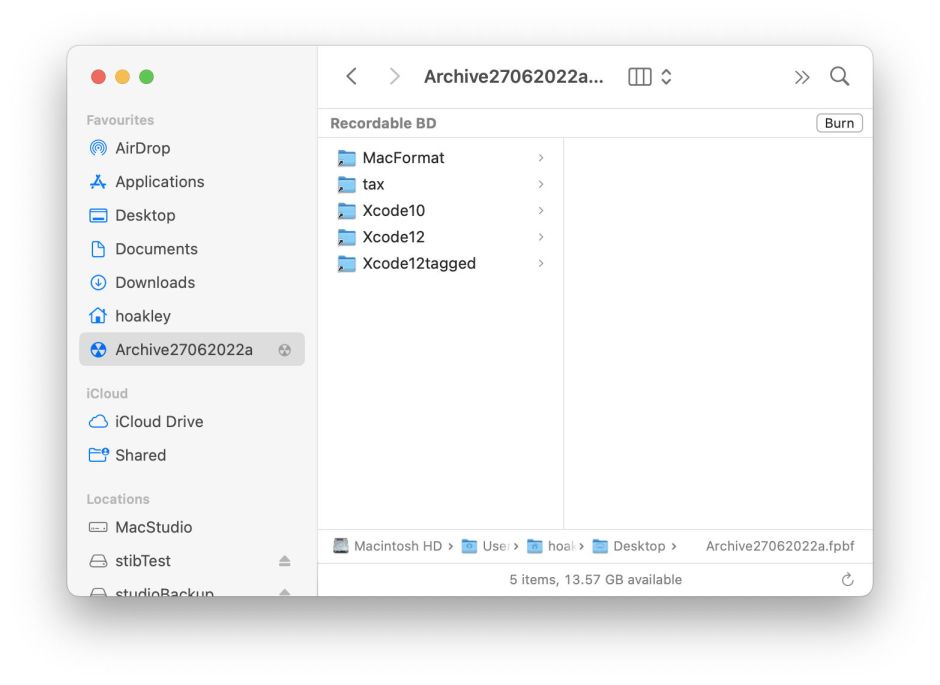
Insert the blank disc you want to burn. You should then be prompted as to what you want to do with it: Open Finder is the correct action if you’re going to burn from the Finder. Then drag the folders you want to burn to that disc. That should create aliases to them, ready for the burn process. Once you’re happy with the contents, click on the Burn button.
You will then be prompted to give the disc a name, and to select the burn speed. My drive supports a maximum of 6x for this particular type of disc, and the drive’s maximum is usually the best choice. Click Burn to start the process.
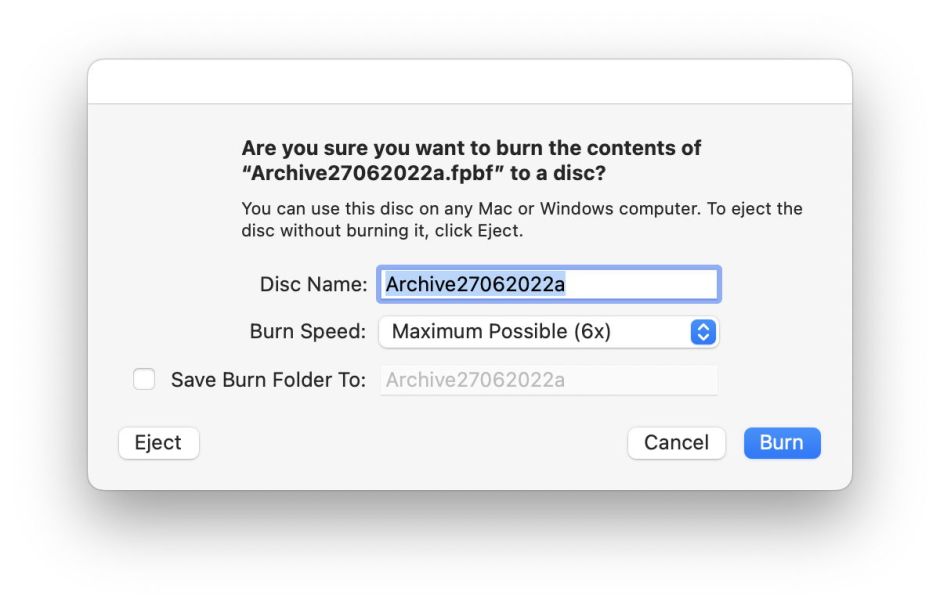

Even at 6x, burning will take around 2 min per GB, followed by a shorter time to verify.
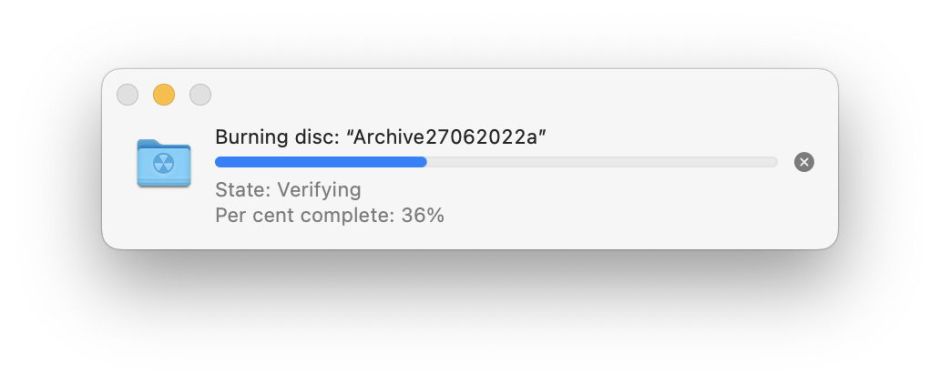
Once verification is complete, check that you can access the contents of the disc correctly before ejecting it.
For archival purposes, you should avoid putting any label on the completed BD. If you want to mark it, use only pens which are intended to be safe for the purpose. Personally, I prefer to write short details on the card insert within its jewel case, then store a more detailed manifest outside that.
Extended attributes
One of the few disadvantages of using BD media for archives is that their file system doesn’t store or preserve macOS extended attributes (xattrs). This is particularly important if you use my free utilities Fintch, Dintch or cintch to tag files for integrity checking, as those tags will be stripped when burning each file to the disc.
The best strategy for preserving xattrs, including these tags, is to write files into a format which will preserve them. If you don’t want to compress them as well, macOS disk images and tar archives can prove a good choice, and this will also keep the archive disk simpler in its structure.
This does mean that, when you want to check tags or integrity, you have to copy the archives from the BD, and could have to un-tar them before running checks. However, even if it were possible to retain tags on the BD disc, checking them there would involve a great deal of seeking, and prove extremely slow.
Your preparation would then involve:
- Copy the folders to be archived to your no-backup folder.
- Tag them there using Dintch/Fintch/cintch, and check those tags.
- Convert the folder into a single archive file, as a disk image, tar, or whatever.
- Burn the single archive file(s) to BD.
Happy archiving!
