
It’s one of the commonest minor disasters on any computer: you accidentally delete a file you later realise you still needed. Thankfully, recent versions of macOS provide several safety nets which spare you from resorting to a third-party tool to undelete files, although there isn’t a simple Undelete menu command anywhere.
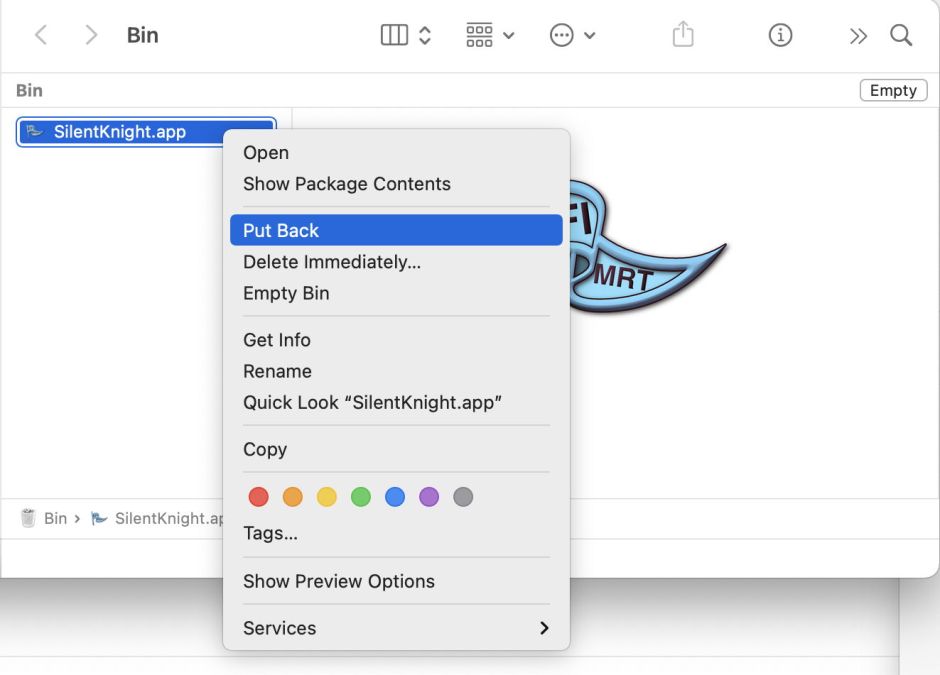
The first thing you’ll do, of course, is look in your Trash. If you haven’t emptied it yet, the file will still be there and you can use the contextual menu to put it back to where it came from. Unfortunately if it’s an app that you kept in the Dock, you’ll have to manually add it back there, but otherwise it should be back to normal.
If you emptied the Trash and the file really has been deleted, your next stop should normally be your backups, for example in the Time Machine app. But if the file isn’t among your backups, or you can’t find it there, so long as there’s a snapshot containing the missing file, it’s just as easy to use that instead.
In my case, I don’t let Time Machine back up large, relatively static folders like Applications. A few days ago I updated one of my key production apps only to discover a serious bug, so I needed to revert it to its previous version which had been replaced a few days before that. My Applications folder is backed up daily using Carbon Copy Cloner, which also makes snapshots of my whole Data volume, and keeps them for longer than those made by Time Machine. All I had to do was locate a suitably older snapshot, mount it, and copy the previous version of that app to replace the newer one in Applications.
The snag with using snapshots is that Apple still doesn’t provide good access to them. Simple features like listing snapshots on a volume and mounting one of them aren’t available outside Time Machine, and that can only see its own snapshots, which it automatically deletes after 24 hours, without any option to preserve them longer.
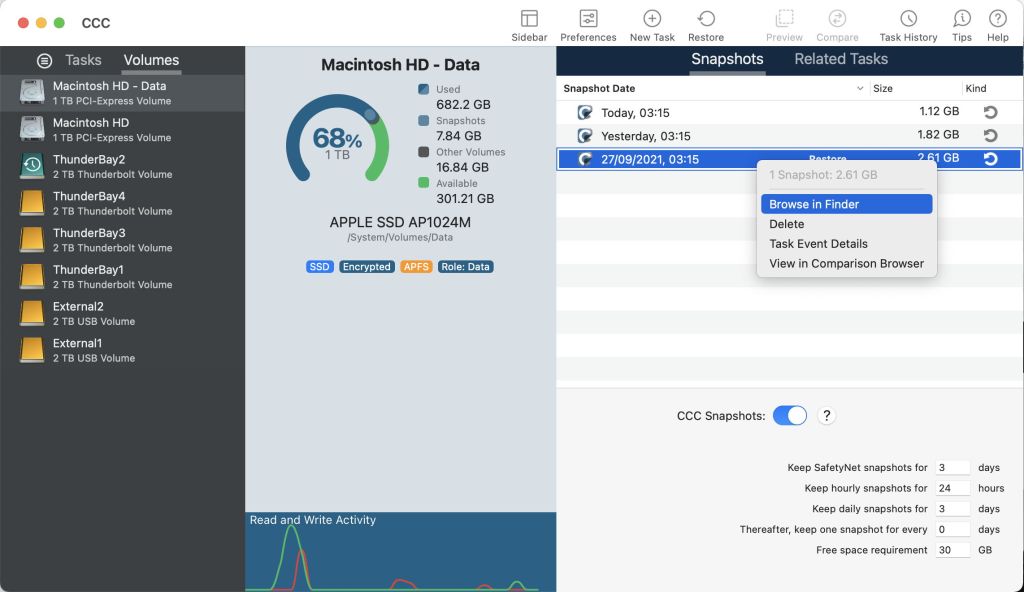
Thankfully, third-party utilities do better. My choice for snapshot management is Carbon Copy Cloner, as it not only lists all snapshots on volumes, but lets you mount them, thus giving easy access to their contents.

The first task in Carbon Copy Cloner is to locate a snapshot of the right volume and age which you expect will contain the document you want. In this case, it’s my Data volume, so all you then have to do is select Browse in Finder from its contextual menu.
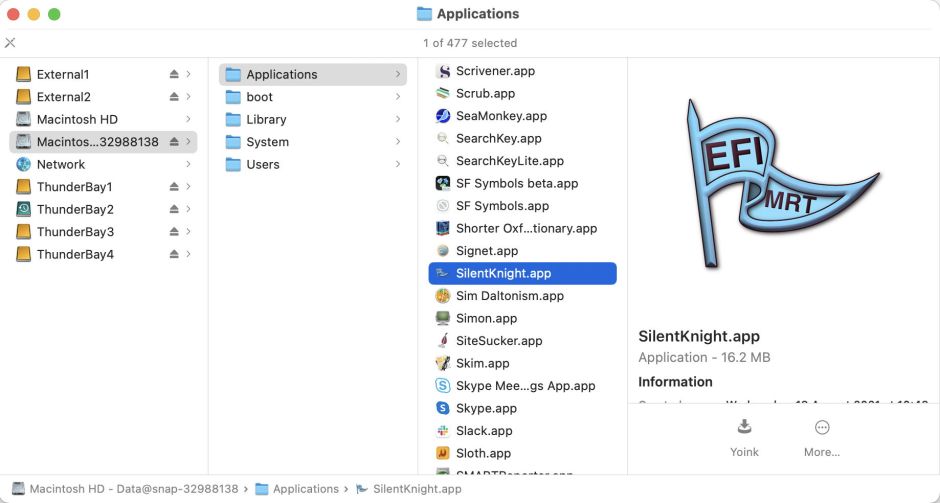
Carbon Copy Cloner then opens a new window with that snapshot mounted. Locate the file you want to undelete and drag a copy to a suitable location on one of your regular mounted volumes.
Amazingly, even those adept with command tools such as tmutil can’t do this at the command line. To the best of my knowledge, there’s no command tool in macOS which can give you similar access to any snapshot, although tmutil does work with snapshots made by Time Machine.
The other macOS feature which you can usually rely on to get you out of these small but painful holes, its versioning system, is unfortunately of no help in undeleting files.
In my case, the versioning system couldn’t have helped, as I was after an older version of an app anyway. Even if it had been a document which was versioned, I would also been out of luck, as you can only access older versions of a document which still exists. Once the document is deleted, all its old versions are purged from the version database too, so even restoring the latest version of that document wouldn’t have given me access to an older version, neither would a copy of the document, even restored from a backup, as versions aren’t then preserved.
If you want to maintain access to old versions of documents, you’ll need to archive or copy them using my utility Revisionist, or DeepTools from here.
