
Like many Mac users, I’ve now phased out the use of hard disks, and although I still have plenty around, all my everyday storage is on SSD. It’s then a pain having to keep two of those in HFS+ format to cater for Time Machine backups. In this article I explain how to avoid that, and keep your Time Machine backups on disks formatted using APFS instead.
If you’re still backing up to hard disk, then there’s no problem with continuing to use HFS+. Indeed, because of the poor performance of APFS on hard disks, I’m sure that you’d much prefer to. But with SSDs the situation is different: for instance, one of my Time Machine backup disks is a 2 TB SSD, on which those backups occupy less than 200 GB. It would be far more convenient for the whole of that SSD to be in APFS, but because Time Machine backups still rely on directory hard links, which aren’t available in APFS, HFS+ it must remain. Or is there an alternative?
One way of hosting a different file system is to use a disk image, in this case a sparse bundle, which has from the first release of Time Machine been used to store backups on shared and networked storage. The core of my plan was therefore to get Time Machine to back up to an HFS+ sparse bundle on an APFS volume. But before I could do that, there were several hurdles to overcome.
Sparse bundles store their data in many files, termed bands, in the same folder. Experience with shared storage is that, if the number of bands exceeds about 100,000, then the sparse bundle is likely to malfunction. As the default maximum size of a band is 8.4 MB, a single sparse bundle containing 500 GB would require almost 60,000 bands. To improve performance and ensure that my backup sparse bundle wouldn’t suffer any such problems, I wanted to keep the number of bands down to less than 2,000. For a sparse bundle of maximum capacity 650 GB, that required setting the maximum band size to around 350 MB.
No disk image utility that I know of – Disk Utility or C-Command’s excellent DropDMG – gives me a simple way to create a journalled HFS+ sparse image of maximum size 650 GB and maximum band size 350 MB. So I wrote one, Spundle, to save me having to keep using the command line.
There are several other problems which I encountered during this journey. Let me explain how to solve them by stepping through the process.

Creating the sparse bundle in the first place is now very simple with Spundle: set its maximum size, the band size, the file system of HFS+J, and click Create. Save that sparse bundle straight to the APFS volume on which you’re going to store your backups.
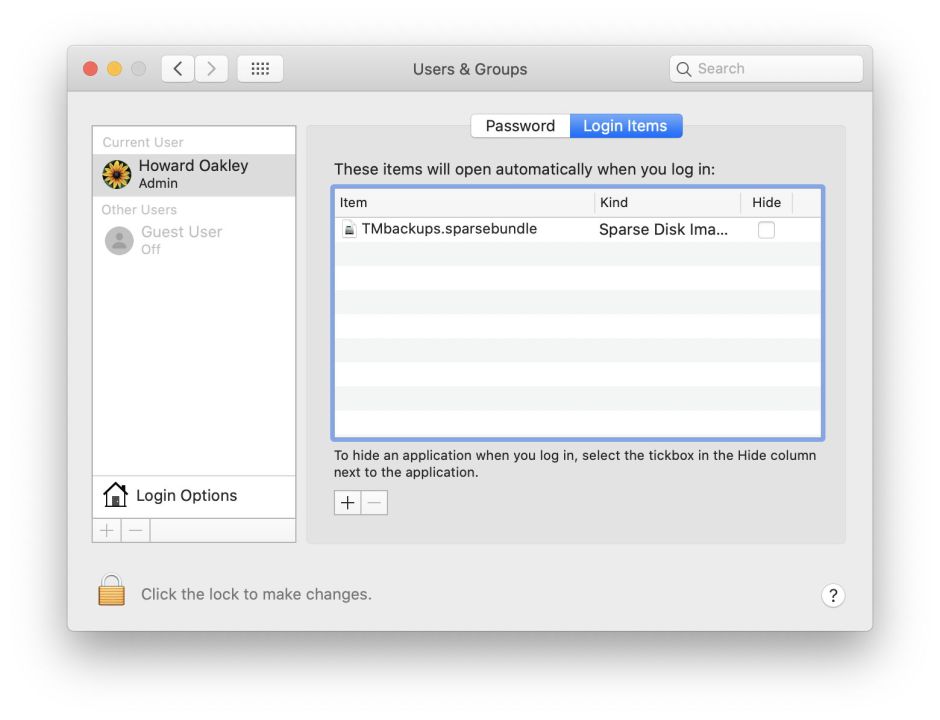
You then have to ensure that sparse bundle is mounted whenever you log in, so that it’s ready for further backups. Open the Users & Groups pane, and select the Login Items tab. Click on the + tool and add the sparse bundle on your APFS volume. It’s wise to restart then and verify that this works.
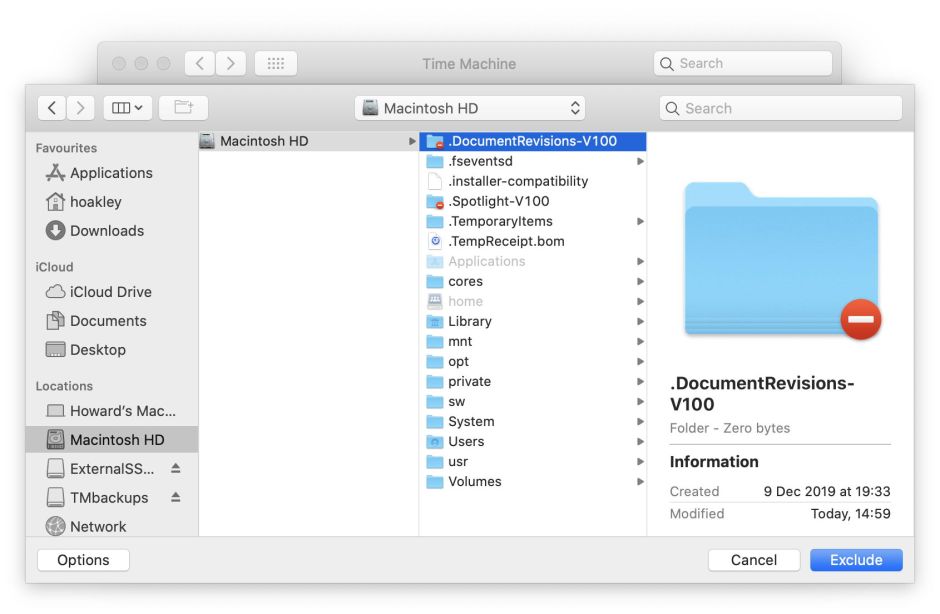
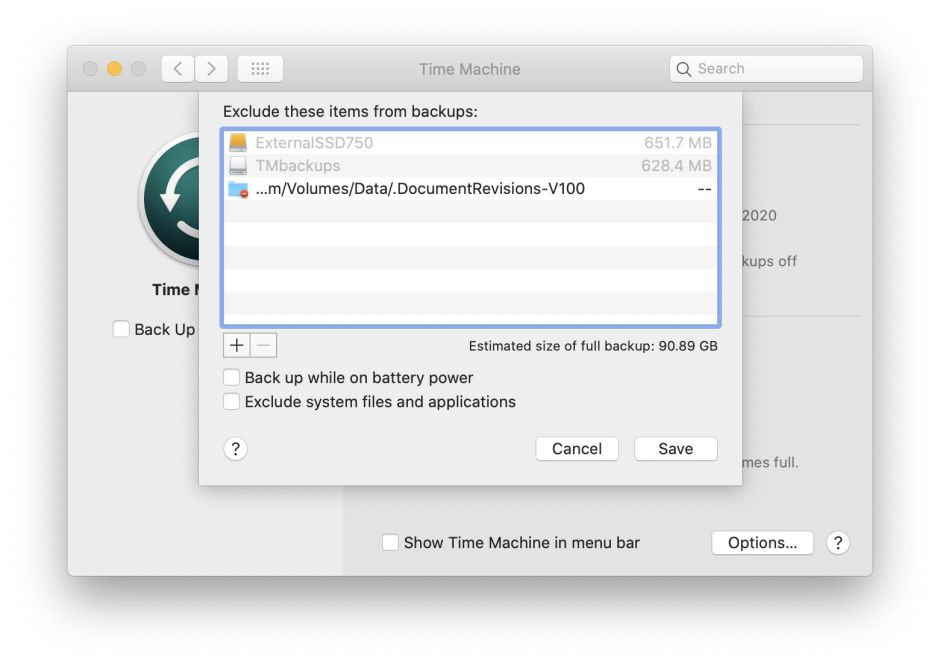
To set this backup in the Time Machine pane, I ensured that the hidden .DocumentRevisions-V100 folder at the top level of my Data volume was added to the exclude list. This folder contains a great many hard links, and in recent releases of Catalina often chokes first full backups, and can cause later problems too. It’s only useful when you do a full volume restore anyway: saved document versions aren’t restored with individual documents, or folders of them.
Ensuring that your new and empty sparse bundle is mounted, now is the time to make that the destination for your backups. But if you try to select the mounted disk in the Time Machine pane, it isn’t offered as an option. Don’t try adding the host APFS volume instead: all that will happen is that Time Machine will generously offer to reformat it for you in HFS+.
Instead, you have to add the sparse bundle in Terminal, using the tmutil command. Use a command of the form
sudo tmutil setdestination /Volumes/MySparseBundle
where MySparseBundle is the volume name of the sparse bundle, as shown in the Finder’s sidebar. Then authenticate to enable that command to run as root.
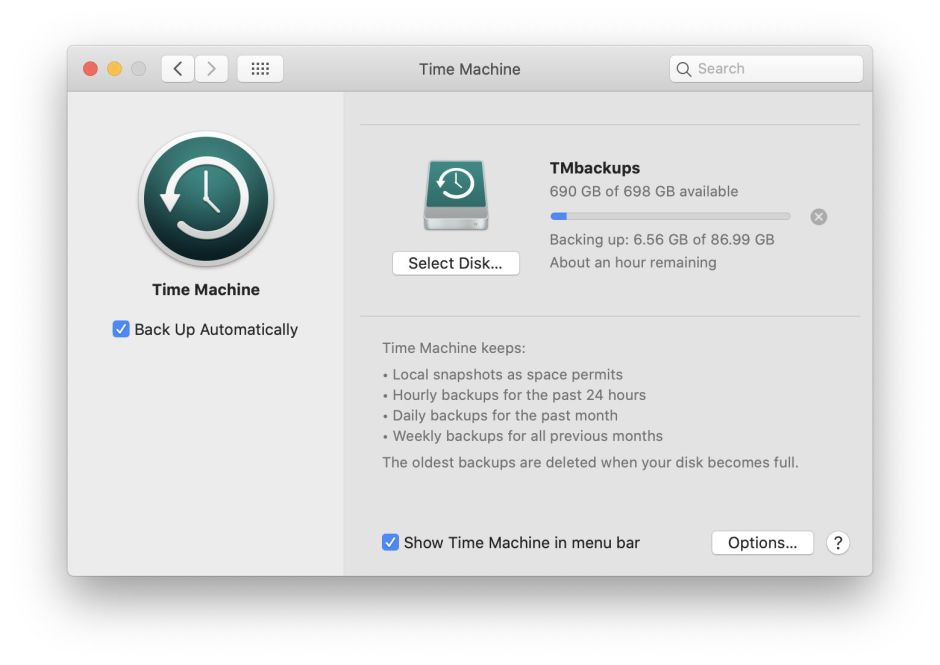
Open the Time Machine pane again, and you should see the sparse bundle given as the destination for your backups. Turn on Back up Automatically. If it’s a good while before the next scheduled backup, use the Show Time Machine in menu bar checkbox to enable you to run a manual backup now, and watch it get going.

I used my own T2M2 to watch progress more accurately, using its Check Speed button. Once Time Machine got its teeth into the files on my Data volume, its transfer rate remained around 70-75 MB per second, which is only slightly slower than the 86 MB/s that my iMac Pro achieves to a similar external SSD.

With the first full backup out of the way, I left Time Machine to get on with automatic backups, using T2M2 again to keep an eye. It has run like clockwork ever since, and the Time Machine app and Finder access to backups also work as expected.
I haven’t been using this new way of backing up to an APFS disk for long, but I don’t see any reason that it shouldn’t continue to work fine. At present, the backup sparse bundle is 91 GB in size, has 608 GB of free space, and has 257 bands. As backups tend to grow over time, there shouldn’t be issues over compaction to recover freed space, although Spundle should be able to take care of those as well as the sparse bundle permits.
The one major disadvantage of a sparse bundle solution is in using the backup from Recovery mode: unless you can mount the external volume and sparse volume from there, the contents of your backup won’t be accessible. I haven’t checked whether Migration Assistant can access the backup either. On the other hand, moving the backup to another disk is very simple when it’s contained in a sparse bundle, but a daunting task when it isn’t.
Depending on how you use your backups, using a sparse bundle hosted on an APFS disk could prove a good solution, and I recommend that you experiment with it too, if you keep your backups on an SSD rather than a hard disk. Please let me know how you get on.
