
If you’ve only got a handful of movies which need conversion to cope with the forthcoming loss of QuickTime 7 codecs in macOS 10.15, you’re probably happy using QuickTime Player to handle that. But if you want control over the codecs and settings to be used, or have a large batch to transcode, then you’re much better off using a dedicated app like Apple’s Compressor.
There is an irony here which won’t be wasted on long-time Compressor users. We’re having to convert old movies and other media because macOS 10.15 will be 64-bit only. It’s not so long ago, though, that the Compressor app itself was still 32-bit. It was one of Apple’s last products to be converted to 64-bit.
Like Final Cut Pro and iMovie, Compressor warns you when you add a file which relies on a codec which isn’t 64-bit. Simply add the file to its Current list, either by clicking Add or dragging and dropping it onto that part of Compressor’s window, and the Job info gives full details of the codecs used and warning.

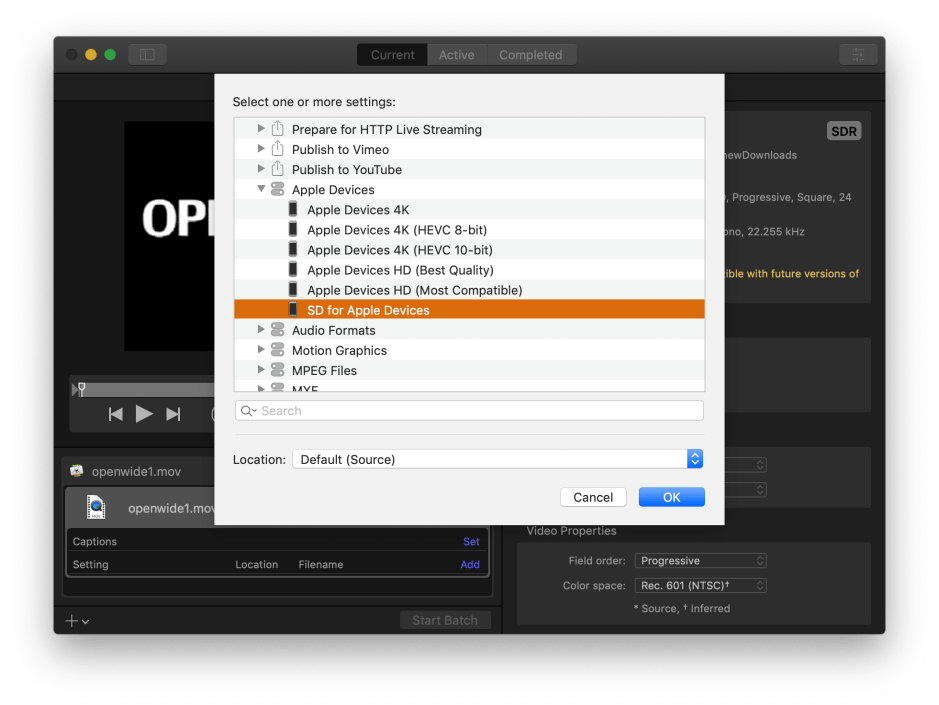
You’ll then need to select a destination format, what Compressor refers to as the conversion Setting. This drops down a sheet with a wide range of presets and the ability to create your own custom combination of codecs and settings. I generally try to stick to presets, and in this case, with ancient low-res video capture, opt for Standard Definition for Apple Devices, which includes Macs and iOS.
When you’re ready to convert a batch of movies, click on the Start Batch button.
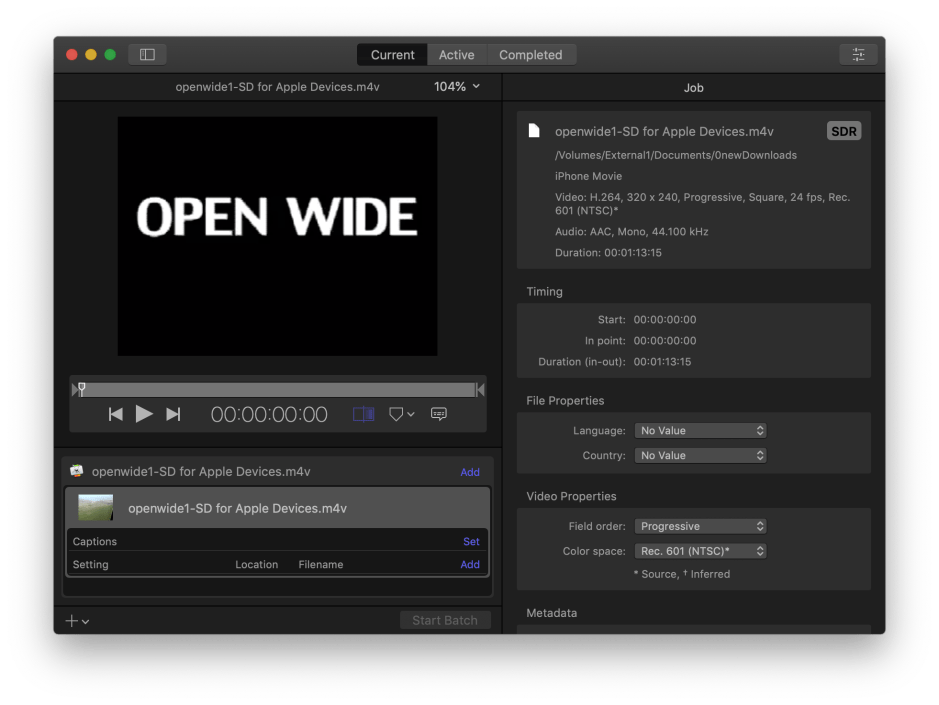
Once you’ve run the transcoding, you can use Compressor to check the new format by dropping the output movie onto it. The warning should now have gone, and all codecs used should be 64-bit compatible.
Don’t forget to keep the original in an archive, and you can then replace your working copy of that movie with the new transcoded version.
Compressor is most useful when you assemble a large batch of conversions. You can then set it converting in the background as you get on with your work.
