
Several have asked me to step through building an app in Xcode 10. Rather than offer something pointless, this is a good chance to show how to use PDFKit and make a real, fully-functional PDF viewer app with hardly any code at all. The idea is simple: glue together features in AppKit and PDFKit, and let them do all the hard work. That’s what scripting is all about.
This workthrough assumes that you already have Xcode 10.1 installed, and that you have set it up with some sort of developer ID and certificate(s). Although you don’t have to subscribe to Apple’s Developer Programme and get proper Developer signing certificates, if you’re going to do anything more than experiment with Xcode you’ll need to do that, sooner or later.
Open Xcode, and in its splash screen, click on Create a new Xcode project.

From among the macOS options, select Cocoa App and click Next.
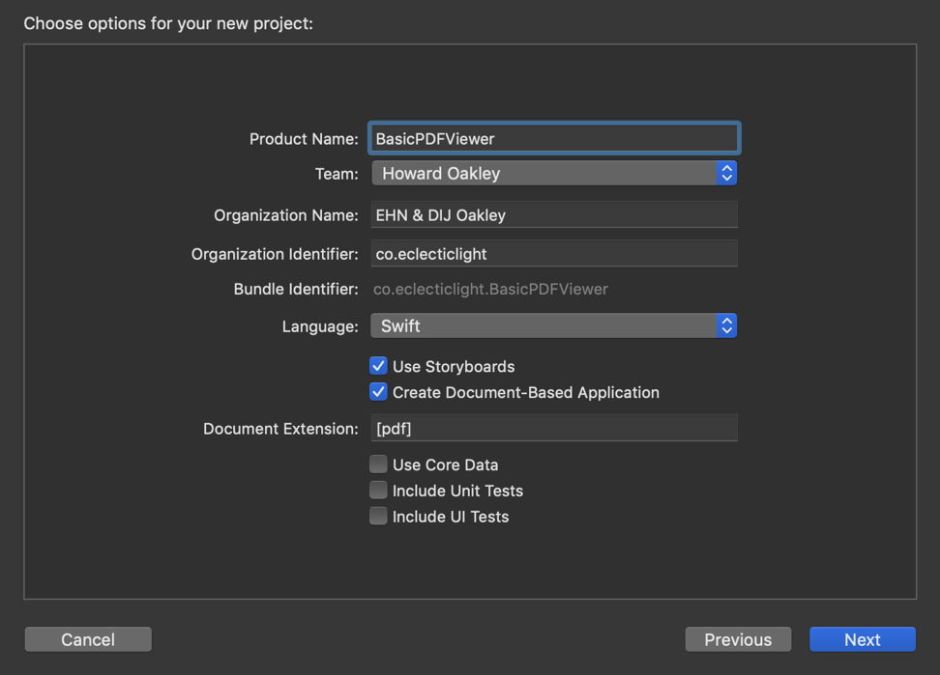
Set the following options:
- Product Name: BasicPDFViewer
- select Team, enter the appropriate Organisation Name and Identifier as needed
- Language: Swift
- tick Use Storyboards and Create Document-Based Application
- set Document Extension to [pdf]
Then click on Next.
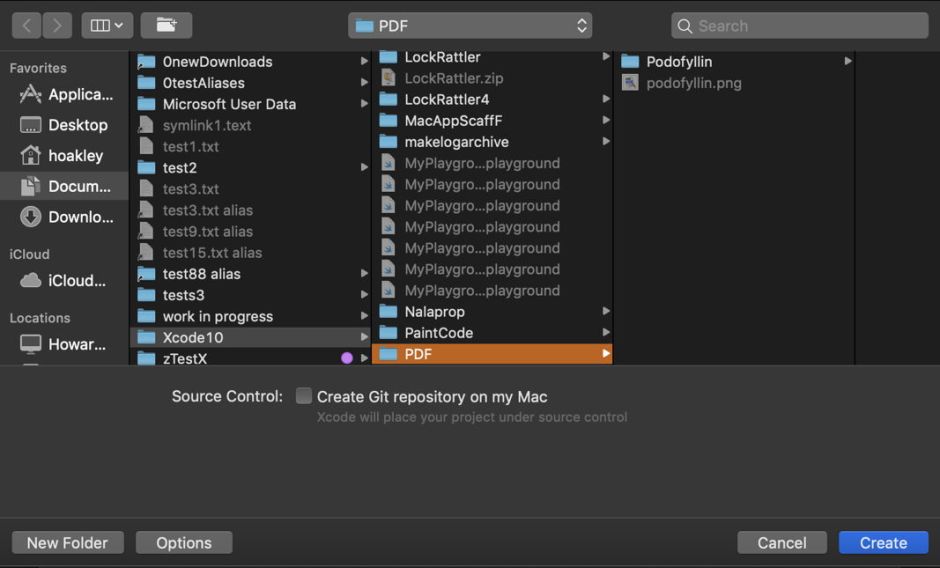
Navigate to an appropriate folder to save your new project, and click Create.
Configuration
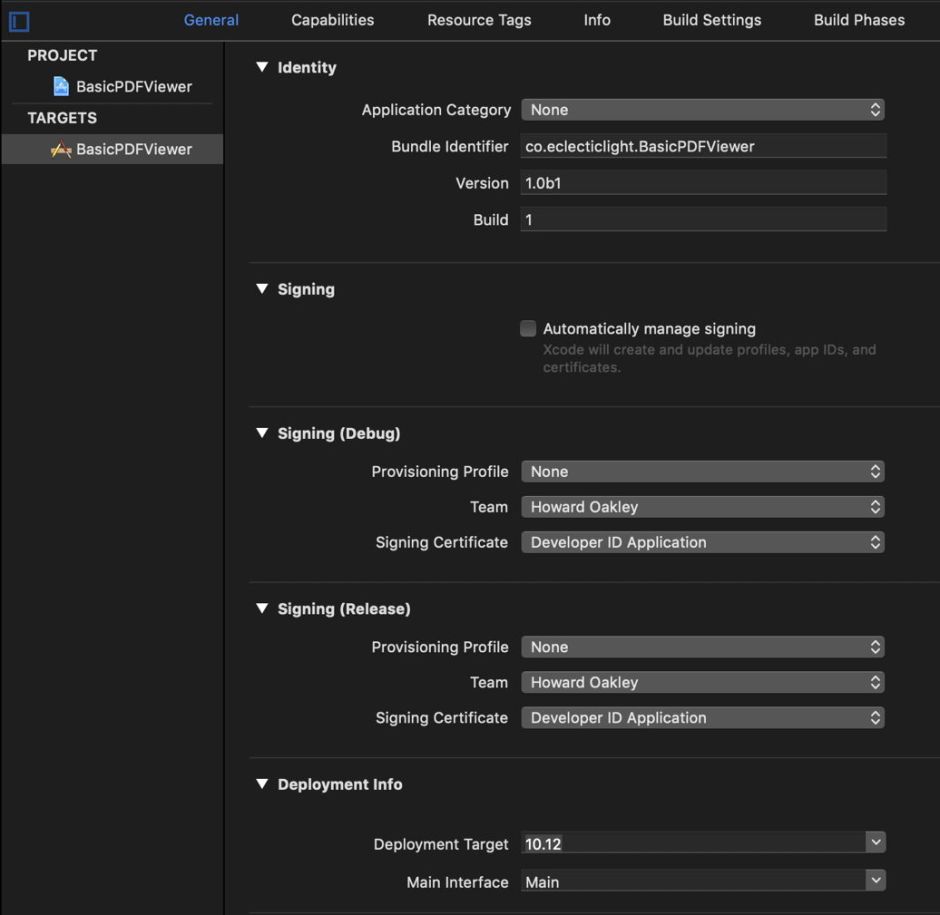
This should open the main window with the Target settings ready to edit. Set Version to 1.0b1, the Signing section to use your certificate as appropriate, and the Deployment Target to 10.12 or whatever you want. Then select the Capabilities section at the top.
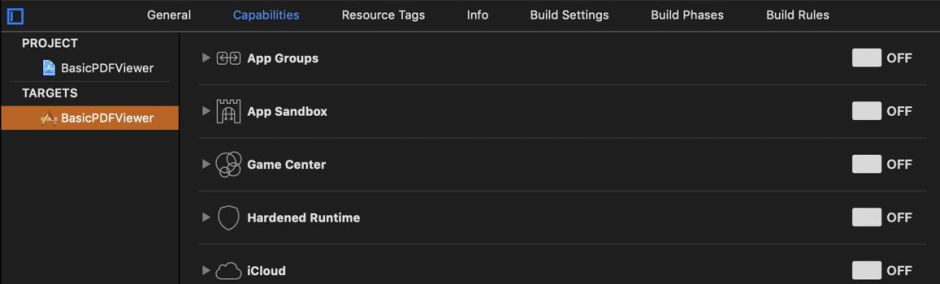
Here, turn off the App Sandbox unless you have aspirations to the App Store and are peculiarly masochistic. Leaving this turned on by accident is a common way to make your app behave most oddly. If you’re going on to have your app notarized, this is a good time to turn Hardened Runtime on, though. Then select the Info section at the top.
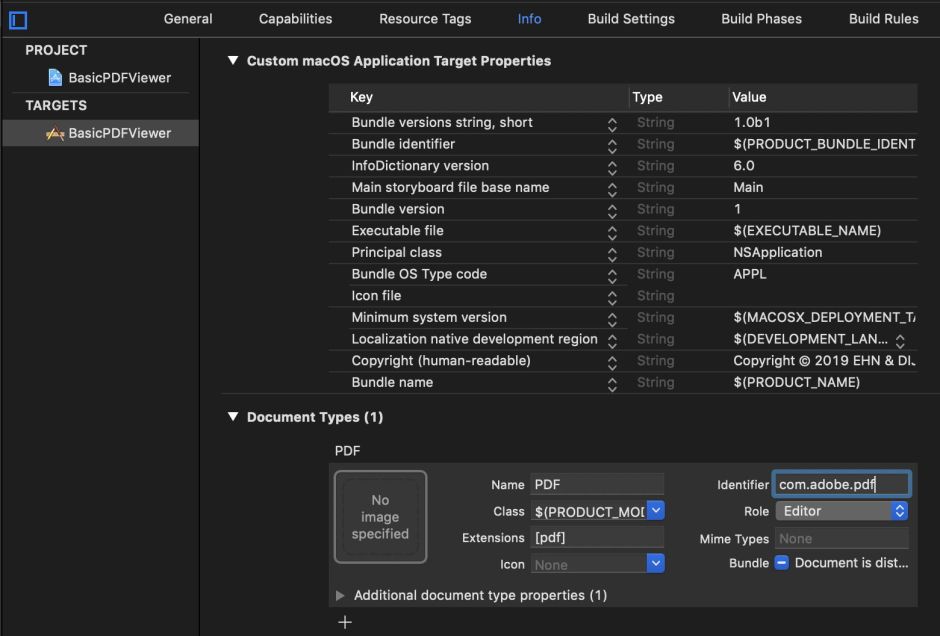
This is where you edit what will end up in your app’s all-important Info.plist. In this case, the important section is that listing Document Types, which you should open. Because you entered [pdf] earlier as the document extension, this has been completed for you, but is worth checking and tweaking.
Change the Name to PDF, and add the UTI Identifier com.adobe.pdf. As this is going to be a document viewer rather than editor, you could change its Role here, but leaving it set as Editor makes it easier if you do develop it into something bigger. Then select the Project item in the sidebar, above the Targets.
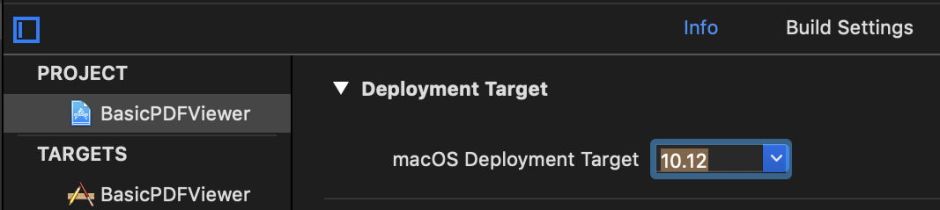
There, set the macOS Deployment Target to 10.12 or whatever you set it above.
Source code
Having set the project and app configuration, it’s time to add the first source code to the Swift files in your project. In the leftmost sidebar of the window, select the AppDelegate.swift file to view and edit its source.
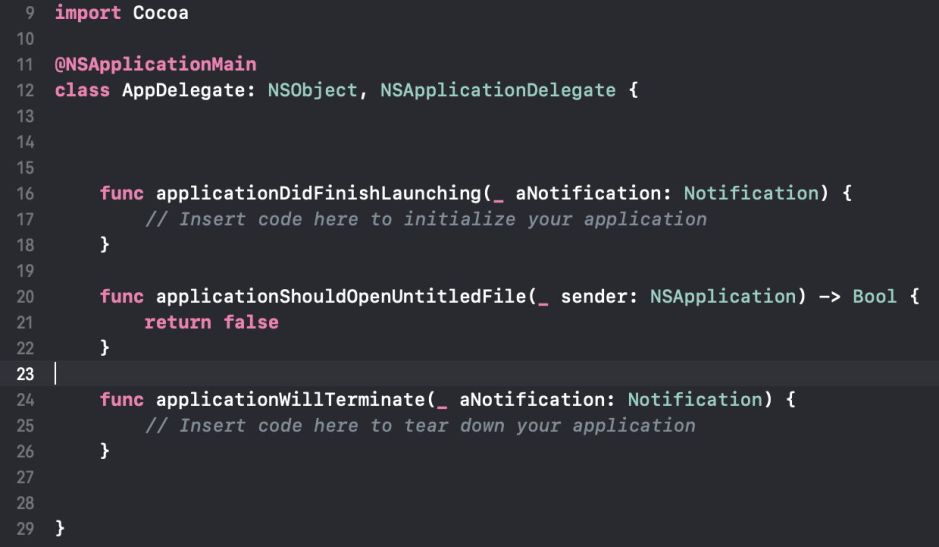
Because this app is a PDF viewer, you don’t want it to keep opening new, empty documents whenever it starts up. The way to fix that is to add the function applicationShouldOpenUntitledFile() as shown above. By returning false, your app will only open document windows when told to. Then switch to the Document.swift file.

There are several changes which need to be made here. First, because you are going to use PDFKit code, you need to import Quartz, which contains PDFKit. Sometimes you can merge classes, and create a composite which uses NSDocument and another class like PDFDocument, but here you can’t do that. So the NSDocument class has to contain a PDFDocument as a variable. This is declared with a ? so that it can be nil, as it will be when a document is first created, and doesn’t have to be initialised when the document is created. Try removing that ? and the compiler will explain its reasons in a error.
You also need to set the class variable autosavesInPlace to return false, as this app isn’t going to save anything, and you don’t want strange behaviours arising from that.
To be able to read in the data in a PDF file and create a PDFDocument from it, the last function read() has to be edited as shown. All this does is initialises a new PDFDocument using the data read from the file, and makes that the variable for reference elsewhere. If that doesn’t work and the PDFDocument remains nil, then it throws an error.
In the second and concluding part of this walkthrough, I will take you through creating its interface, and adding the final code to bring it all together.
