
It seems like a good plan: your existing external drive containing your Time Machine backups is nearly full, and the drive itself is getting long in the tooth. You buy a new, much larger external drive, and copy the old backups into a folder on the new drive named old. You then turn Time Machine back on, to make backups to your new drive. Once those are working well, you decide to trash the old backups and reclaim the space.
This is all good, safe, carefully-planned computer system management, but hits a brick wall when all attempts to trash the old backups return an error code -8072. A quick check on OSStatus.com reveals that is not a recognised error code, leaving you clueless as to what to do next.
1. The best new backup drive has been freshly erased (formatted, initialised)
Of all the things that you do with your Mac, making backups creates the most complex and demanding volumes, which contain a mixture of millions of folders, real files, and hard links. The best way to start a new series of backups is on an otherwise empty volume which has been freshly erased.
The snag, of course, is that once you have started making backups to a volume, you are not going to want to erase it, lose the backups which you have already made, and start afresh. But if you can, you are best off starting with a freshly erased and otherwise empty volume.
2. Are you sure that you’re trashing the right Backups.backupdb folder?
A lot of people wonder why Macs bother to have a Trash which you must then empty. Then one day, they have second thoughts about something they put there, and understand why. That is why you should look in your Trash before emptying it: that gives you a chance for such second thoughts.
Here you need to be very careful. Although you think that the folder named Backups.backupdb in your old folder is now surplus to requirements, you should check that you’re not still backing up to it, or using its contents. The best way to do this is in Terminal’s command line, using the simple command
tmutil listbackups
This should result in a list of all the active backups which Time Machine knows about, and should only contain lines starting with
/Volumes/[newname]/Backups.backupdb
where [newname] is the name of your backup volume. If it contains lines beginning
/Volumes/[newname]/old/Backups.backupdb
then you have a problem, because those are in the folder you are about to trash. You will probably then wish to have second thoughts.
3. Is it just a permissions problem?
Select your old Backups.backupdb folder in the Finder, and Get Info (Command-I, etc.) on it.
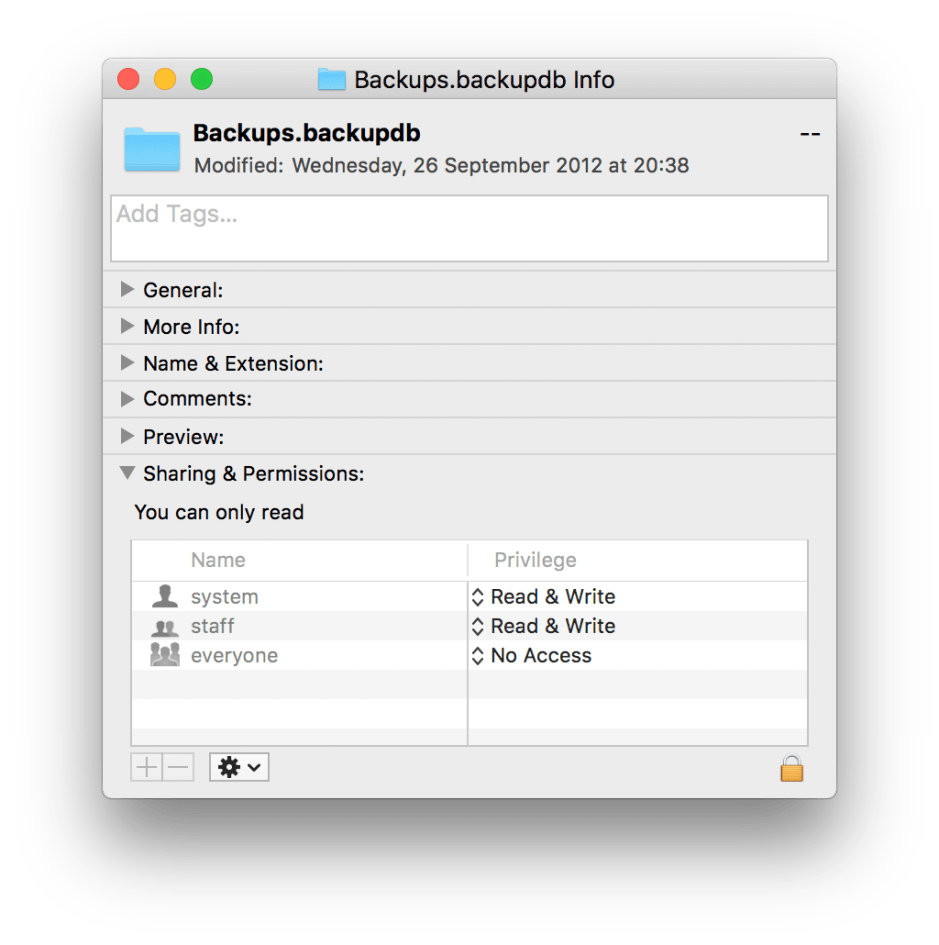
You’ll see that it is not owned by you, but by system, and you may not have read and write access to it. You can fix that by adding yourself to its permissions list, or changing the staff or admin permissions, with read and write access. To do that, you’ll have to click on the padlock icon and authenticate as an admin user. Also click on the cog icon to propagate the changed permissions to the entire folder contents.
macOS should routinely prompt you to enter your admin user’s password in order to move folders like this to the Trash, but sometimes that doesn’t work as expected. Another reason in this case is that your backups contain a very large number of hard links, as well as real folders and files. You can only delete an original file when all its hard links have also been deleted – a potential problem here.
4. Hard links are hard
The biggest problem in trying to work with hard links is that neither the Finder nor file listings in Terminal’s shell identify whether any given file is the original, containing data, or is merely a hard link to an original. Both pretend that hard links are the files themselves. So even if your backup didn’t contain such a vast number of hard links, you still wouldn’t know which to delete before trying to delete the original files.
If you have tried changing permissions and still get the same error when trying to trash the Backups.backupdb folder, you can’t do much to fix the hard link problem.
5. Just rm them away
It’s at this stage that someone who knows a bit of Unix will open Terminal and try using the command rm to remove the lot. For example, you might use a command like
sudo rm -rf /Volumes/[newname]/old/Backups.backupdb
then authenticating using your admin password. Note that if [newname] contains spaces, you’ll need to put that part of the command in quotation marks, e.g.
sudo rm -rf '/Volumes/[newname]/old/Backups.backupdb'
or ‘escape’ the space with \ as in
sudo rm -rf /Volumes/my\ disk/old/Backups.backupdb
The rm command is one of the most feared in Terminal, because it deletes completely, and gives you no chance for second thoughts. It may well fix this problem, though, so long as you are assiduously careful to enter the correct command. With rm, it is critical that you check the command carefully at least twice before pressing Return. If you have any doubts, don’t do it.
6. The most specific solution
So far, all the potential solutions to the problem have been generic, and could be applied to any folder of stuff which you want to trash but can’t. There is one solution which is specifically designed to cope with removing old backups; being the most specific it is likely to be the most effective, and to risk fewest adverse side-effects.
You’ll need to do this in Terminal’s command line, where you should of course check twice before pressing Return.
The Time Machine command tool tmutil contains a verb delete which can remove snapshots, machine directories, or individual backups, whether or not they were made by the current Mac. To use it, you’ll need a command of the form
sudo tmutil delete [path]
where [path] is the full pathname to the backup to be removed. In this case, you’ll probably need something like
sudo tmutil delete /Volumes/[newname]/old/Backups.backupdb
or
sudo tmutil delete /Volumes/[newname]/old/Backups.backupdb/[macname]
where [newname] is the name of the volume, and [macname] is the machine name, e.g. Howard's iMac. The latter may well contain spaces and single quotation marks, in which case you’ll need to use a form like
sudo tmutil delete /Volumes/my\ disk/old/Backups.backupdb/Howard's\ iMac
or
sudo tmutil delete "/Volumes/my disk/old/Backups.backupdb/Howard's iMac"
If that doesn’t clear them out, then you can be even more specific, and remove the backups one at a time, something which you can always do with an active backup to reclaim some space.
First, list the backups using a command of the form
ls /Volumes/[newname]/old/Backups.backupdb/[macname]
such as
ls "/Volumes/my disk/old/Backups.backupdb/Howard's iMac"
Then copy and paste the paths of the backups that you want to delete into individual commands like
sudo tmutil delete "/Volumes/my disk/old/Backups.backupdb/Howard's iMac/2017-05-02-181524/"
7. Why so complicated?
Time Machine backups are ingenious, but basically work around all sorts of problems for which the Mac Extended (HFS+) file system and other components were not designed. Hard links, in particular, allow backups to work, but bring their own problems. As most backups after the first consist mainly of hard links rather than actual files, they push HFS+ to its limits, sometimes a bit beyond.
All this should change later in 2017, with the release of macOS 10.13 and its new APFS file system. This is designed with snapshots built into it, which should form the basis of a replacement for the current Time Machine backup system.
There will be some issues with APFS, though. It does not currently support hard links, so there may be no option to move old Time Machine backups across to new APFS volumes. APFS will initially, at least, only be available on local storage (not NAS) which is specifically initialised for the new file system. But APFS should finally see an end to Apple’s most successful kludge yet.
