
The best way to find out about anything new is to try it. Reading the developer information about Apple’s new file system APFS is all very useful, and running it on your iOS devices may be helpful, but there is nothing better than having a live APFS volume to try out. As I happened to have an unused 750 GB USB3 SSD to hand, I thought that might be a good place to start.
For various reasons, I have now set up and destroyed my APFS volume several times, so the following account is a summary of those experiences. It will hopefully spare you some of the learning curve.
The simple way to start this process is to initialise the disk using Disk Utility, and partition it to have two volumes: a small one for Journalled HFS+, and a large untitled one, also in HFS+, which will be converted to APFS. Currently you have to use a minimum of two volumes, because in order to use the APFS tools, the volume which you are going to use must be unmounted, but the whole disk must still be mounted. You cannot do that with a single volume.
Once partitioned, select the target volume in Disk Utility, and click on the Info tool. Note the BSD device node given near the top there: you will need that in the commands you will use in Terminal. Then quit Disk Utility, and in Finder eject just that volume. When the Finder invites you to eject all the volumes and the whole disk, don’t do that – just the single target volume.
Given that the destination volume is already formatted in HFS+, you can convert that to APFS using the command
apfs_hfs_convert -v -i /dev/disk4s3
assuming that your target partition’s BSD device node was given as disk4s3. If you are worried about getting this correct, you can list all the mounted volumes using the command
ls /dev/disk*
Assuming that your APFS drive was mounted last, it should have the highest parent disk number, here disk4, and your target volume is likely to be the highest numbered among the disk4s… nodes. If you’re still uncertain, check with Disk Utility again.
The -i option makes this case-insensitive, which is the variant which now appears the more likely choice for use with macOS 10.13. If you want to try the case-sensitive variant, omit that option. However, at present that option makes no difference to the final setting of the APFS volume created, so it is actually not of any consequence at this stage. I’m still trying to understand that one!
The tool will then issue its dire warnings of doom and disaster, with words like
WARNING: You are using a pre-release version of the Apple File System called

APFS which is meant for evaluation and development purposes only. Files

stored on this volume may not be accessible in future releases of OS X.
You should back up all of your data before using APFS and regularly back up

data while using APFS, including before upgrading to future releases of OS X.
Continue? [y/N]
If you’re still feeling up to it, type y and press Enter to proceed.
Because we used the -v option to make responses verbose, you’ll now see a running commentary on the conversion process. With an empty volume, this should be quick, and you’ll then see the word Done, followed by the time taken for the conversion. Raise a slight cheer at this point, as your journey has started.
The other way to do this is not to convert that volume, but just to install a new APFS file system there, using a command like
newfs_apfs -v burble disk4s3
where burble is the name to be given to your new disk. Note that here you don’t give the whole path /dev/disk4s3, just the node name disk4s3. There is also an option -i for this command, but that too doesn’t actually seem to affect the case-sensitivity of the APFS volume which will eventually be created.
If you now look for APFS containers using the command
diskutil apfs list
you will see that none are found.
It is not inconceivable that, at this stage, a different command such as mount_apfs might be able to mount the created APFS volume which should have resulted from either method. However I have not got that to work here. So my next step is to create an APFS container, using the command
diskutil apfs createContainer disk4s3
This should result in a short series of lines like
Started APFS operation on disk4s3 Untitled

Creating a new empty APFS Container

Unmounting Volumes

Switching disk4s3 to APFS

Creating APFS Container

Created new APFS Container disk5

New APFS disk: disk5

Finished APFS operation on disk4s3 Untitled
Now you have an APFS ‘container’ which is ready at disk5. The final task is to add a volume to it, using a command such as
diskutil apfs addVolume disk5 'Case-insensitive APFS' Fixed
which creates a new case-insensitive volume named Fixed and mounts it on your Desktop, with another little stream of lines like
Exporting new unencrypted APFS (Case-insensitive) Volume "Fixed" from APFS Container Reference disk5

Started APFS operation

Preparing to add APFS Volume to APFS Container disk5

Creating APFS Volume

Created new APFS Volume disk5s2

Mounting APFS Volume

New APFS disk: disk5s2

Finished APFS operation
For a case-sensitive volume, use something like
diskutil apfs addVolume disk5 APFS Fixed
and you should then see
Exporting new unencrypted APFS Volume "Fixed" from APFS Container Reference disk5

Started APFS operation

Preparing to add APFS Volume to APFS Container disk5

Creating APFS Volume

Created new APFS Volume disk5s1

Mounting APFS Volume

New APFS disk: disk5s1

Finished APFS operation
For reference, the createContainer verb has the following help info:
Usage: diskutil apfs createContainer <disk>

where <disk> = MountPoint|DiskIdentifier|DeviceNode

Create an empty APFS Container. You can then add APFS Volumes with the

diskutil apfs addVolume verb.

Ownership of any affected disks is required.

Example: diskutil apfs createContainer disk0s2
The addVolume verb has the following help info:
Usage: diskutil apfs addVolume <containerRefDisk> <fs> <name>

[-reserve <reserveSize>] [-quota <quotaSize>]

[-en[crypt]ion | -[eff]aceable] [-role <roles>]

[-nomount | -mountpoint <mountPoint>]

where <containerRefDisk> = Container Reference DiskIdentifier

<fs> = an APFS personality: specify "APFS"

<name> = a volume name

<reserveSize> = optional minimum guaranteed file data capacity

<quotaSize> = optional maximum file data usage limit

-encryption = enable per-file encryption

-effaceable = enable O(1)-time cryptographic erase

<roles> = one or more of 0|B|U|S|R|V; see changeVolumeRole

<mountPoint> = a custom mount point (path must already exist)

Add a new APFS Volume to an existing APFS Container.

Ownership of the affected disks is required.

Example: diskutil apfs addVolume disk5 APFS VirtualSpaceVolume

diskutil apfs addVolume disk5 APFS Fixed -quota 10g -reserve 10g

diskutil apfs addVolume disk5 APFS QuickErasableShared -eff

diskutil apfs addVolume disk5 APFS CryptoLimited -crypt -quota 5g

diskutil apfs addVolume disk5 APFS System -role S
Note that usage summary is currently incorrect: for the APFS personality, you can now specify either “APFS” or “Case-insensitive APFS” depending on which variant you want.
Additional terse docs are in man diskutil, of course.
What do you get at the end of this? Disk Utility now recognises the APFS container as a disk.

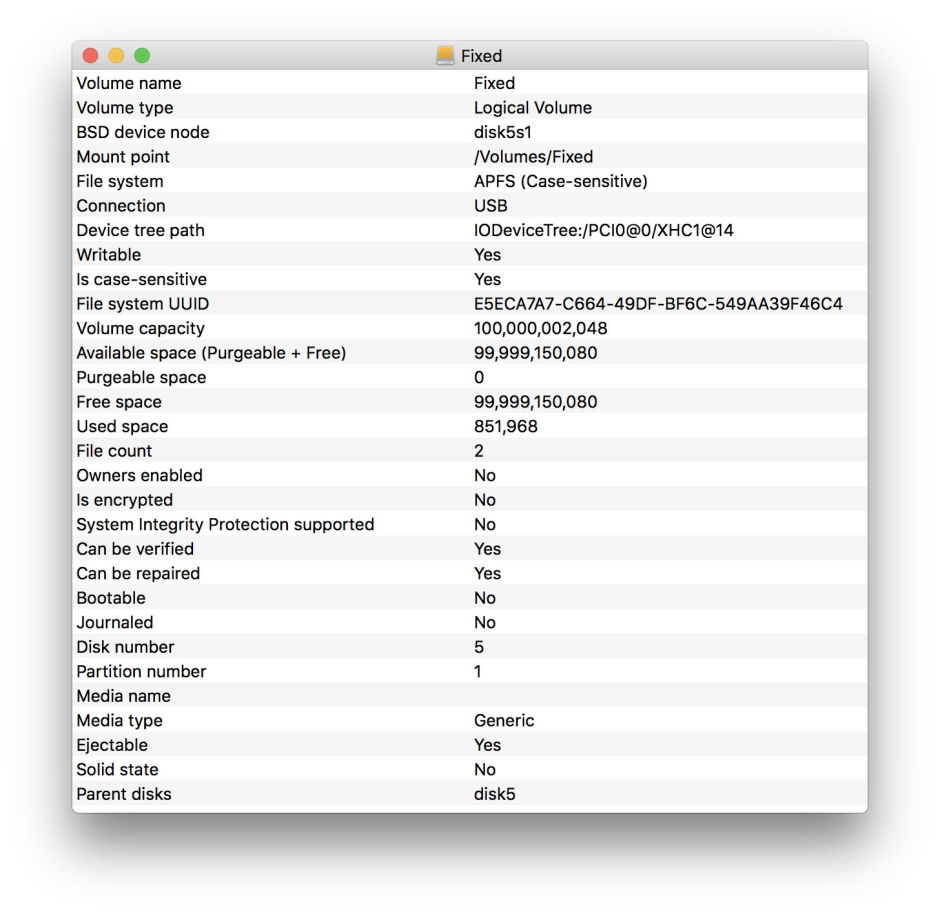
It also recognises the APFS volume as a volume, although currently Disk Utility does not report the case-sensitivity status correctly, claiming that all APFS volumes are case-sensitive.
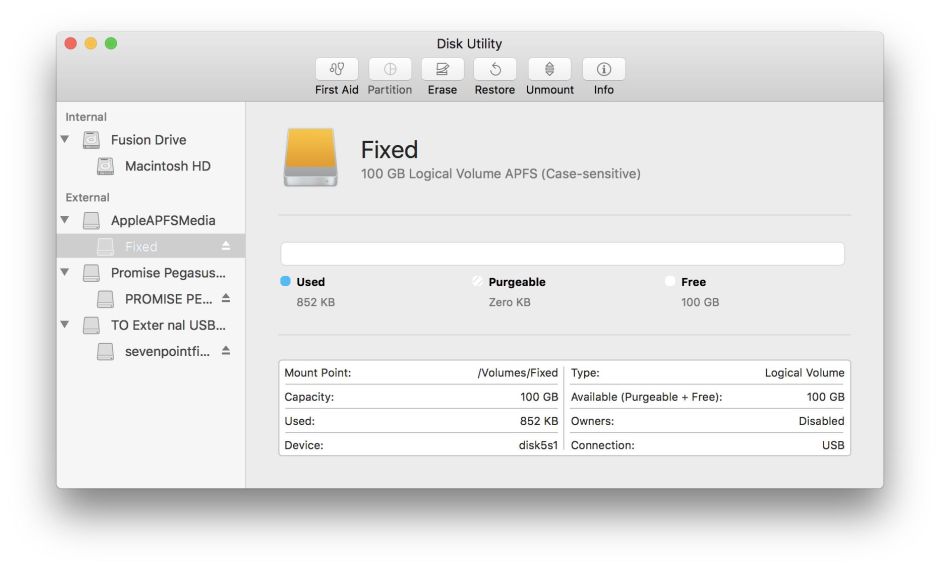
The info for the volume looks sensible, although again case-sensitivity is reported incorrectly.
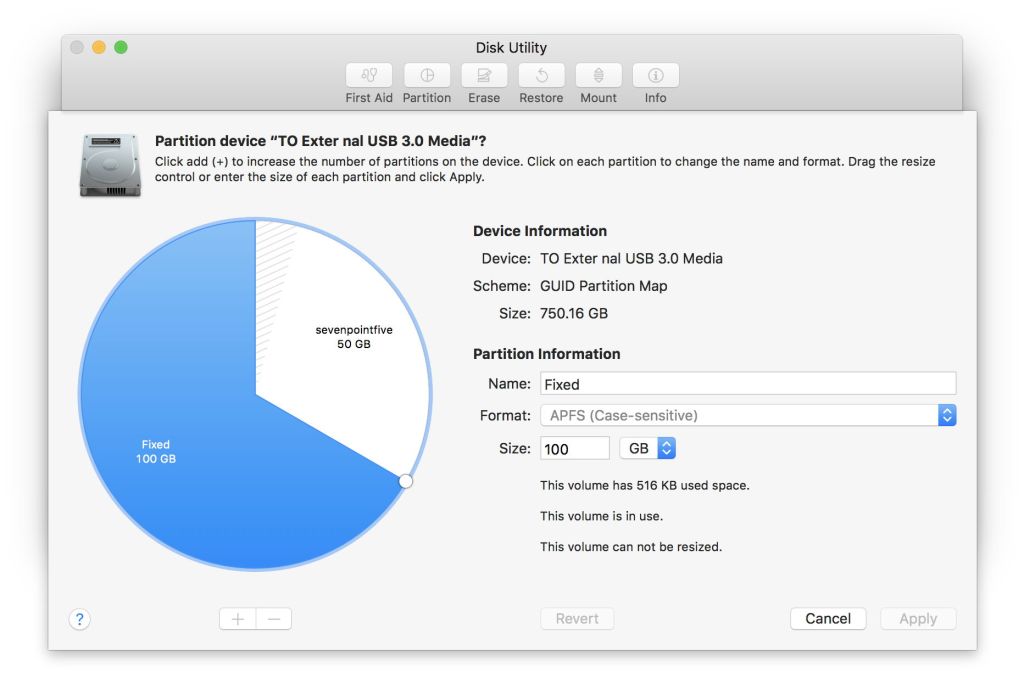
Even the partition map looks good (this was from an earlier 100 GB APFS volume, not the much larger one that I made later). Once again, the case-sensitivity reported here is incorrect.

Currently, Disk Utility cannot actually do anything directly with APFS disks or volumes, which is why you have to use Terminal still.
Happy experimenting: you can now start exploring the normalisation of file and folder names, perhaps!
