
Yesterday I released the first beta of my log browser app, Consolation. I promised there that I would explain how it works, in other words walk you through the code.
Xcode bug
First, though, I have another warning about a bug in Xcode 8.2.1: its Interface Builder throws horizontal lines around. If you look at Consolation’s window, you’ll notice that there are three horizontal lines, used to divide its controls into sections. Every time that I open my Consolation project, those lines appear in different locations.
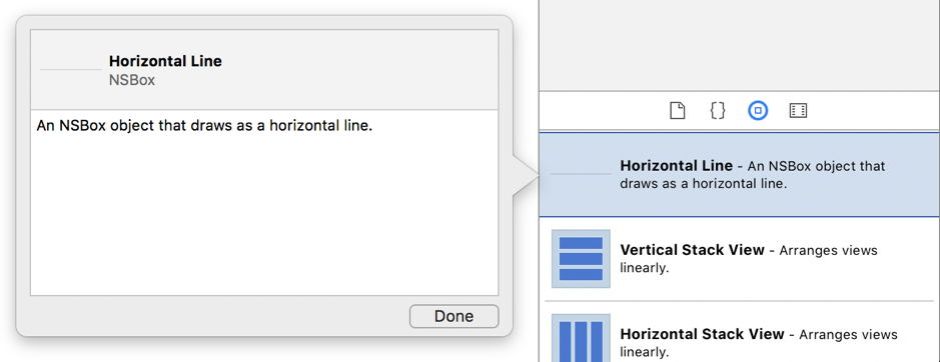
It’s not a major issue, but it means that every time I go back to work on Consolation, I have to replace those three horizontal lines. Hopefully the next version of Xcode might fix that.
Code walkthrough
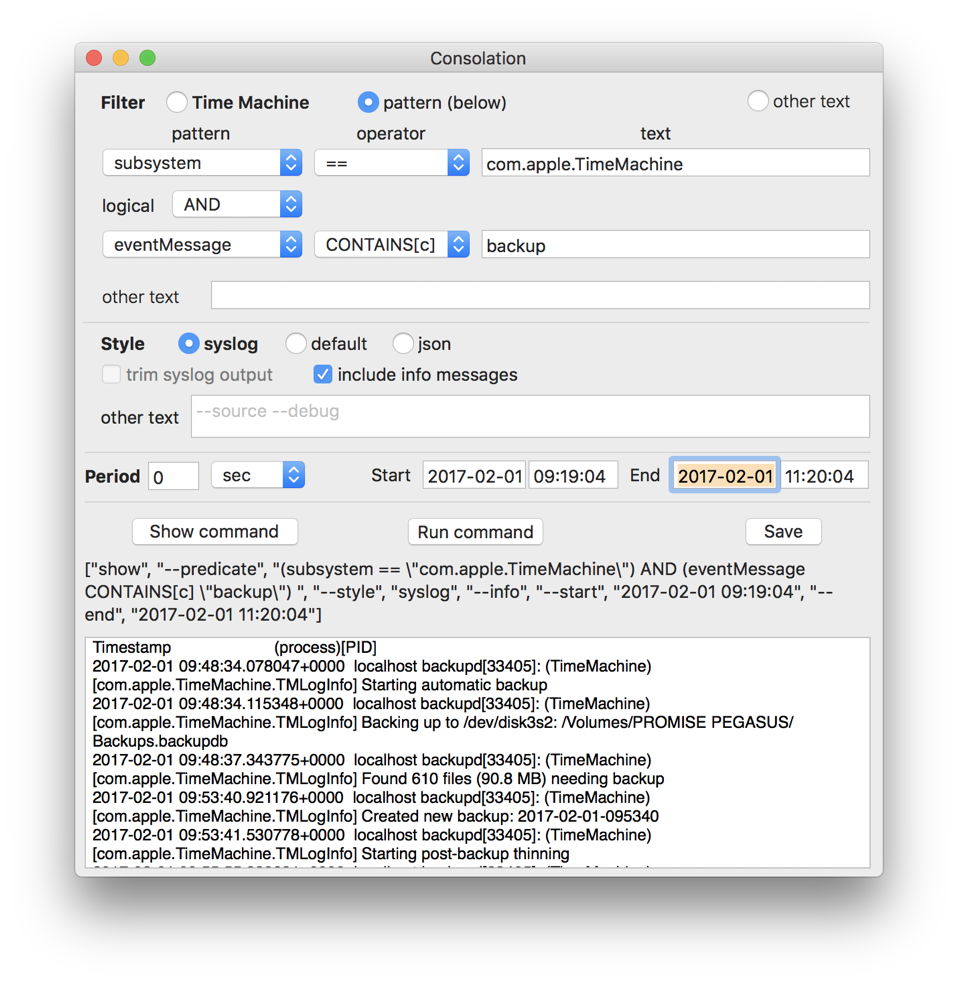
Consolation is a good example of what we used to accomplish in AppleScript, which is to wrap a Terminal command in an accessible user interface so that ordinary users can use the command to do what Apple’s apps fail to provide us with. The command at the heart, log, is particularly complex even for those happy to hack in Terminal.
The interface therefore provides a suite of controls, which are then converted into the various options passed with the basic command. Its standard output then contains the required log extracts, which are displayed in a scrolling panel on the same window. Apart from one function in my scripting library (to display an error alert), the entire code is in the View Controller source file. I have not yet factored it into function calls, so it reads linearly, which should make it easier to follow here.
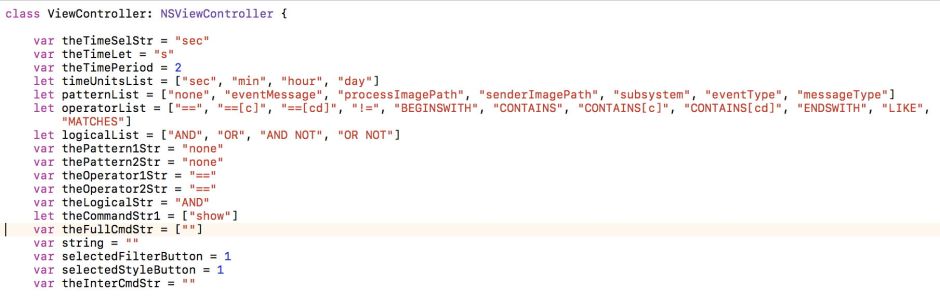
Initially I set up the variables and constants to be used. Most of these are fairly trivial, and their use will become apparent in the code, but it’s worth drawing attention to the string lists which provide entries in the popup menus. These make it very easy to use quite extensive menus where needed, particularly as the strings are those which are used to build the command options and arguments.
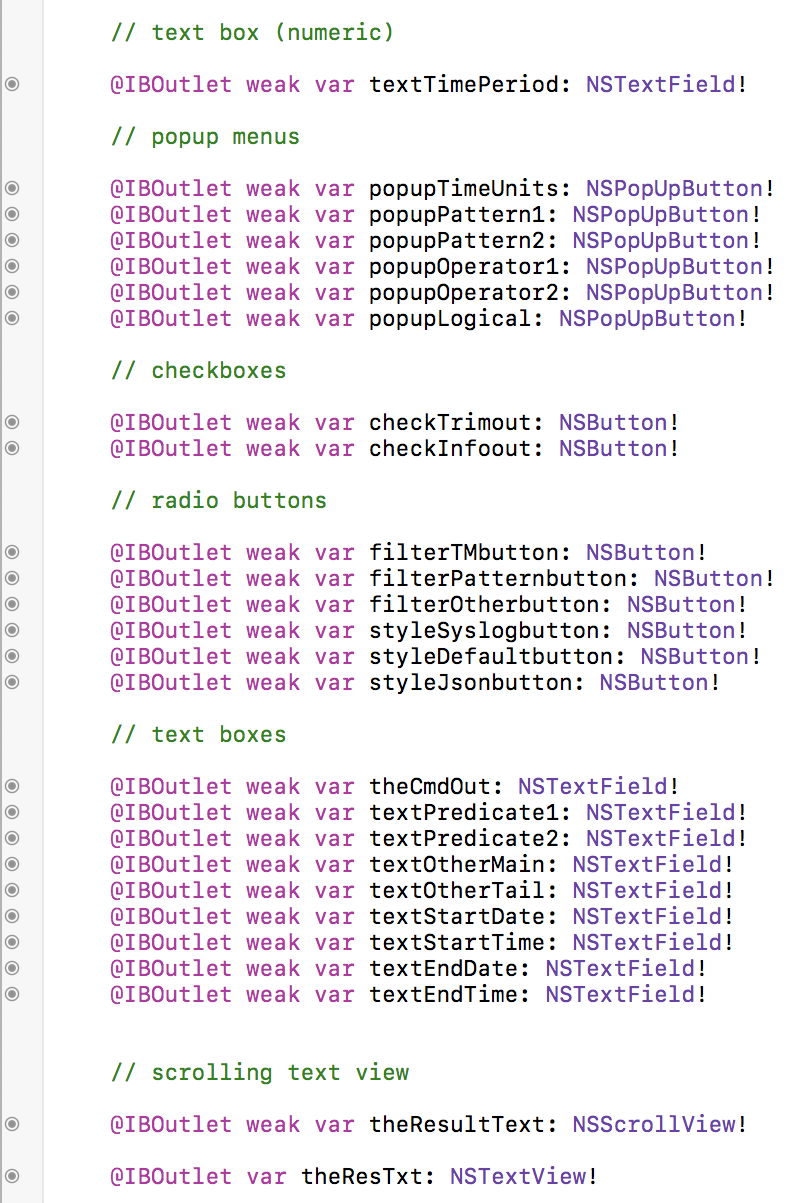
The next section contains the Outlets for all the interface items which need to be accessed, and are grouped here by the type of control. The filled circles in the left margin indicate that each has been connected to the control in the Interface Builder. A bit fiddly to learn to use, this is a good system which makes interface design a breeze.
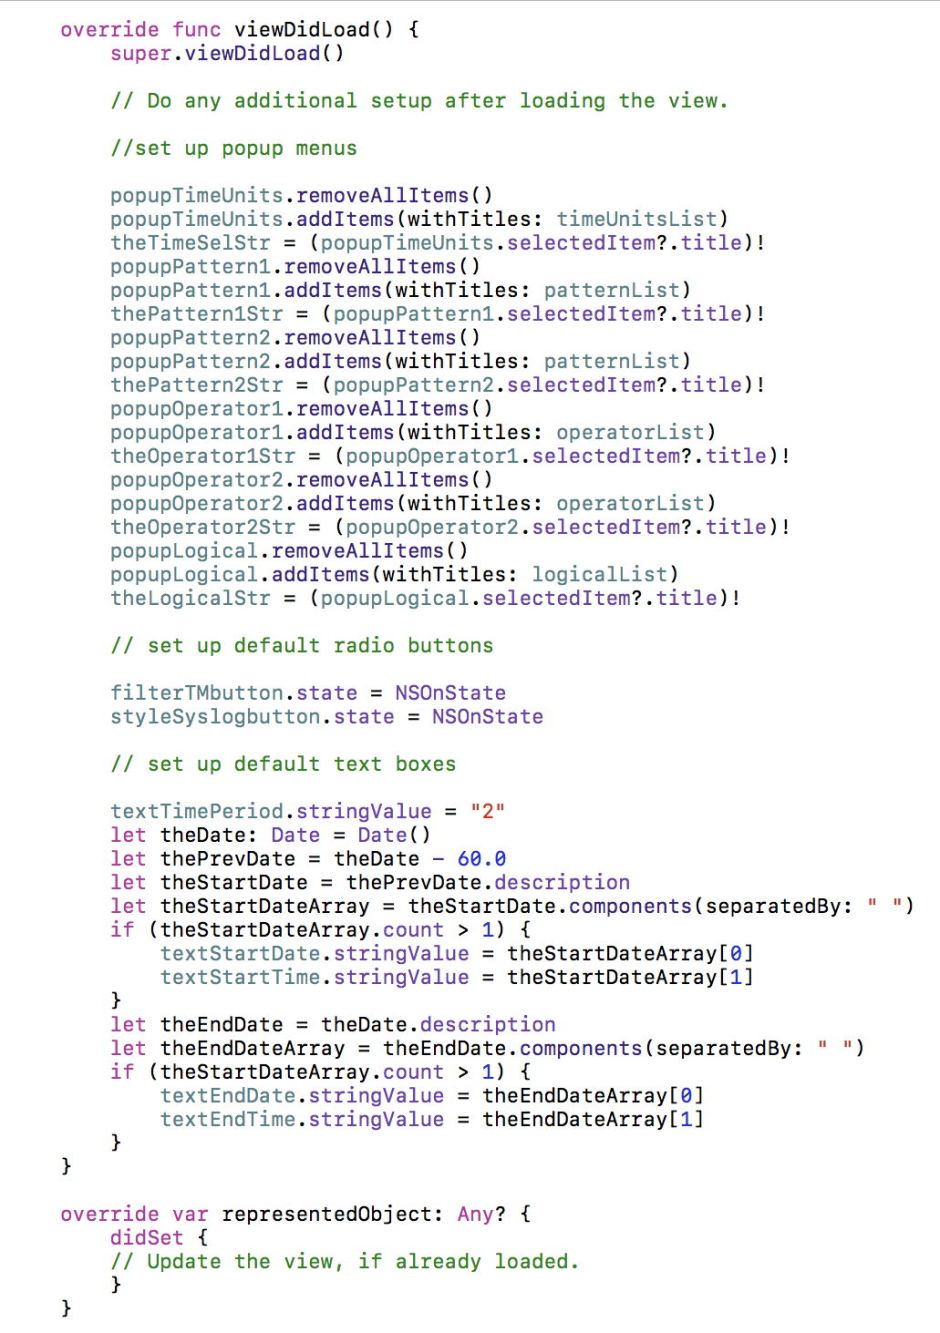
Next in the code comes the additional setup required once the view has loaded. The first block sets up the popup menus, first by removing all existing items, then adding those we need using the lists of strings defined above, and setting a variable with the title of the currently-selected item. Then we set the state of the two radio buttons to the default selections.
Setting the date and time text boxes is a bit more intricate. I want those to hold the current date and time, with the start time one minute ago. So I first get the system date and time, which is readily obtained as a string of the form
YYYY-MM-DD HH:MM:SS [optional]
where some systems seem to provide a third block of location-dependent information.
The code then separates this string into a string array by splitting it at the spaces. This provides the date component in the first item in the array, the time in the second, and anything else is ignored in the third.
The final code there is left in its default form.
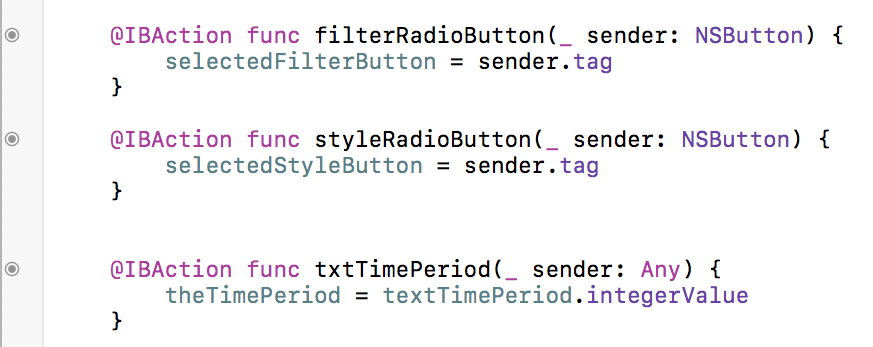
We move on now to the simpler Actions, which make the radio buttons work as a group, and the third extracts the integer value of the numeric text box. This is a really useful feature which not only saves us having to perform an explicit string to integer conversion, but handles many entry errors too.

The heavy lifting is left to the Action function for the button which runs the command. This works through each of the controls in the interface, converting their current settings into the options and arguments which have to be passed when calling the command. The array of strings which is passed as the arguments starts off with just the basic verb show, and it’s steadily added to through the series of conditionals.
Once that is complete, it is just a matter of creating the process which will run the command, setting it up with its arguments and output pipe to collect the log excerpt requested, and running it. Error handling here is quite basic and needs improvement to pass on error codes to the user.
Once the command completes, the standard output is converted to a string, then inserted into the scrolling text panel as an attributed string, although it has no attributes, of course.
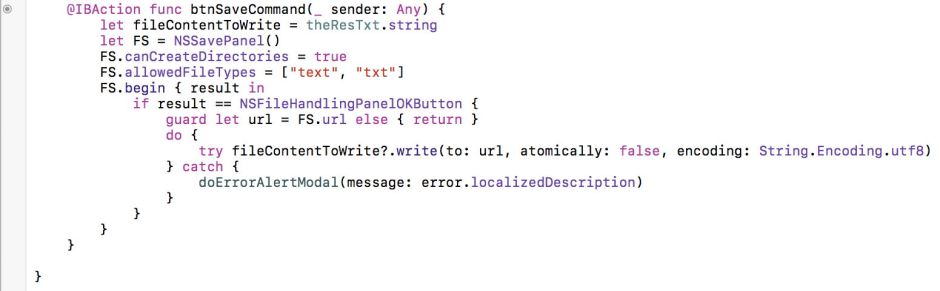
The other button, which saves the text currently in the scrolling text panel, is thankfully much simpler. It first obtains the string representation of that text, then calls the File Save dialog. If that is OKed, writing the string out to the file is very simple.

The third button, Show command, is there primarily for debugging, but I am inclined to tidy it up and retain it for users. It uses exactly the same code to construct the command arguments as the heavy lifting code above, but does not set a process up at the end, or run it: it just displays the arguments as an array of strings.
I will shortly be updating my Swift code snippets and help pages with additional material I have learned here. I hope that you find this interesting, and that it perhaps even inspires existing scripters to have a go with Swift 3. I think that I am starting to get the hang of it now, and to enjoy it.
