

It is time now to put the ideas that I have discussed in the previous articles into practice. How could you take a Swift script which you have developed and tested in a playground and deploy it? The answer, for now, depends on whether the app requires any sort of human interface. I’ll look at the faceless option first, because of its simplicity and elegance.
Running faceless Swift without Xcode
Your deployment Mac will need the Xcode command line tools installed, specifically /usr/bin/swift and its associates, to use this neat solution. Check this in Terminal with
ls /usr/bin
Open Xcode, and create a new Command Line project for macOS, using Swift as the language. This will create a new project window, with the file main.swift open. That is where you’re going to create your Swift applet.


Write some code, in my case
#!/usr/bin/swift

import Foundation

var str = "Hello, playground"

let path = "/usr/bin/say"

let task = Process.launchedProcess(launchPath: path, arguments: [str])

task.waitUntilExit()
which just speaks the string. This must have the shebang/hashbang line at the start, which specifies that it is to be processed using the swift command line tool. You can only include this in the main.swift file in Xcode.

Save that file. You then need to cd in Terminal into the folder containing main.swift, which Xcode helpfully tells you as the Full Path in the right-hand section of the window. Copy the folder path from there, and cd to that in Terminal, e.g.
cd /Users/hoakley/Documents/Xcode/TestScript1/TestScript1/
List the contents using ls, and you should see your source file main.swift. Make this executable using
chmod +x main.swift
If you now ls -la, you should see something like
drwxr-xr-x 3 hoakley staff 102 25 Nov 21:20 .

drwxr-xr-x 4 hoakley staff 136 25 Nov 21:17 ..

-rwxr-xr-x@ 1 hoakley staff 199 25 Nov 21:20 main.swift
confirming it is executable.
All you have to do now is run that file,
./main.swift
and your Mac should talk back, then return you to the command line.
Thanks to Hector Matos for pointing the way.
Running code from a playground with a graphic interface
The simplest way to do this is to use Xcode to build the interface, and deploy your playground code as Interface Builder Action(s). The following example is based in part on the guidance and example given in the Scripting OS X blog, as well as the books which I have recommended, and is current for Xcode 8.1.
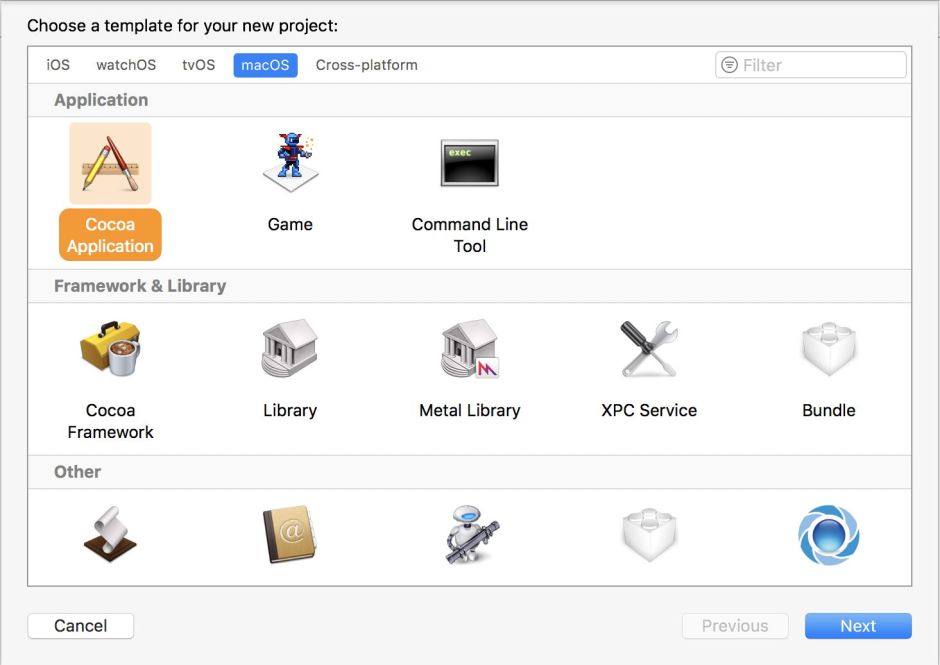
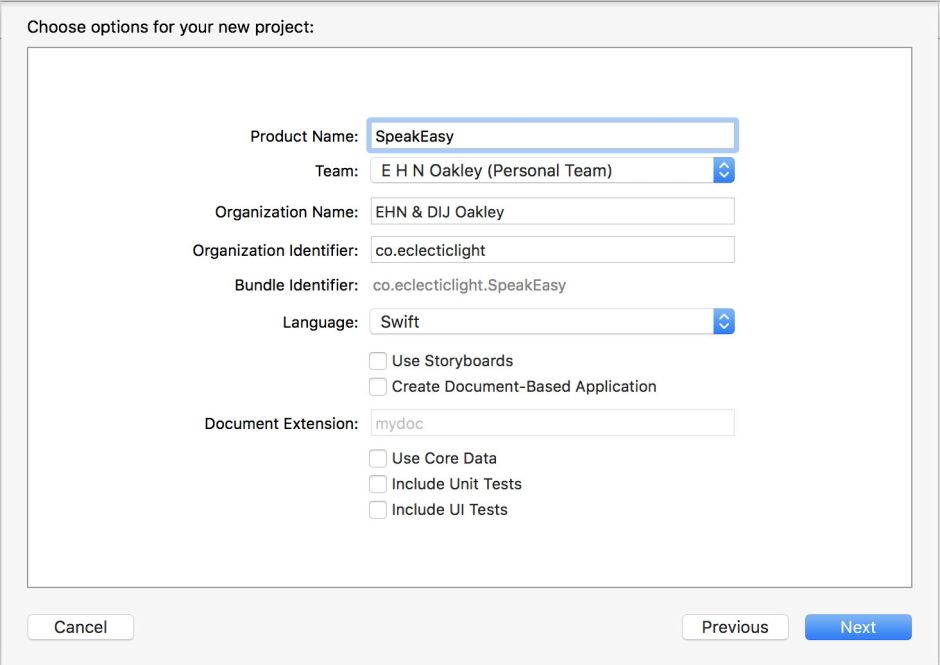
Open Xcode, and create a new Cocoa Application for macOS, using Swift as the language.
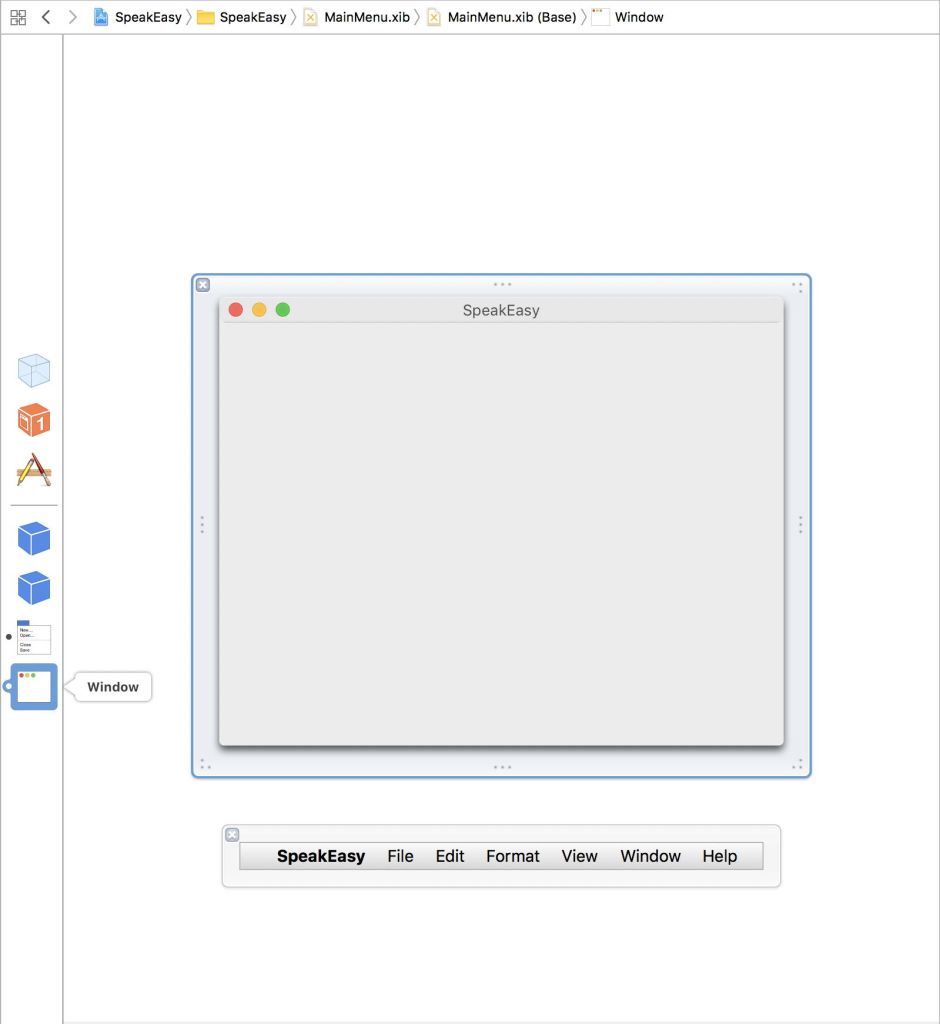
This will create a new project window, in which you should select the MainMenu.xib item at the left. This should show you a menu bar and nothing else. In the panel of GUI objects just to the left of the panel containing the menu bar, the lowest icon shows a window. Click on that to add a window to your project.
With the window selected, click on the icon of a small square inside a circle, at the lower right of the Xcode window, to display the list of objects which you can add. Locate the Push Button item, drag it over to your window, and drop it where you want the button to be.

Double-click the text in that button and edit it to read Speak. Then return to the list of objects, locate the Text Field item and drag that across and add it to the window, placing it and resizing as you wish.

You now need to connect those two objects to your AppDelegate.swift source, to provide an outlet for the text typed in the Text Field, and an action for the Push Button. To do this, the source code of the AppDelegate.swift must be displayed in the editor window. This appears in an Assistant Editor view: an easy way to expose it is to click and hold on the double-circle tool (top right), and select Assistant Editors on Bottom. The source code should then appear in a new view below the window you have just been working in.
In the upper view showing the window, select the Text Field, and Control-drag to drop the other end of the blue line which appears, into the upper gap (before the two function definitions) in your source code below.
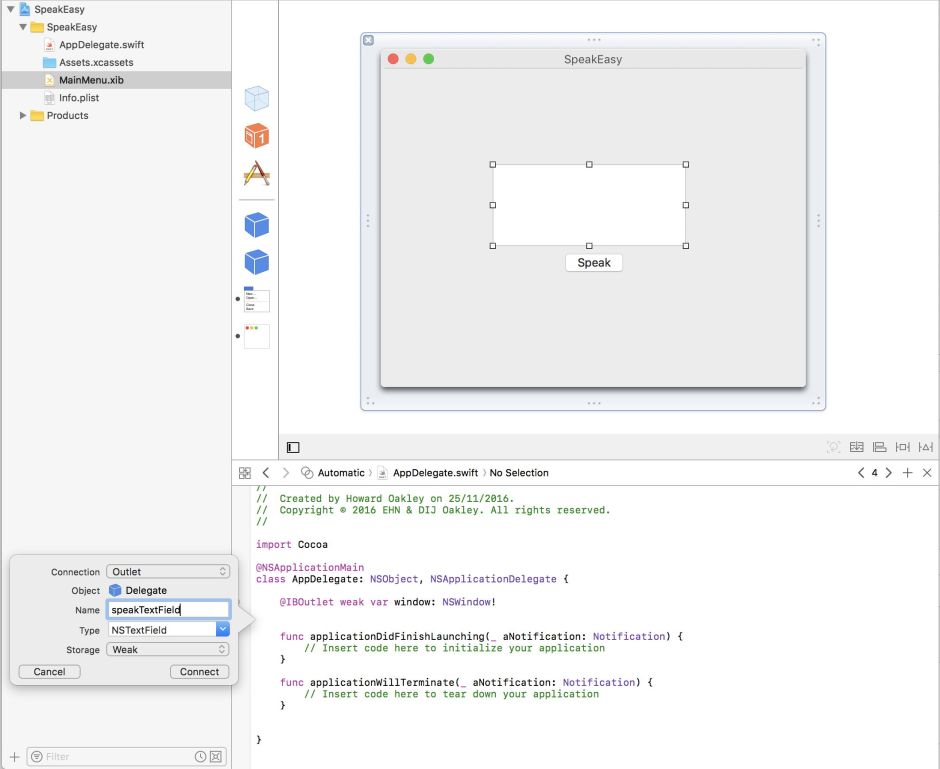
A connection editor then pops up. Give the connection the name speakTextField, and click on its Connect button. This inserts the line
@IBOutlet weak var speakTextField: NSTextField!
into the AppDelegate.swift source.

Control-drag from the Push Button down to the blank area in the source code prior to the final }, to add the Action connection for that button. In the popup, change the Connection to Action, give it the name speak, and the type NSButton, then click on Connect. It will insert an empty @IBAction into the AppDelegate.swift source. This is where the code from your Swift playground is inserted. Insert the code and edit it to read:
 let path = "/usr/bin/say"

let textToSpeak = speakTextField.stringValue

let arguments = [textToSpeak]

let task = Process.launchedProcess(launchPath: path, arguments: arguments)

task.waitUntilExit()

Your completed Xcode editor window should then look something like the above, with the complete source code for AppDelegate.swift as below. Don’t forget to import both Cocoa and Foundation, just as you did in the playground.

When you click the Run button at the top left (next to the maximise button of the window), Xcode should compile and automatically run your app.
