

A lot of users who have upgraded to El Capitan have noticed poor performance – on Macs which never used to display the spinning beachball cursor, it is now a frequent companion. Apps which used to load briskly and run like the wind seem to be struggling, slow to load, and pausing at times.
It is easy to blame El Capitan, but the problem, and its resolution, is more complex and more deep-seated than that.
Going faster
Before El Capitan, accelerating OS X and its apps was a matter of throwing plenty of memory and loads of free hard disk space at them. Ample memory meant that apps did not have to keep much cached to disk, and you could happily run many services and apps at once, without any significant performance hit. Plenty of free disk space allowed OS X to write its secret cache files to large chunks of contiguous disk space, so anything that did end up cached to disk was quick to access.
Use the same plan with El Capitan, and it no longer seems sufficient: even common, everyday actions seem to take longer, unless you are running OS X and major apps from a solid-state disk (SSD), or one of Apple’s Fusion Drives, which incorporates an SSD with a hard disk.
So if El Capitan is sluggish and you are tired of the beachball being a constant companion, the biggest single improvement which you can make is to switch to a Mac with a Fusion Drive, or SSD.
SSD on a (sensible) budget
We would all love to be able to leave hard drives behind, and just to use SSDs. The snag is that their storage remains expensive: a 1 TB hard disk is around £50, but as an SSD it will cost you about £500.
Some of that investment in an SSD is more effective than the rest. It is an expensive overhead to store infrequently-accessed documents and apps on an SSD, and far more efficient to keep those on a hard disk, where speed of access is of little importance. So if you want a lot of storage, the ideal combination is an SSD, on which you keep OS X, often-used apps, and key documents, and a larger hard drive for the rest. And that is exactly what Apple’s Fusion Drive is: hybrid storage.
How it works
In most cases, when you buy a Mac with a Fusion Drive, it comes with a 120/128 GB SSD and a hard drive of 1-3 TB. In the latest iMacs, their 1 TB Fusion drives may only have 24 GB SSDs, which is still sufficient to provide good acceleration, if you are not a heavy user of large apps.
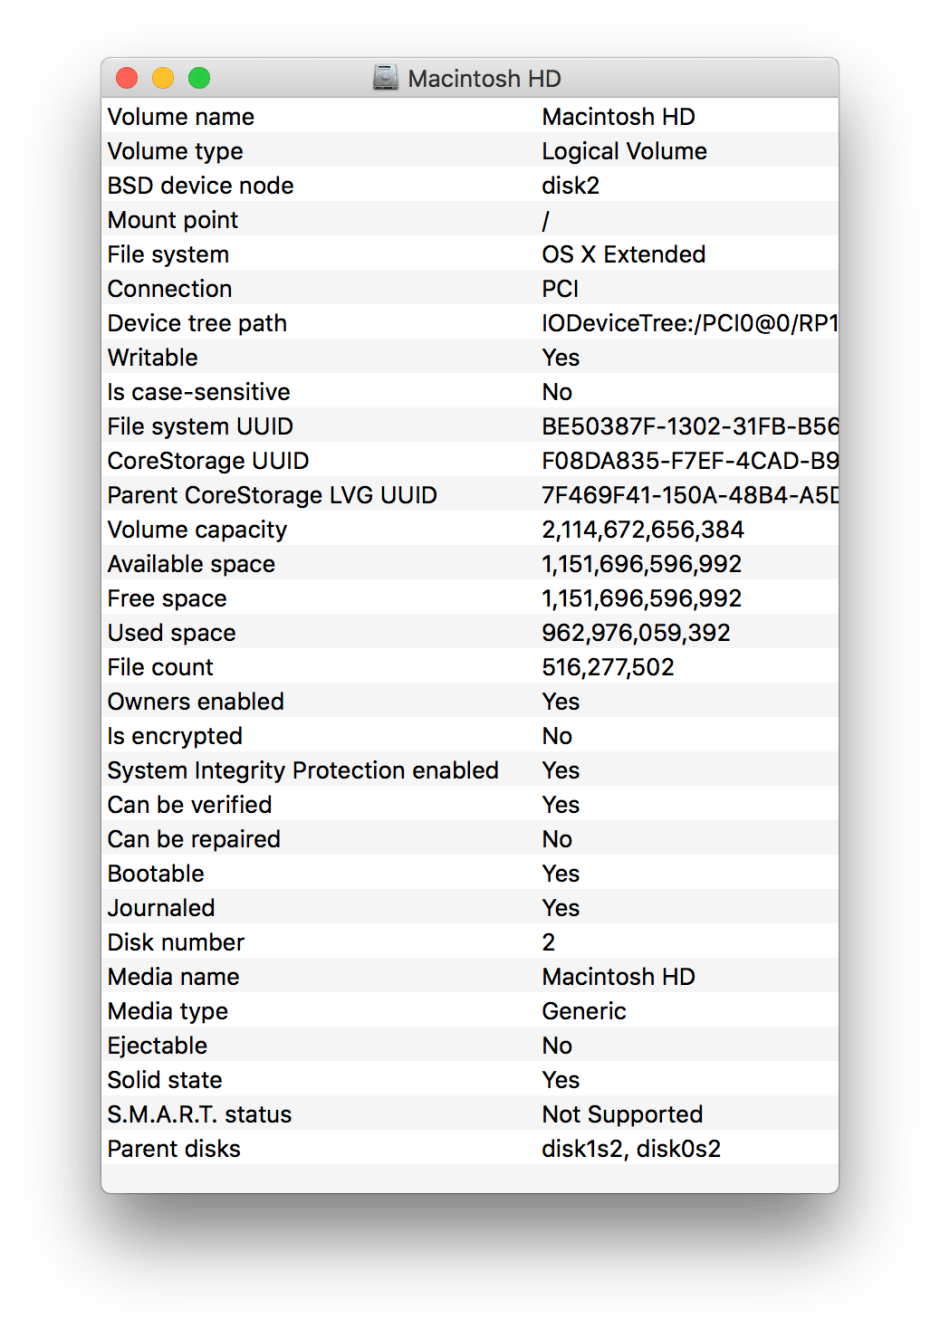
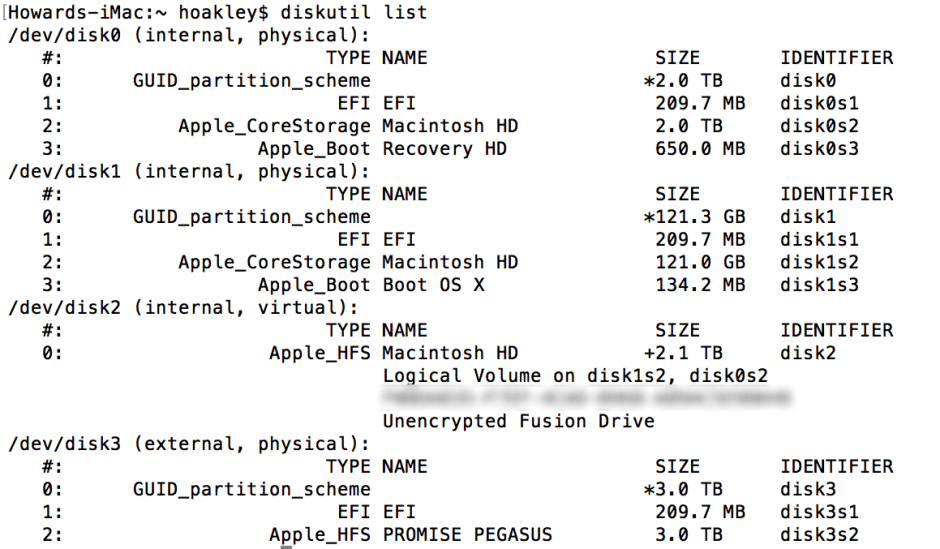
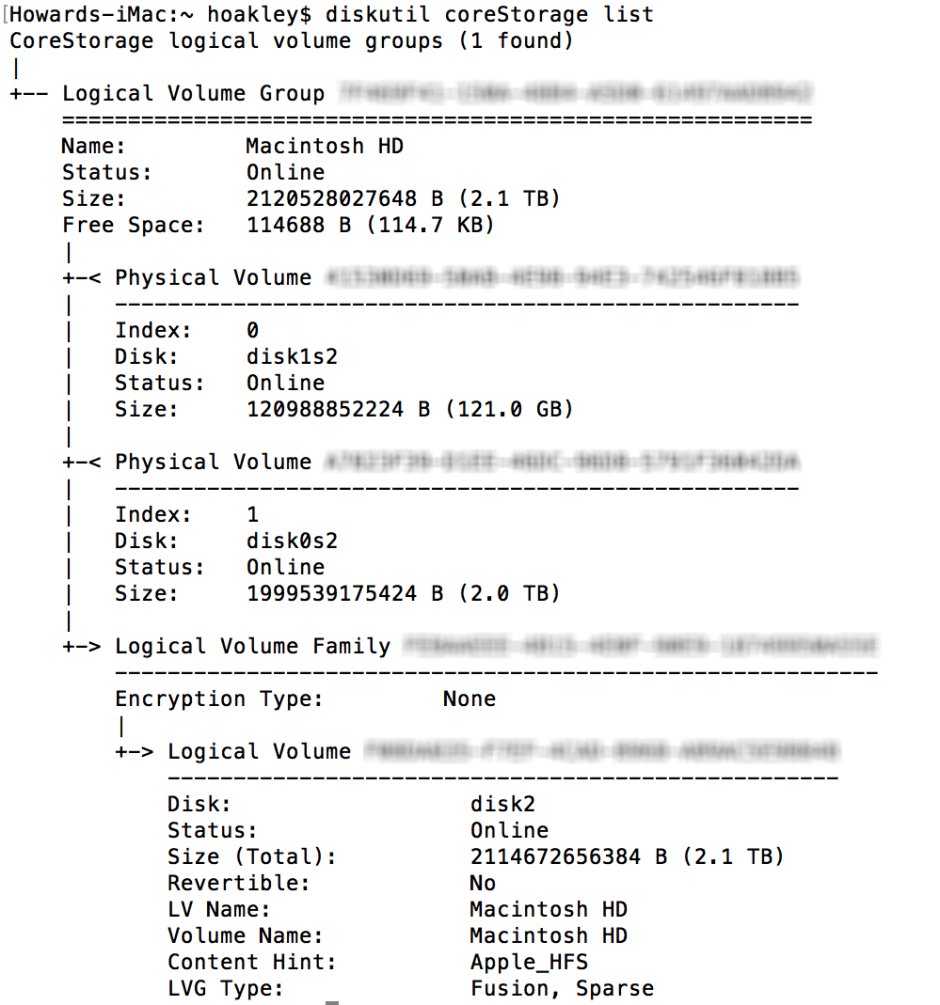
 OS X then sees the Fusion Drive not as two separate disks, but a single storage device, using the relatively new Core Storage feature. You can see this if you open Disk Utility on a Mac with a Fusion Drive: it is reported as ‘CoreStorage Logical Volume Group’, and the space on it is given as the total capacities of the SSD and hard drive. If you are unsure of how big an SSD your Fusion Drive has, this is a quick method of finding out. The two drives are also reported separately in the SATA/SATA Express entry in the System Information app.
Like some other advanced storage management systems – the ZFS file system is similar in this respect – OS X can now merge the SSD and hard drive into a single block device managed by OS X. Apps, including the Finder, then see them as one drive, and read and write from them without knowing whether those data are being stored on the SSD or hard drive part. It is left to OS X to determine what is actually stored where.
The SSD is used to store the following:
- a small write buffer, typically of 4 GB, for files being written to the hard drive,
- most, perhaps all, of OS X,
- apps and documents which are used most frequently; OS X monitors this constantly, and moves files in chunks of 128 KB at a time when system load is light.
 Care and maintenance
You can also add a second partition on an internal hard drive to an existing Fusion Drive, but cannot add those on external storage devices, even when connected via Thunderbolt. To do this, you need to repartition the Fusion Drive, so it is best performed when you have started up from another drive such as a USB memory stick or external disk.
Similarly, you can split the hard drive in a Fusion Drive into two partitions (volumes), for example so that one will be a Boot Camp Windows partition. In that case you should use Boot Camp Assistant to create the Windows partition, rather than Disk Utility.
If you reset the NVRAM (formerly PRAM), this removes the startup drive setting, and may result in performance problems with a Fusion Drive. You should correct this by selecting the Fusion Drive as the startup disk in the Startup Disk pane in System Preferences, then restarting your Mac.
Apple’s technical note about Fusion Drives is here.
Make your own Fusion Drive
 If Fusion Drives are so good, why doesn’t Apple, or third parties, offer them as a retrofit?
For Apple, it is one of the strong selling points of a new Mac; if it were to offer upgrades for older pre-Fusion Drive models, it would undermine its market for new Macs. Third parties, such as Seagate, do offer hybrid drives for Macs which can rival a Fusion Drive for performance. But they are aimed mainly at laptop users, and SSD sizes are usually much smaller than in Apple’s Fusion Drives.
If your Mac has an internal SSD and internal hard drive, you may be able to turn them into the functional equivalent of a Fusion Drive for no added cost. The process of doing so is detailed by Jesus Vigo on TechRepublic, and involves Terminal commands using the diskutil command shell sibling of the Disk Utility app. The key command creates the CoreStorage logical volume group (LVG) along the lines of
diskutil coreStorage create "Macintosh HD" /dev/disk1 /dev/disk0
which returns the Core Storage LVG UUID, which you must record and enter in the following command to create the logical volume, along the lines of
diskutil coreStorage createVolume F0FDA13D-B7E3-5ACD-C668-BC5AC5E3CA48 jhfs+ "Macintosh HD" 100%
where F0FDA13D-B7E3-5ACD-C668-BC5AC5E3CA48 is the Core Storage LVG UUID returned by the previous command to create it.
Full details are available, as ever, in the man pages for diskutil, accessed by typing
man diskutil
into Terminal.
 Another more generally useful shell command is
diskutil coreStorage info
which delivers information about any Fusion Drive in the form of a nested text list.
