

So the FLIR One™ infra-red camera for iPhone and iPad is an amazing bargain. But how does it work, and how well does it really work?
Principles of Infra-red Thermography
Our eyes and optical devices such as cameras detect visible light, with wavelengths between 380 and 780 nm. Bees, birds, and some other species can also see into the ultraviolet end of the spectrum, to around 300 nm, but few species can see much into the infra-red (IR) beyond 780 nm, and even they cannot see far into it.
Most night vision devices operate in the near-IR wavelengths, of 750 to 1400 nm, but the FLIR One™, as with most thermography cameras, captures long-IR radiation of 8000 to 15000 nm (8-15 µm). This is the bandwidth of most of the heat emitted by radiation from us and the world around us.
The basic law governing IR radiation is the Stefan-Boltzmann Law, which states that the power radiated from a ‘black body’ is proportional to the fourth power (^4) of the temperature of that body in degrees Kelvin (˚C + 273). As objects on earth are not perfect ‘black bodies’, in practice this has an added factor called the emissivity. Emissivity of a ‘black body’ is 1.0, and values for ordinary objects are between about 0.1 and 0.99.
An IR camera thus uses special glass which is transparent to long-IR, and a special sensor, which detects long-IR instead of light. The firmware then converts the IR detected into temperature using physical principles, and expresses the temperatures in the image as different colours.
What you see as the colour or temperature of a surface is a bit more complex than just its IR emission, as there will also be some reflected IR. So the firmware makes assumptions – which you can adjust – over the IR reflectivity and emissivity of surfaces, the fudge factor used to convert from power radiated into temperature.
Surfaces such as optically shiny metal are also more IR reflective. Some surfaces have low emissivity, which can alter their appearance in an IR image. One common problem which has tripped up many users of IR thermography is that water, as in fine beads of sweat on the skin, dew, or rain, also has different characteristics, and will affect the image.
What your FLIR One™ IR camera does
Amazingly for its size and price, the FLIR One™ is a proper IR camera, albeit with a low resolution. Even more so than in optical camera sensors (‘CCDs’), the cost of IR sensors rises considerably with their resolution.
If you wanted an IR camera which generated images closer to the resolution of your iPhone’s display, then you would be looking to pay something on the wrong side of £10,000. If you wanted one approaching 1 Mpixel – yes, pathetic by comparison with even a cheap in-phone camera – then you are are at the top end of what is available off-the-shelf.
So its 160 x 120 pixel resolution is actually excellent value.
 But the images which you see are not heavily pixellated as you might expect of such low resolution, and they contain fine details. This is accomplished using a second camera (the reason for the FLIR One™ having two lens openings) which records a higher resolution image in the visible light spectrum.
The camera’s smart firmware then processes that visible image to detect the edges of objects, and superimposes those edges on an interpolated version of the IR image – a process which FLIR® refers to as ‘MSX’. It is very clever, and turns a small, pixellated image into something which almost looks as if it was taken at the same resolution as FLIR’s top of the range systems.
 The snag is that the IR image only contains as much data as it can within its original 160 x 120 pixel image. If a hot-spot is too small to appear in that, it cannot appear in the processed composite image at the end. A distant field with tiny dots of sheep will not show those sheep.
Superimposing the visible edges also makes the blurry interpolated IR image look much sharper than it is – it ‘locks in’ the slightly blurred edges of objects. This makes it much easier for you to identify objects in the image. If you capture images in the dark, so that the visible light camera cannot contribute anything useful, you will notice that sharp edges appear blurred in comparison with those obtained in the light and benefiting from MSX. The FLIR ONE app allows you to turn a light on to illuminate closer objects, to counter this.
What it does not do
More sophisticated IR systems do a lot more than produce an image: they allow you to set temperature/colour scales, and to measure temperatures at any location within the image. To a degree, the FLIR One™ does too, but not in the same way.
Normally the firmware selects the temperature/colour scale automatically, so that the range and contrast appear best. If you wanted, say, to compare two different shots of the same objects, you can ‘freeze’ the scale so that it is not automatically adjusted. You might even, with a bit of ingenuity, emulate a fixed scale of your choosing: place in the view a cool object, slightly colder than the coldest in the rest of the image, and a warm one, warmer than the rest, and keep those two objects at the same temperatures. But that is an elaborate workaround.
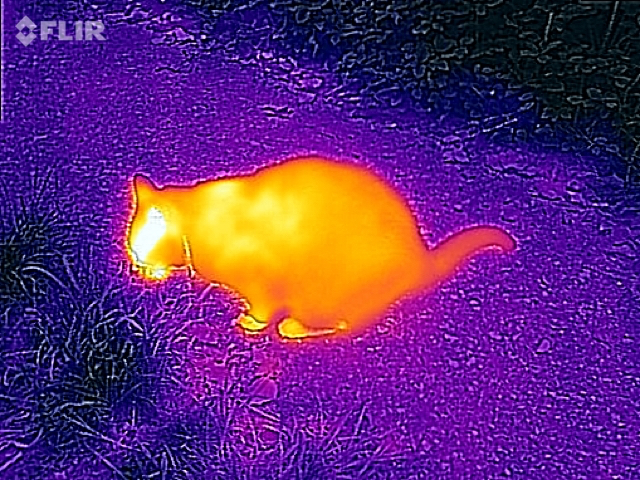
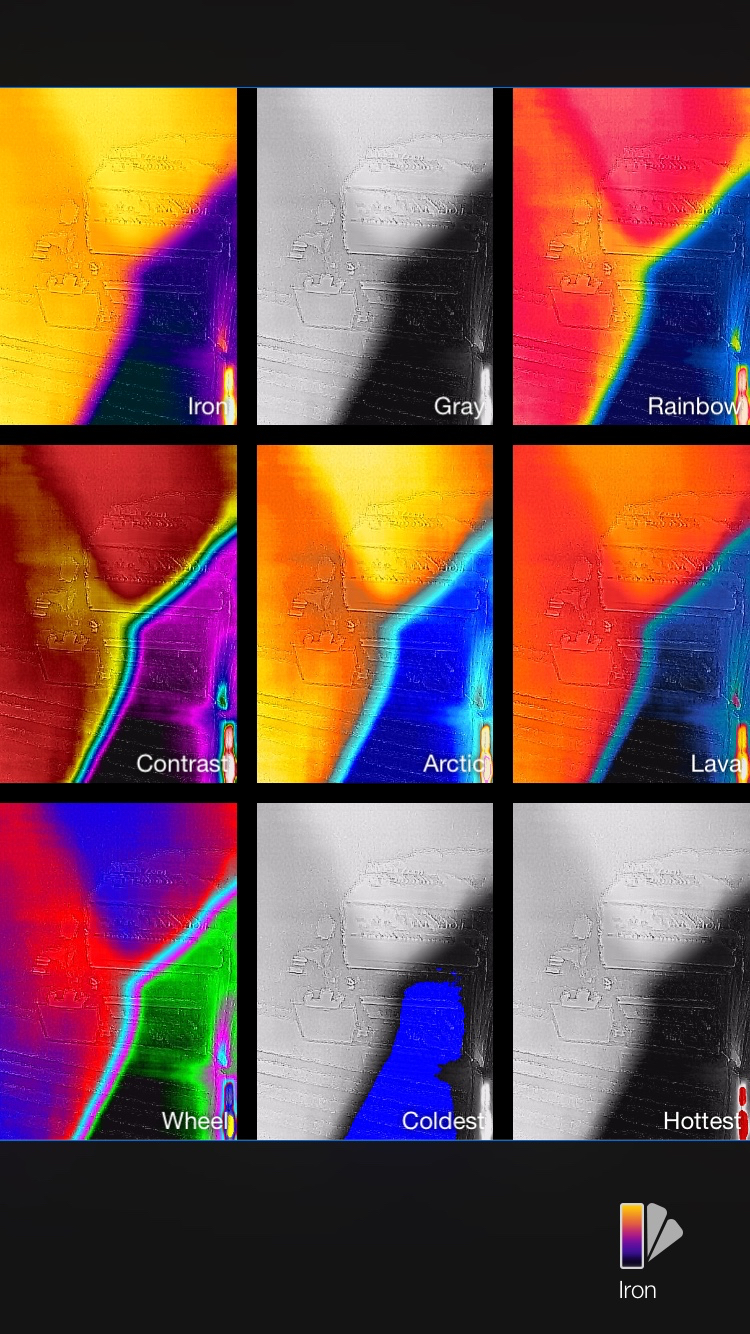
You can change the colour scheme used to portray temperature. Almost all my images are taken using the standard Iron scheme, the one which I have used for the last 25 or more years, which seems both intuitive and meaningful: the coldest areas are shown in black, cool in blue, rising through purples, to warm in orange, and hot in yellow and white.
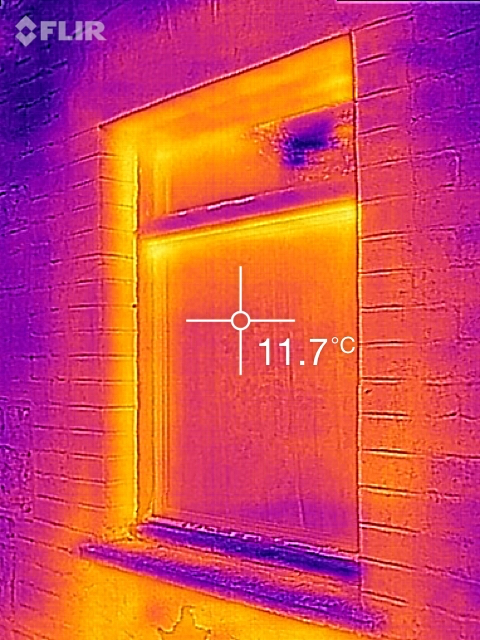 The free FLIR ONE app allows you to get a spot temperature from a single pixel in the middle of the image, but no more.
Extras
The FLIR One™ has some very natty extra features which you may find useful, even vital.
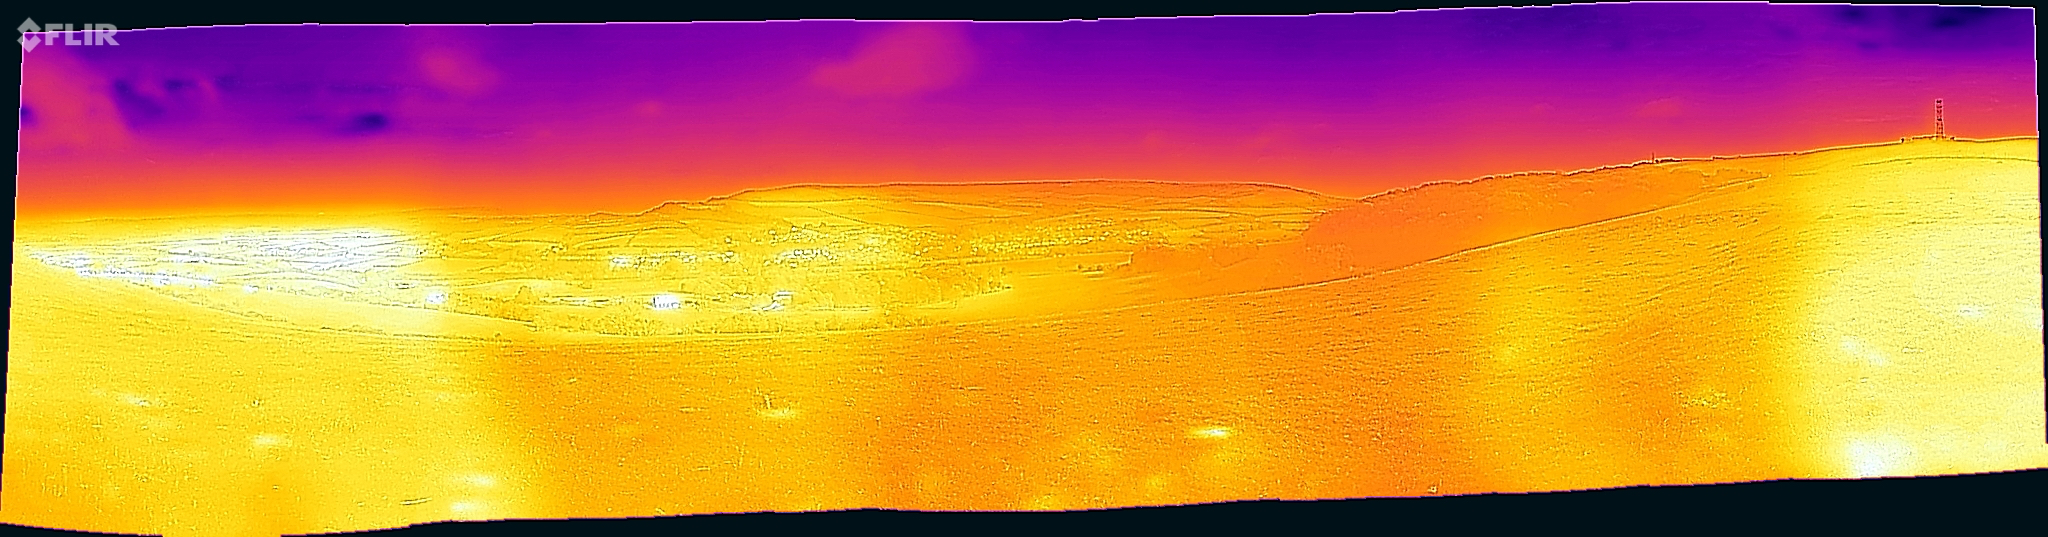 In addition to still images, it will also capture 640 x 480 movies, stitched panoramas, and time-lapse shots. Because of its low resolution, panoramas of distant views such as the countryside are disappointing, but the firmware can stitch together those of much closer objects, if you wish, and they are more likely to appear impressive, and be functionally useful.
Third-party apps (which I will cover in a later article) offer ‘burst mode’ capture, of several different versions of the same image using different colour schemes, and the concurrent visible light image. They can also attach GPS co-ordinates to images, and more.
Power
The FLIR One™ contains its own internal rechargeable battery. This has the advantage that use will not drain the battery in your iPhone or iPad much, but the disadvantage that it does limit camera use. The outcome is that each charge will be sufficient to operate the camera for around 30 minutes, perhaps rather more, but not several hours.
One possibility which is worth exploring is whether you could operate the FLIR One™ tethered to a larger capacity USB battery (one of the many portable chargers, for example) to achieve longer use. I have yet to try that.
In use
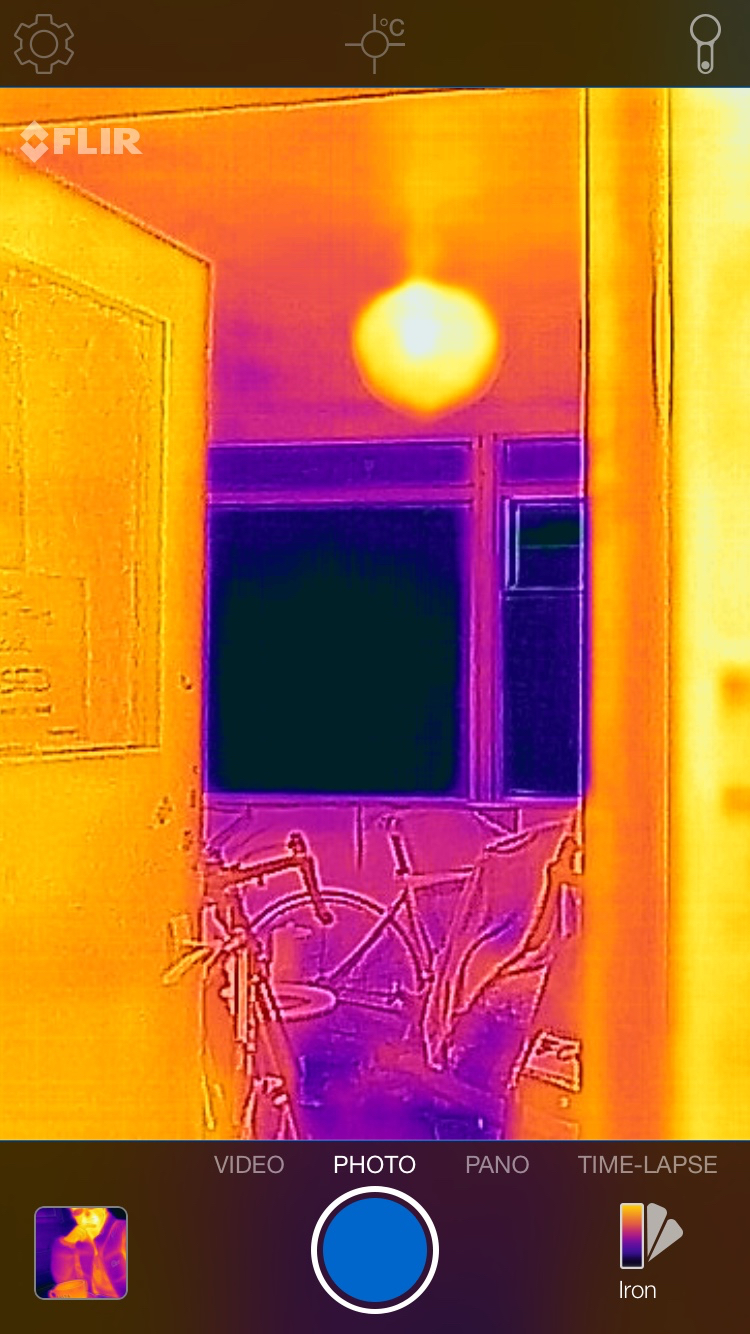 The standard free app, FLIR ONE (iTunes Store), provides fairly comprehensive access to the camera’s main features, using a similar interface to the standard Camera app.
 The simplest way to start it all up is to remove your camera from its protective housing (which comes with a convenient lanyard), attach the camera to the Lightning port, and turn the camera on by pressing the power button on its side. iOS will then ask you whether you wish it to recognise the device: agree to that, and the app will start automatically.
 From this live image display, select the Settings tool (top left) to adjust the emissivity and other controls. FLIR advises that you use this sparingly, and that is good advice at least until you know what you are doing. By default images will be saved to your main photo store, which most users will prefer, although you can alter that if you wish.
 At the bottom right of its main display is the tool to change colour schemes. Although others may be more useful to you, I was happy leaving it in the default Iron much of the time.
Periodically, whilst the camera is running, it will automatically recalibrate itself, which takes just a second or two. Unfortunately it sometimes does this while you are shoooting a movie or making a panorama, which results in momentary unevenness. In return for this slight glitch, it does ensure that the camera remains quite accurate.
If you search the Internet, you will find a few papers claiming that IR thermography is not accurate, for instance when measuring skin temperatures. Fortunately most if not all of those are flawed, studies undertaken by those who either did not understand the limitations to their techniques, or who chose to ignore a lot of basic physics. Used carefully and with understanding of the physics involved, you should get as accurate temperatures from your FLIR One™ as you will from anything under £2000.
My final comment about the camera in use should be almost obvious: although very small, the camera adds a significant chunk to the bottom of your iPhone or iPad, which is kept there by its Lightning connector. You will want to be very careful not to drop or otherwise damage the camera and phone, but I have not yet seen a suitable case system. The camera comes in a good protective plastic enclosure, which prevents any damage to its connector or lenses when not in use.
Once you have captured photos and movies using your FLIR One™, you will then want to sync those images and movies back to your Mac, which is readily accomplished over iCloud, by docking your iPhone with your Mac and opening Photos, etc.
