

I often use my digital camera to take RAW shots of paintings, as it has excellent macro capability. However if the painting is to make best use of the available resolution, some lens distortion is inevitable. One of the main reasons that I have stuck with Adobe Photoshop is for its excellent correction tools for such distortion. With Affinity Photo, I no longer need to resort to Photoshop.
Here is a simple example of how I use Affinity Photo to get RAW shots of paintings looking at their best.
I open the RAW image, which takes me into Develop mode (Persona). There I ensure that the Basic, Detail, and any other panel presets, are left at Default. I then click on the Crop tool in the lefthand toolset, and adjust the edge of the crop so that it is just outside the margins of the painting, in the image.
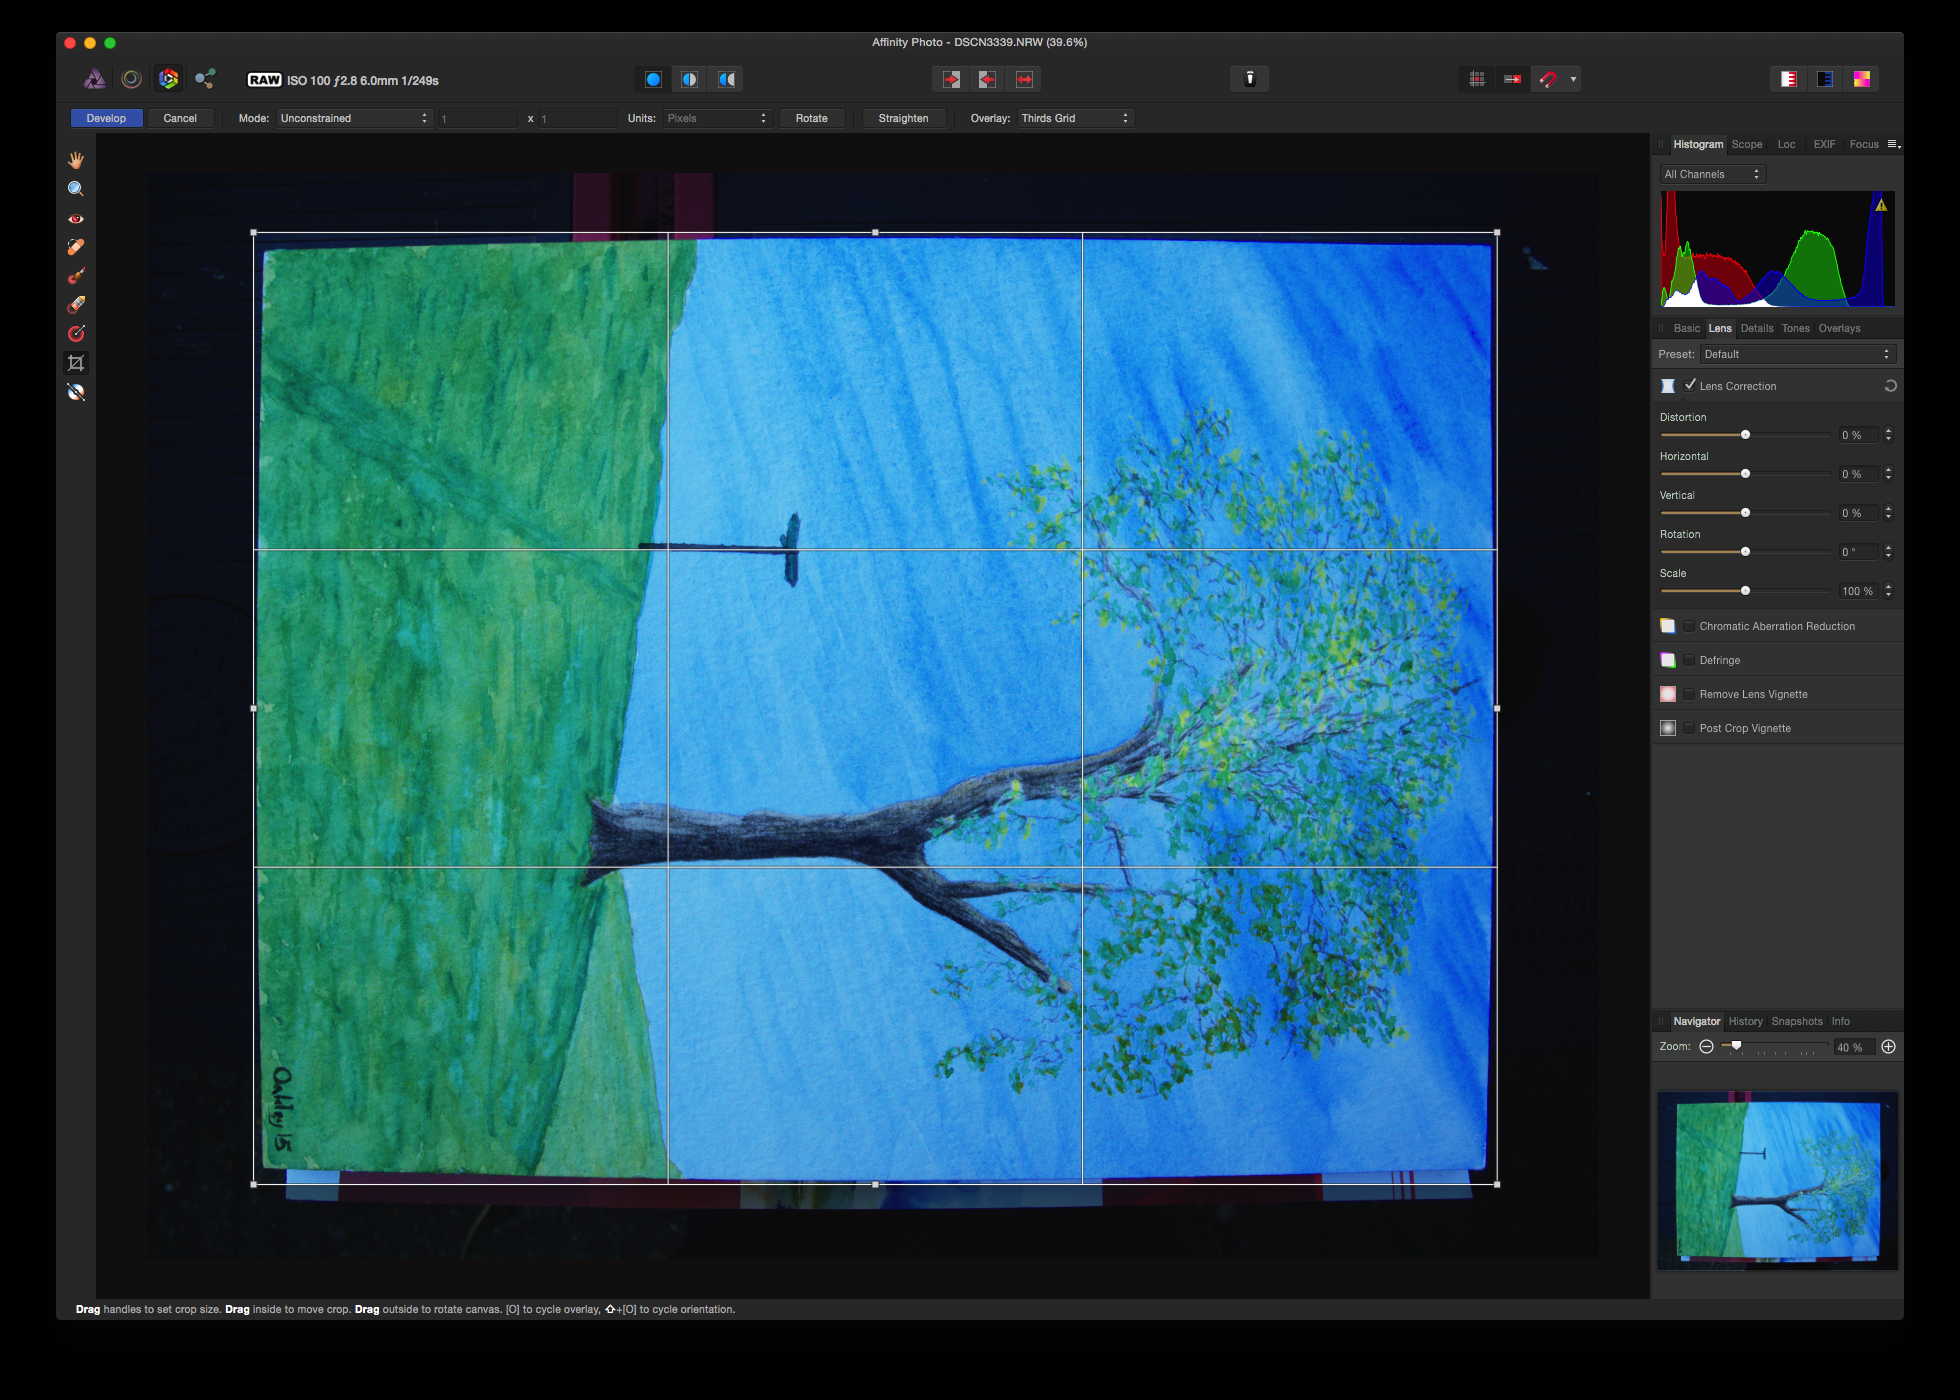
Some users prefer to place the corners of the crop box on the corners of the painting; because this dims the existing edges of the painting (where they lie outside the crop box), at this stage I prefer to include the whole painting within the crop box, so that adjustments will be as accurate as possible.
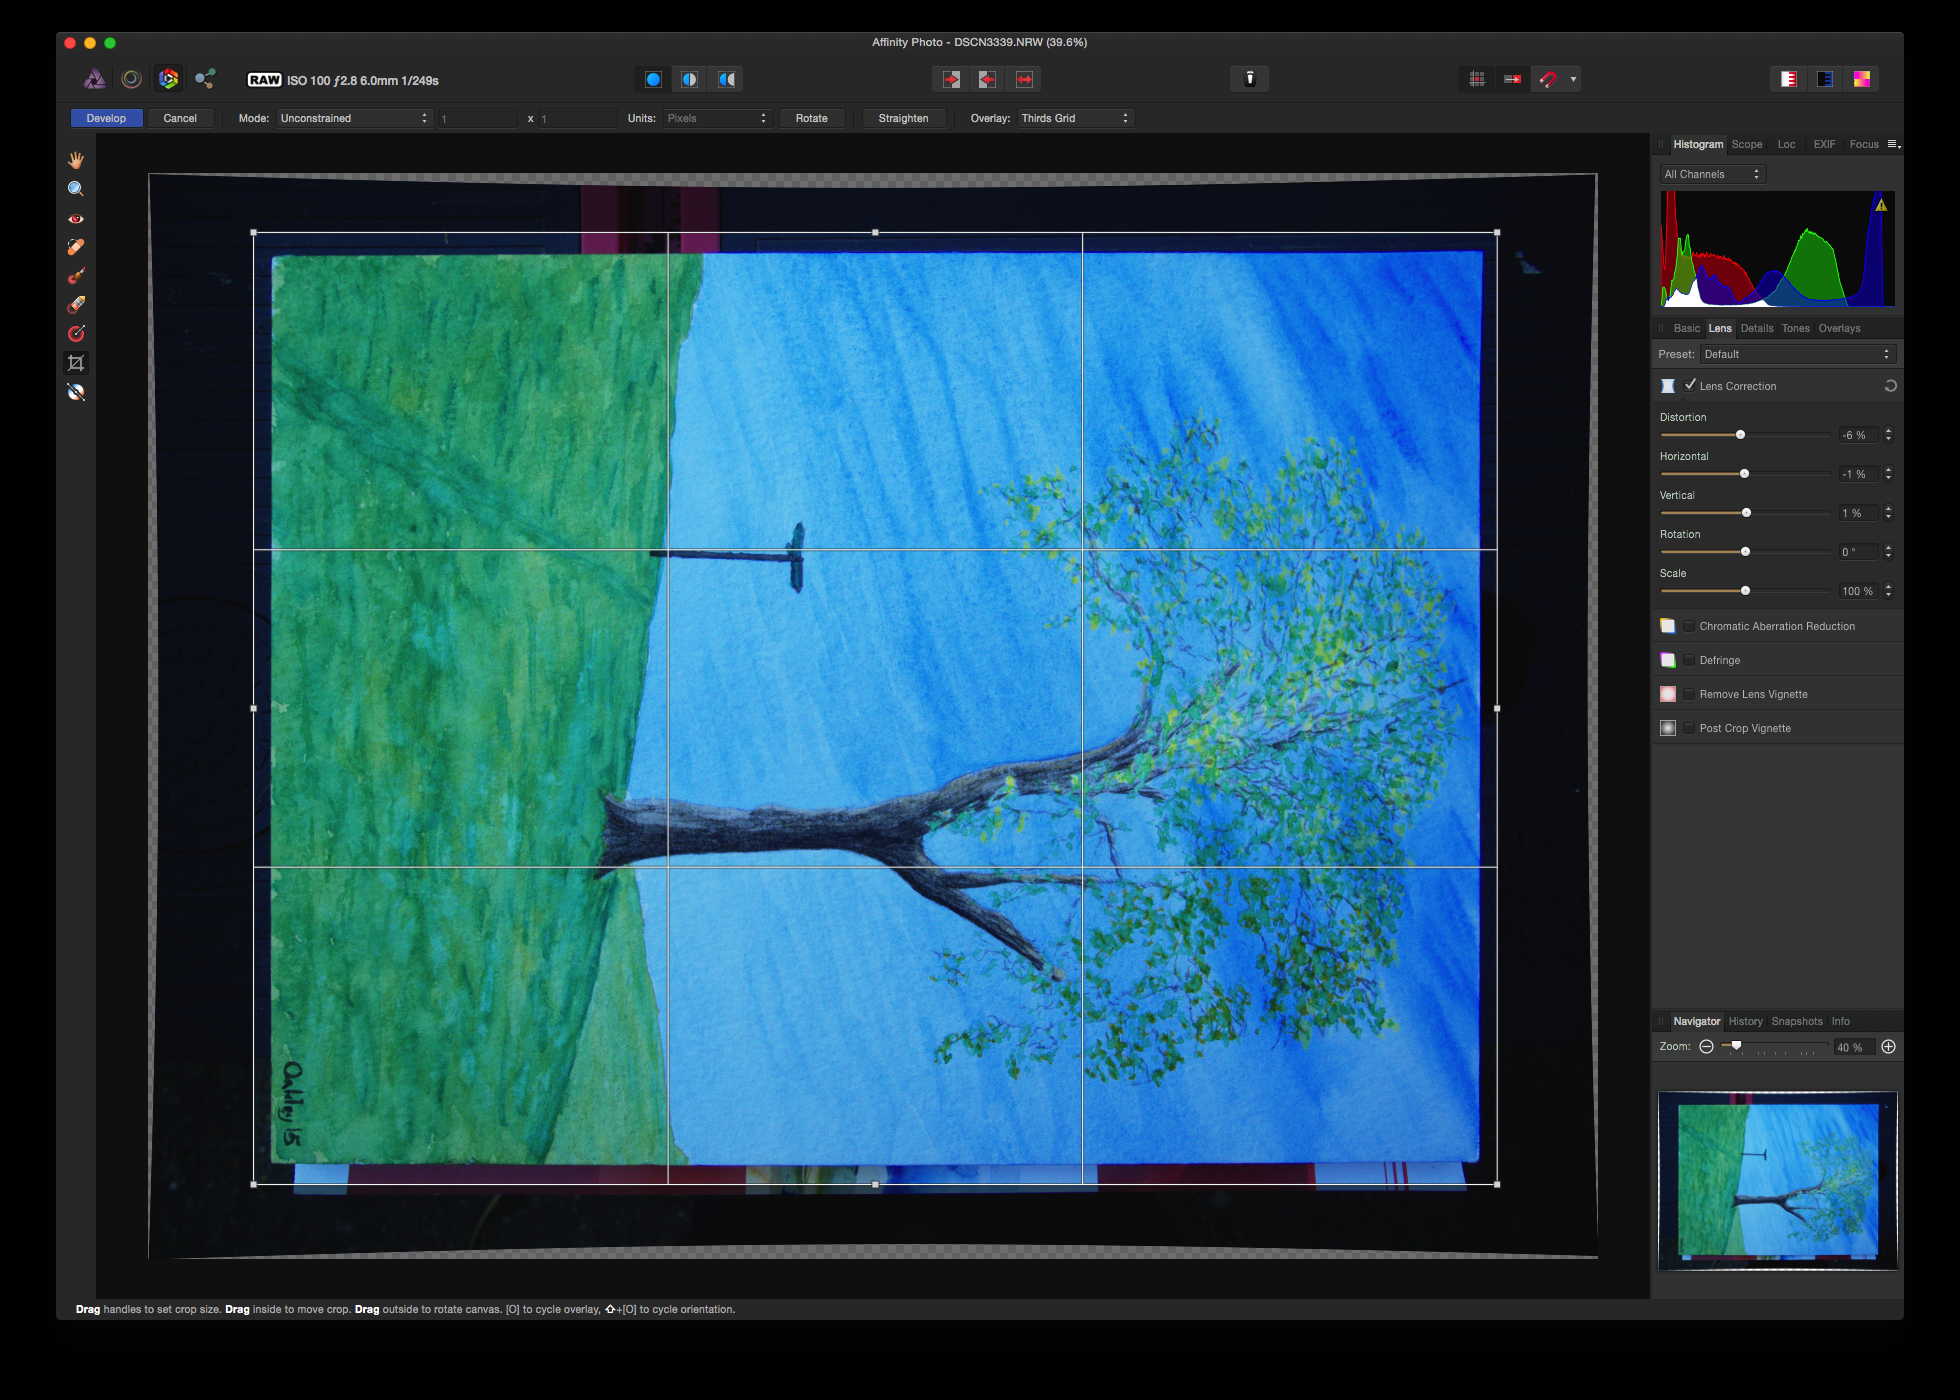
In the Lens panel, I then adjust the controls to make the edges of the painting as close, and parallel, to the crop box. I find this easier when the crop box remains outside the edges of the painting throughout. You may also find it helpful to enable the View/Show Grid menu command.
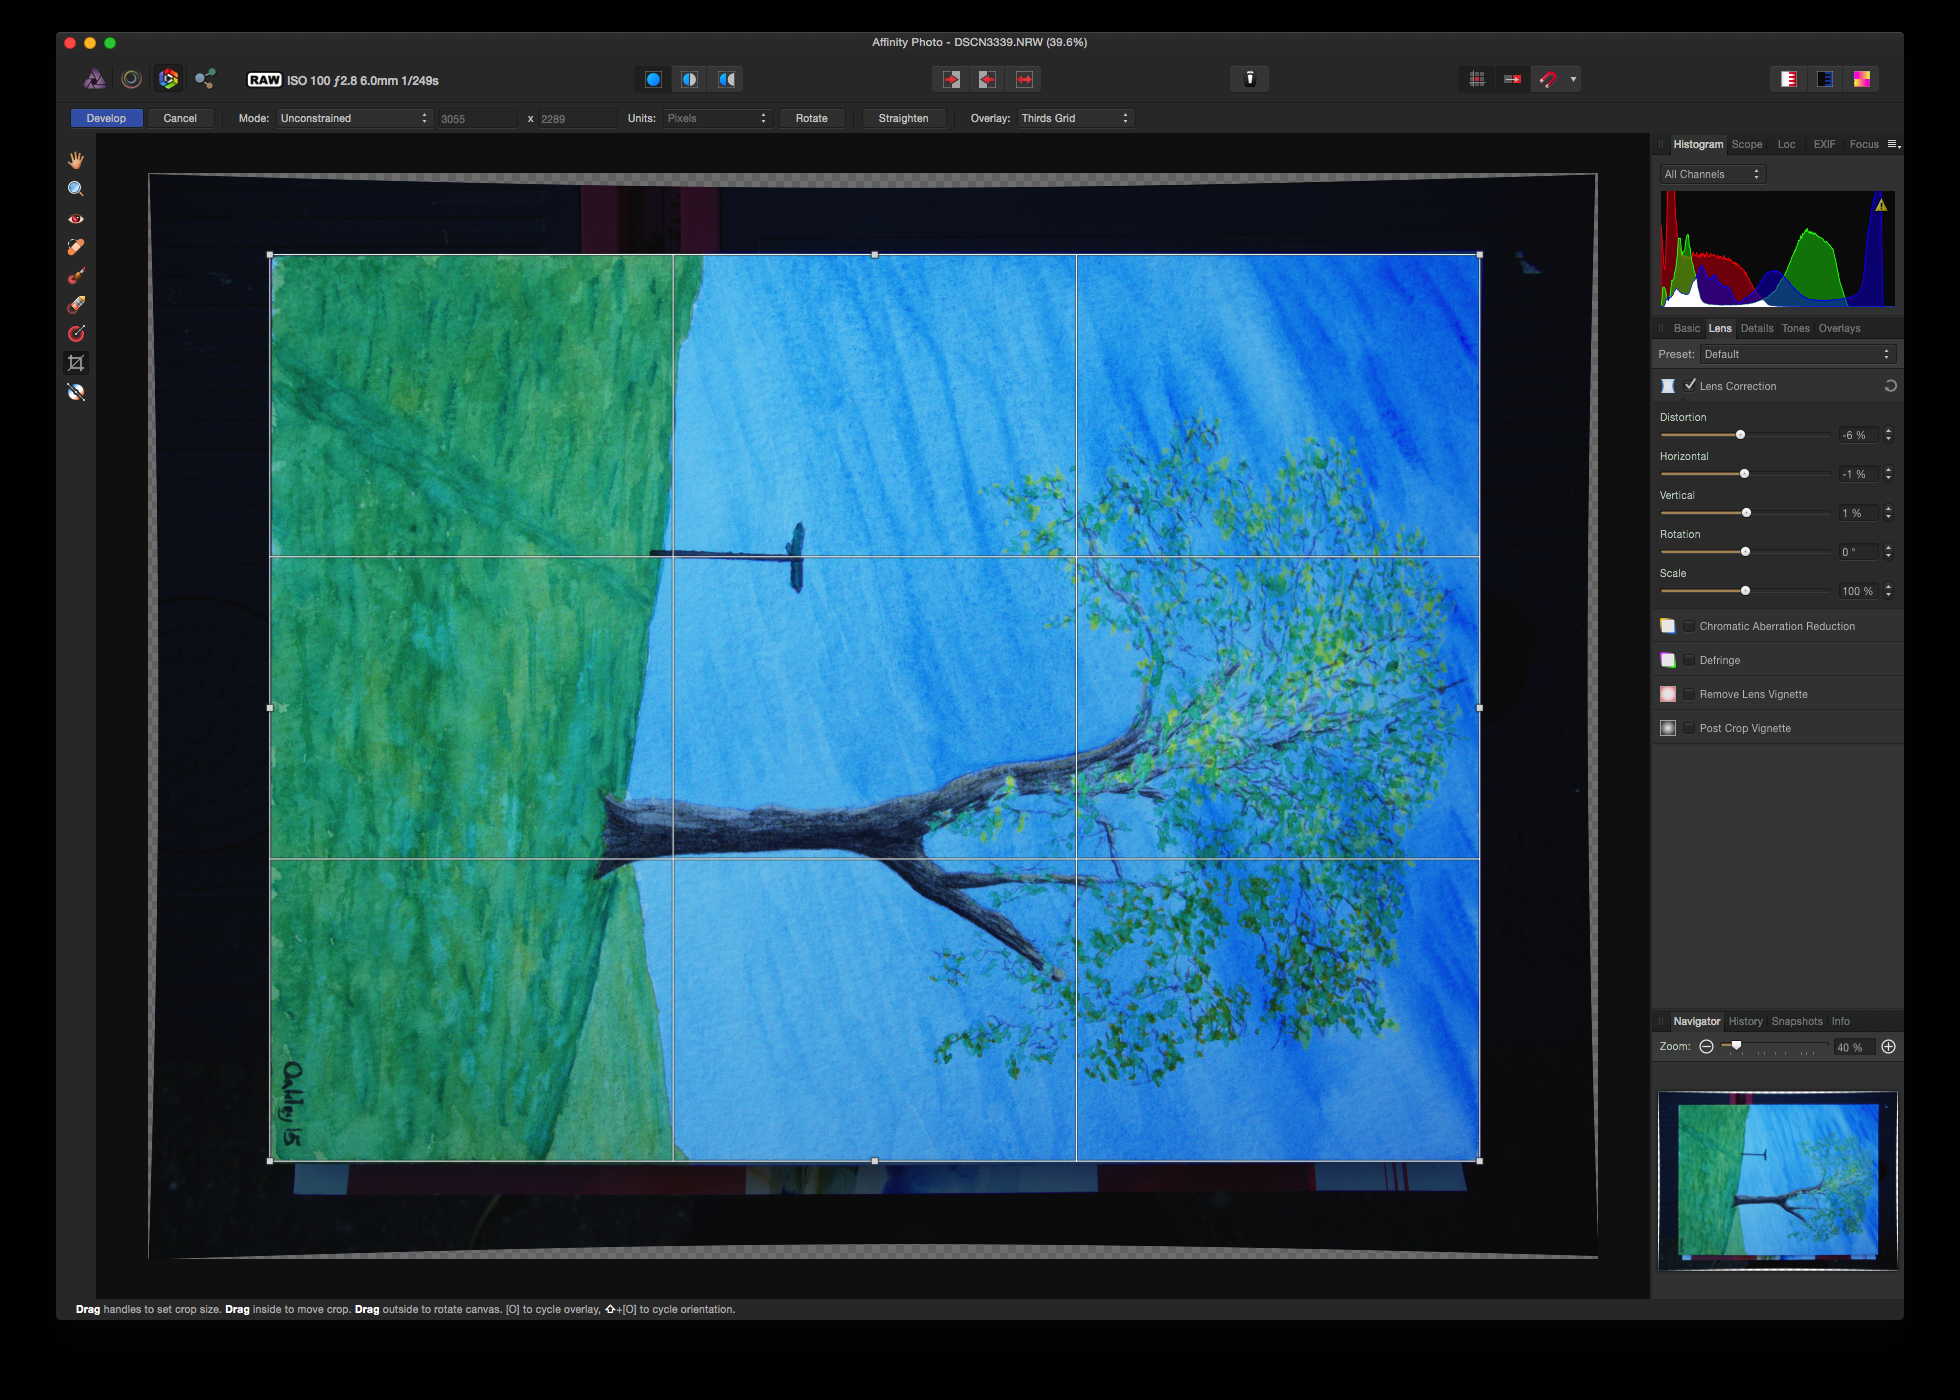
Once I am happy with the Lens settings, I re-adjust the crop box to set it to the edges of the painting.
I then use the Basic, Detail, and other panels to perform any remaining adjustments to the image, before clicking on the Develop button. If you have a lot of similar images to process, you might find it wortwhile saving a Lens preset. However in my experience the adjustments required vary so widely between different images that this does not save time or effort.
Note that at present, having adjusted for distortion, if you switch to a different panel, such as Basic, and then return to the Lens panel, you may see that your previous settings have apparently been blown away and the sliders set back to the Default preset. This seems to be a minor bug, and so long as you do not try changing those settings again, your original ones will stand (and remain reflected in the image as shown).

Rotating the image 90˚ is deferred until you have clicked on the Develop button, and is a simple menu command in the Photo mode (Persona).
Once again, Affinity Photo does everything that Photoshop does, at a fraction of the cost. And you only pay for it once, not every month. Thank you, Serif.
