
So far in my exploration of Big Sur’s new Time Machine feature to back up to APFS (TMA), I have covered exclusively backing up to local storage. This article looks at configuring and using TMA’s backup storage on a shared disk over a network – in this case, a shared APFS volume on another Mac running Big Sur.
Configuring the server
The fundamental requirements for the shared folder or volume on the server are that it’s shared using SMB and designated as being available for Time Machine backups. For the sake of simplicity here, I formatted an external SSD on the server in APFS Case-sensitive format, then ensured that volume was already added to the Time Machine exclusion list on the server, so that the server wouldn’t try to back it up.

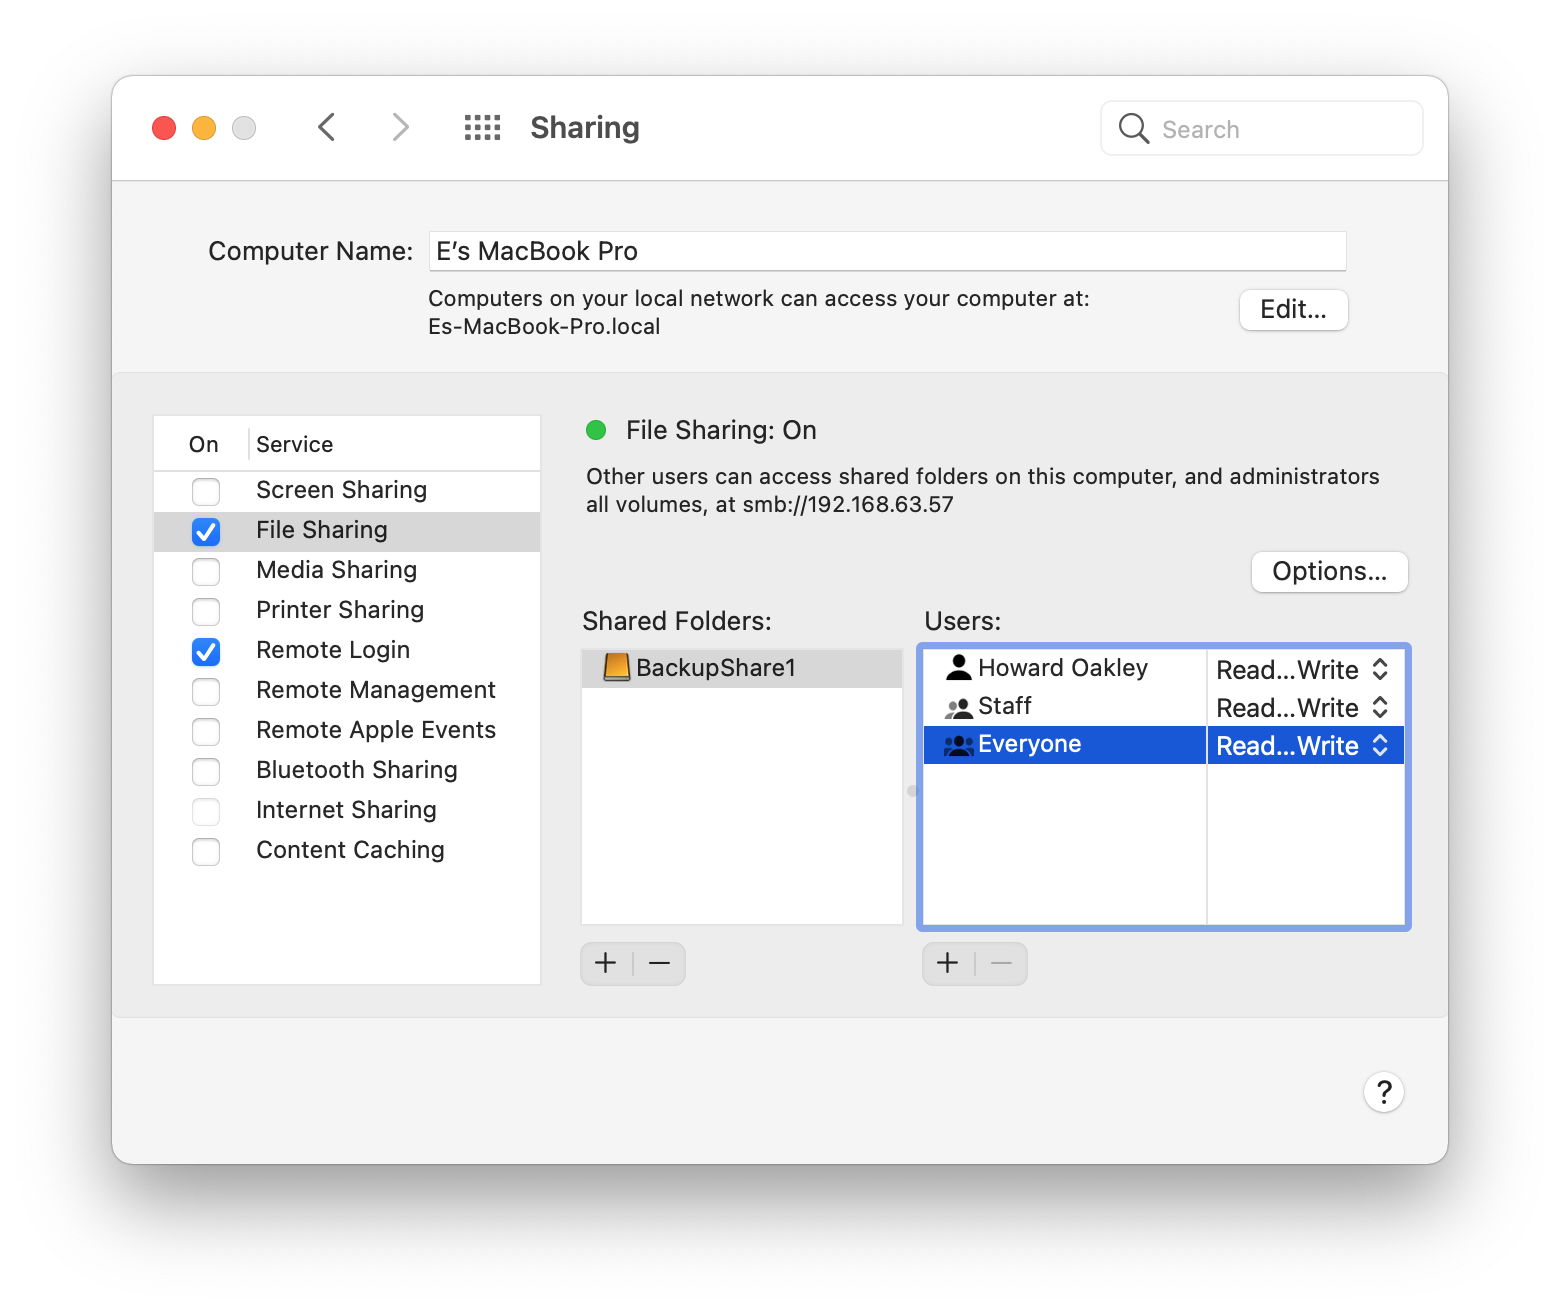
With the volume/folder to be shared mounted on the server, click the + tool at the foot of the list of Shared Folders, and add the shared volume/folder to the list of Shared Folders. Check that the list of users is appropriate, with the correct permissions, then click the Options button.
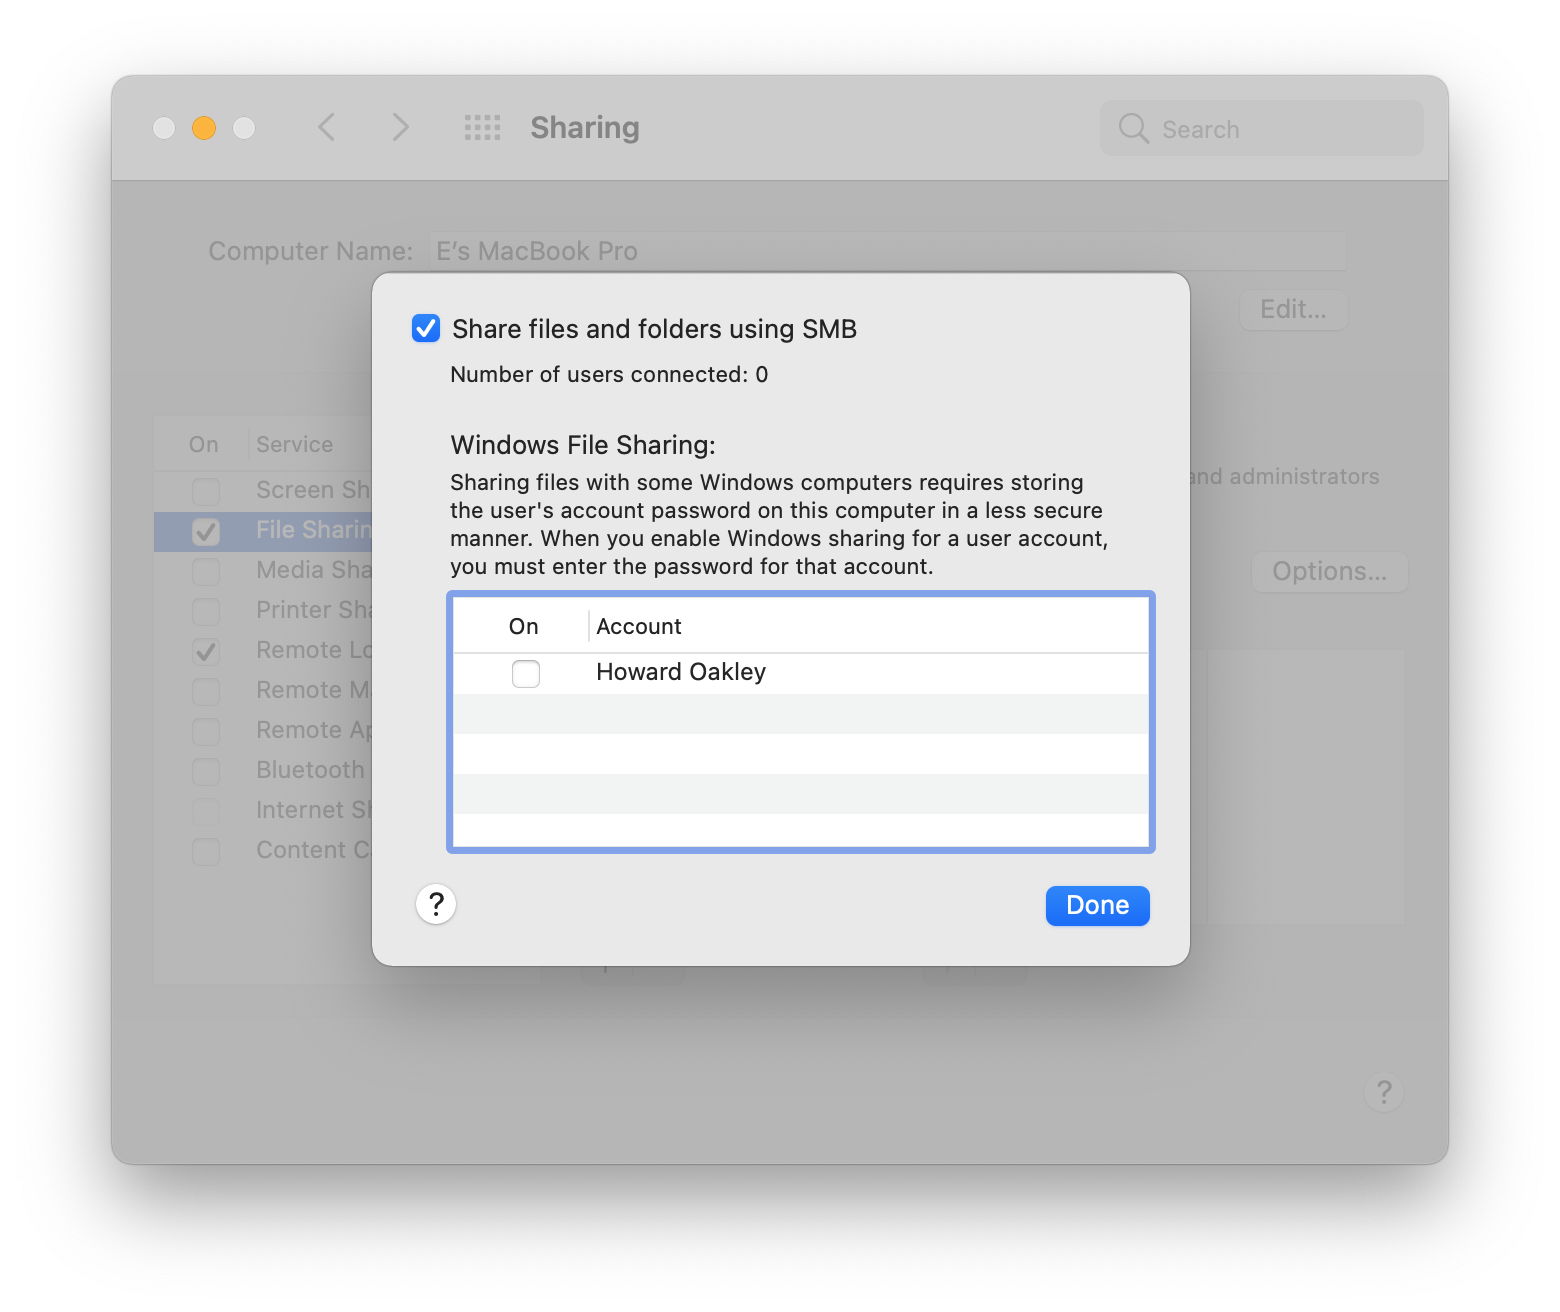
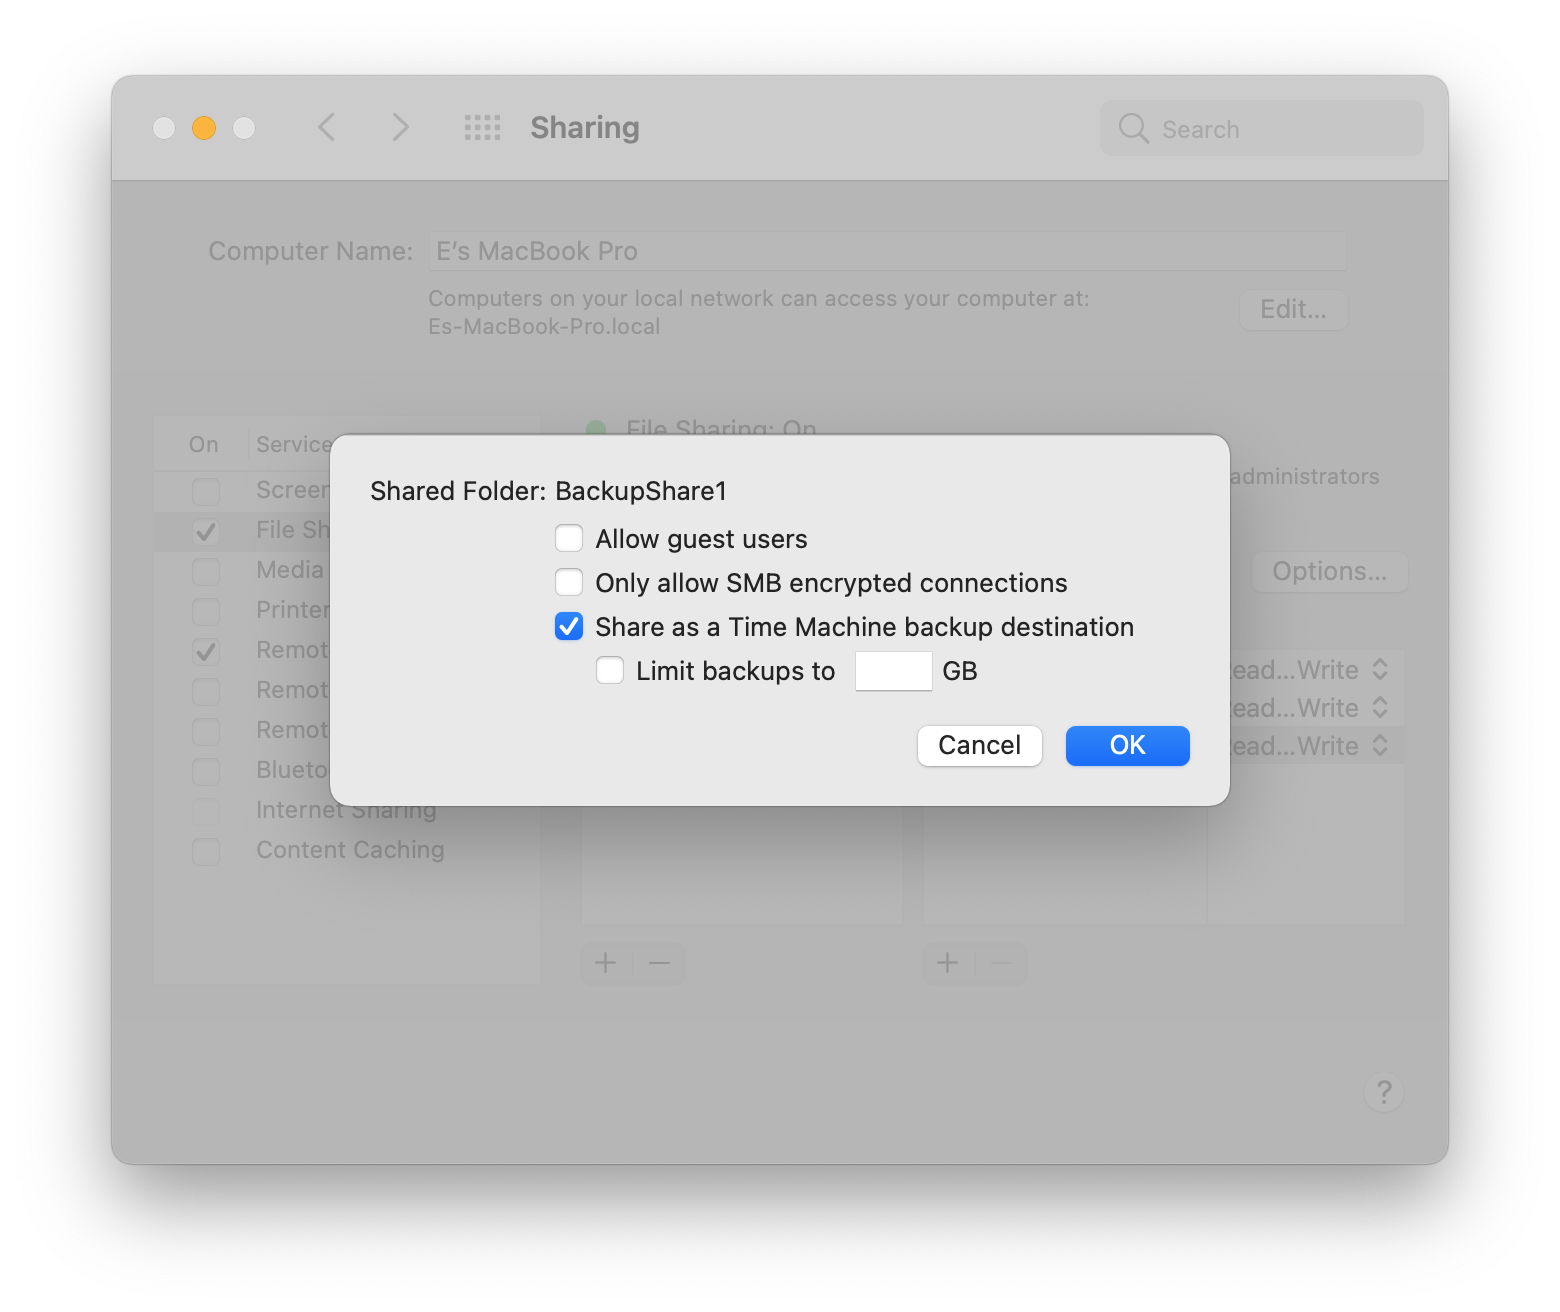
Ensure that the files and folders will be shared using SMB; the older alternative of AFP has long been deprecated and shouldn’t be used. Then select the name of the shared volume/folder in the Shared Volumes and Control-click it to bring up its options. There tick the third item, to share the volume as a Time Machine backup store. If you want to enforce any maximum size limit on this share, this is the place to set that too.
Check the remaining options, particularly users and their permissions. Your network share is now ready for connection.
Configuring the client
Ideally, particularly for the first full backup, ensure that both the server and client are connected to the local network using wired Ethernet. Even backing up a fairly modest internal disk is going to take an hour or more if left to a Wi-Fi connection.
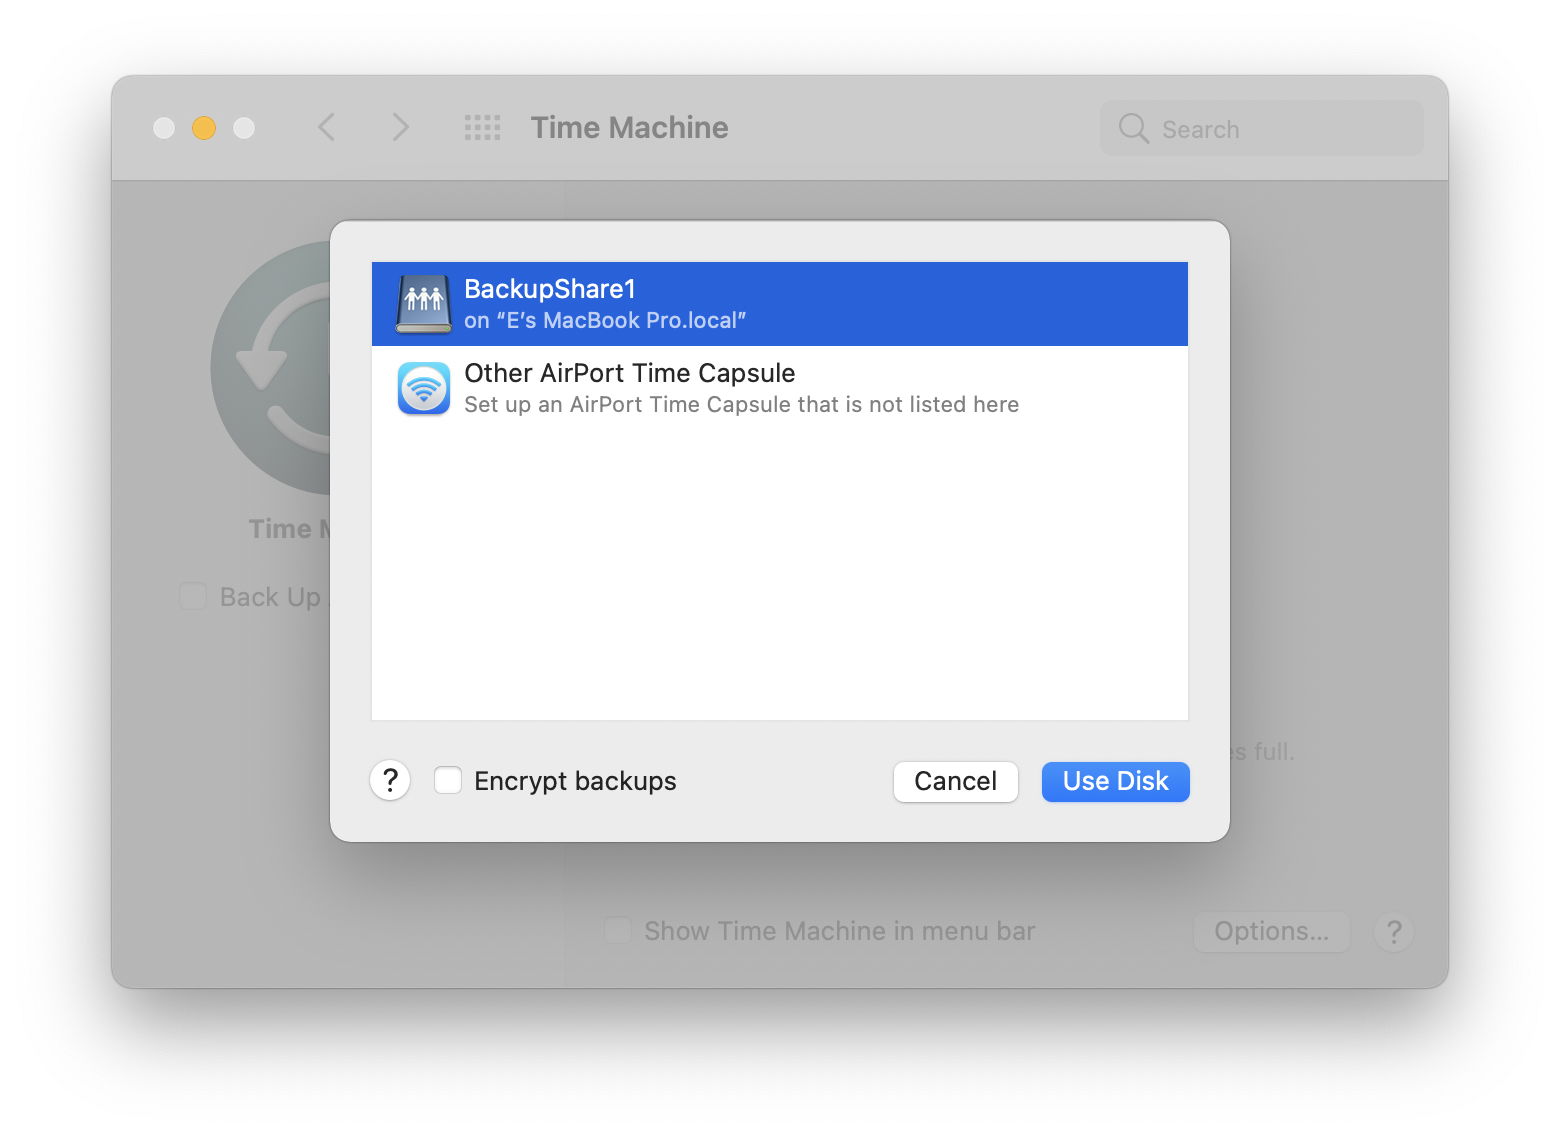
On the client which is going to back up to that network share, open the Time Machine pane and configure any exclusions using the Options button. Then click the Select Disk… button, and you should see the network share. Select that, decide whether you wish to encrypt the backups, and click Use Disk to start the countdown to the first full backup.
You’ll then be required to authenticate to the server, and Time Machine will construct a special type of sparse bundle on the shared volume.
Time Machine will next start its first full backup to the network share.

Although the Time Machine pane shows a useful progress indicator during the backup, its estimate of time remaining is quite flexible. You should also expect it to show Zero KB available on the share throughout the backup. Backups can slow to an interminable crawl when copying very large and complex networks of folders and files, including those in Apple’s Xcode. Over Wi-Fi, transfer speeds can be as high as 50 MB/s. When copying parts of Xcode, transfer rates can fall unrecordably low, with less than 50 items/s being copied. Use T2M2’s Check Speed feature to monitor progress and reassure yourself that it hasn’t entirely ground to a halt.
Because of its more general significance, I’m posting a separate article about this very shortly. You may wish to exclude items such as Xcode from your TMA backups made over a network.
The network share
Time Machine creates a machine-specific sparse bundle in which it stores the backups. In my case, this contains 1,050 band files each of no more that 67.1 MB, giving it an initial capacity of just over 70 GB, the size of the first full backup. When mounted, the sparse bundle’s virtual volume is in APFS Case-sensitive format, just as local backup stores are in TMA. In addition to containing some custom Property List files, this special sparse bundle contains another folder named mapped, in which there’s a matching file for each of the band files. None of the band files or other contents of the sparse bundle are themselves sparse files.
Conclusions
As an implementation of TMA on a network share, this backup scheme appears to work well. It’s readily accessed through the Time Machine app, although that isn’t complemented by the same Finder interface as a local backup store is. Its main limitations appear to be those imposed by poor performance of SMB file sharing, particularly on objects which contain large numbers of small files, notably the Xcode app. Provided that they are excluded, it should prove suitable for backing up documents and the other contents of a user’s Home folder.
