
All good Macs must come to an end, and one day, unless you hoard them away, go to someone else. That someone else could be a close relative, a purchaser, or the fate of recycling. The last thing that you want to do is simply shut down one day and send your Mac away, even if it is just for scrapping. This article explains what you need to do to prepare a Mac which is running Catalina before parting with it. If yours is still running an older version of macOS, then you should find this article more helpful.
If your Mac has multiple user accounts, you’ll need to repeat account-specific items for each of the user accounts for which they are relevant: that applies particularly to iTunes accounts, iCloud, and Messages.
Backup (twice)
Before going any further, ensure that you have a full backup, and preferably another complete copy of your internal storage. When you’ve made your farewells to the Mac that has seen you through the last few years, run one last backup to Time Machine, then turn Time Machine off.
I like then to make a full clone of the boot volume using Carbon Copy Cloner or SuperDuper. If in the next few weeks I discover that something important is missing from my new Mac, I can then go straight to that clone and rescue it. I still have the option of accessing its Time Machine backups too.
Deauthorise third-party licences
Next, I work through all products which are licensed by serial numbers and authorisation systems, and ensure that this old Mac is no longer authorised for them. In the days of Adobe CS, this was very important, or you could end up wrestling with Adobe Support trying to get your licence transferred. Most schemes are much more flexible now, and might require you to log out of your account on the old Mac instead. Check for each of those apps what you need to do, and get it done next.
iTunes account – deauthorise
Having dealt with all the third-party products, turn now to Apple’s. Open the Music app, and in its Account menu open Authorisations and De-authorise This Computer. You’ll then have to enter your Apple ID password to complete that, and the process does take a few moments to complete.

If you can’t do this, or forget, you can later go in and manage your account, but this is much simpler done now if you can.
Disable Activation Lock
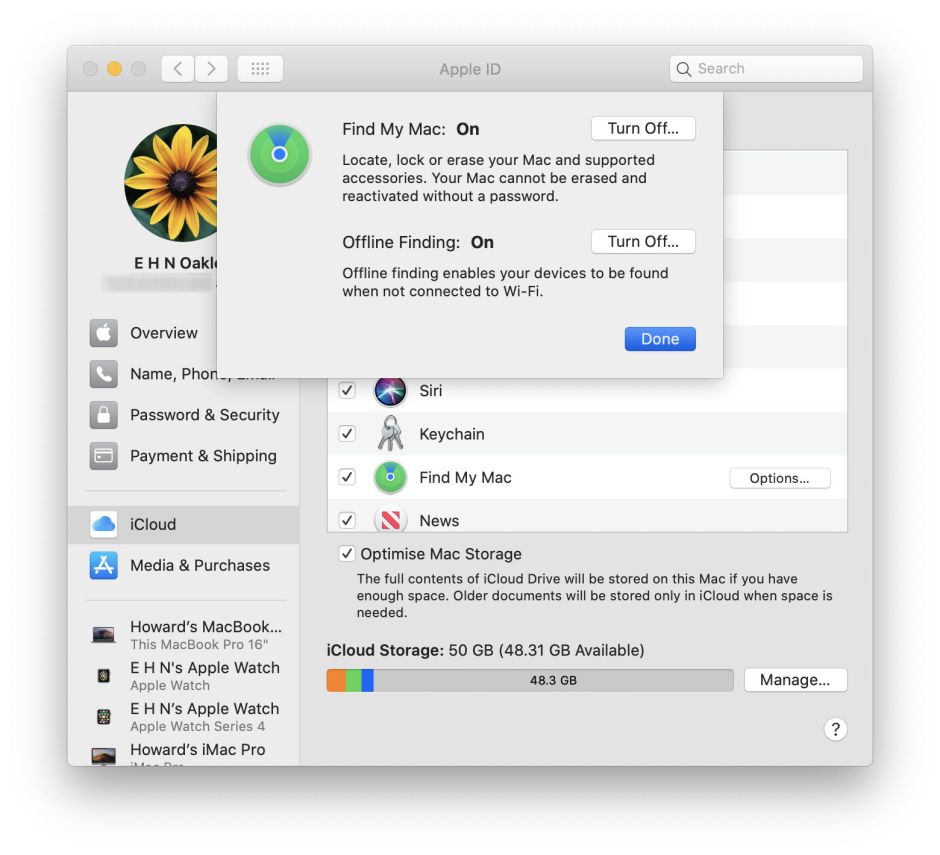
Before signing out of iCloud, if your Mac has a T2 chip you may need to turn off Activation Lock, which is engaged when you enable the Find My Mac service in Catalina. Open the Apple ID pane in System Preferences, click the iCloud item at the left, then click on the button to Turn off Find My Mac. This service will also be deactivated when you remove your Mac from your list of devices, shown at the left in this pane, and you can also remove it from your account in the iCloud.com website. Further details are in this support article.
iCloud – sign out
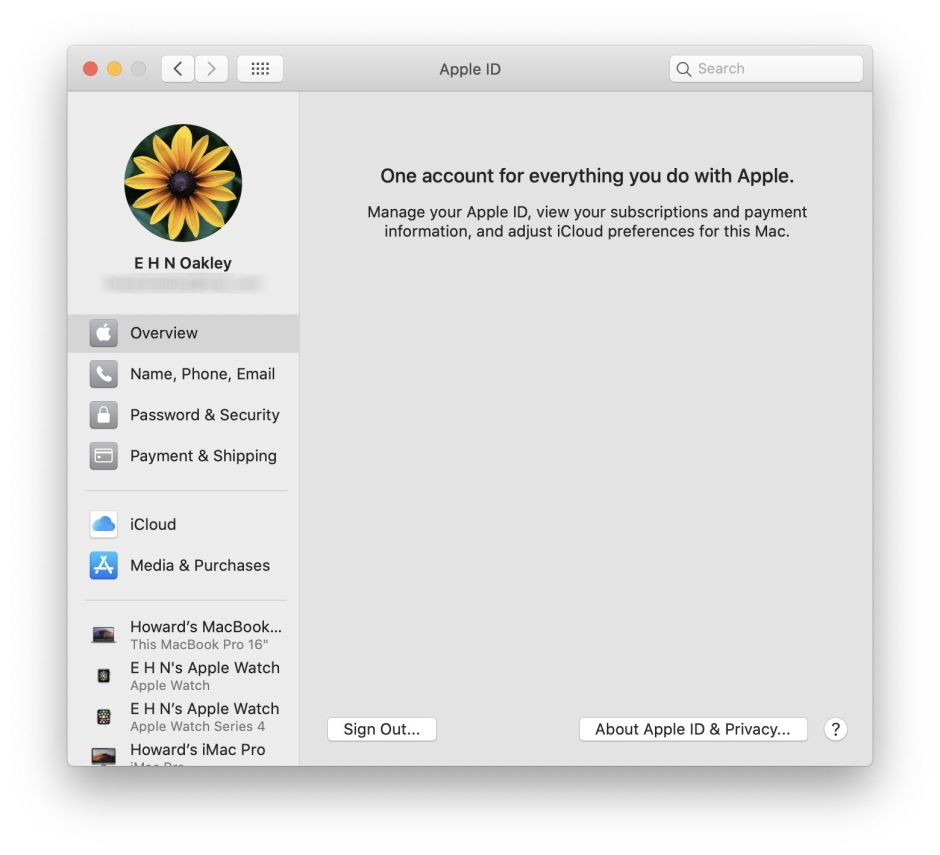
Still in the Apple ID pane, select the Overview at the left, and click the button to Sign Out of iCloud. In theory, this step isn’t essential, but in the remote chance that someone tries to connect that old Mac with your iCloud account, this is an important barrier to them.
Messages/iMessage – sign out
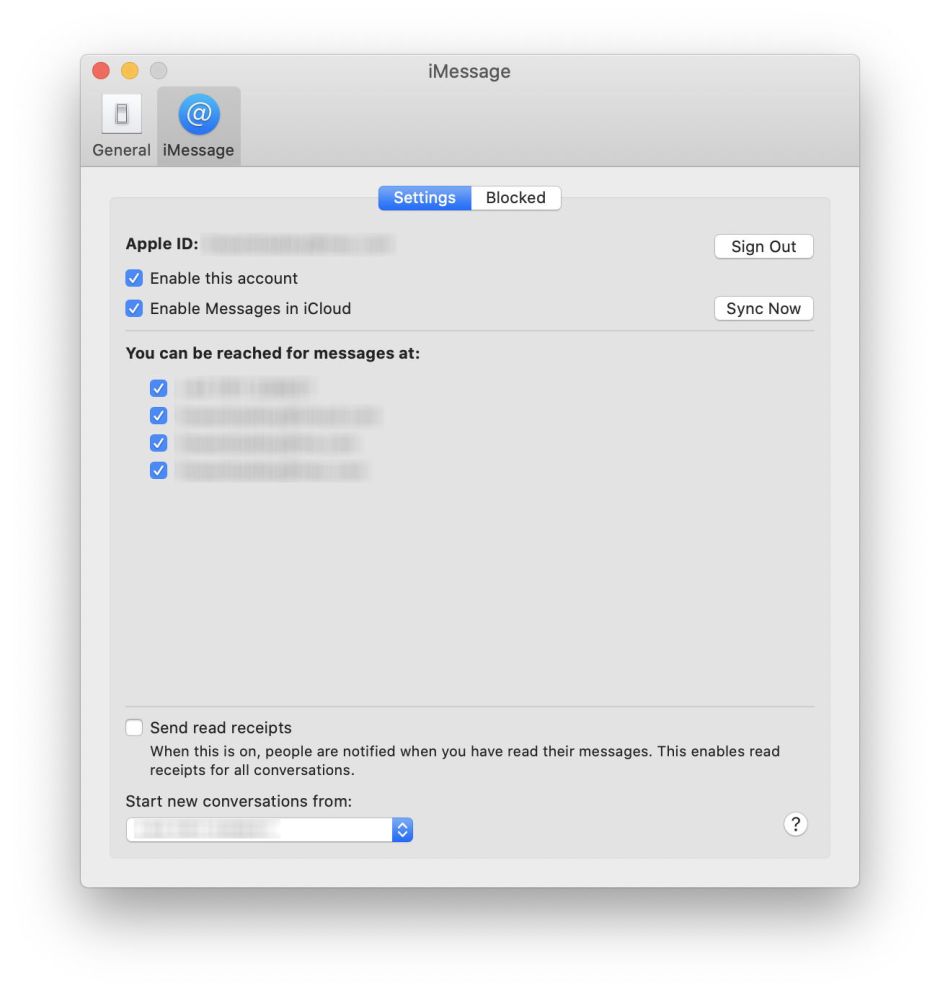
In the Messages app, open its preferences, select the iMessage tool at the top, and click on the Sign Out button to ensure that Mac doesn’t get any more pushed messages for you.
Bluetooth devices
If your Mac is going on to someone who will use it, you’ll probably be passing on its Bluetooth input devices, such as wireless mouse, trackpad and keyboard. In that case, you don’t need to do anything with them now. (But remember to turn them off when you finally shut the Mac down.)
If you’re going to keep any of those, open the Bluetooth pane and unpair them from there. You’ll then have to connect input devices using their charging cable, so that they work over USB, until your Mac is finally shut down.
If you have any other Bluetooth peripherals which you’re keeping, unpair those too.
Sanitise and prepare internal storage
You should now work through preparing your internal storage, sanitising it as necessary, as I have advised in this article.
The concluding steps in this process are common to most if not all: restart in Recovery mode (Command-R with a wired keyboard) or from an external bootable drive. Open Disk Utility, select the internal disk, and click on the Erase tool. Don’t use Partition, though.
If you’re handing your Mac on to another user, it’s good form to set it up as if it were new, by installing macOS ready for them. To do that, quit Disk Utility and in the macOS Utilities window select Reinstall macOS. You’ll need a good internet connection, as it will almost certainly download a fresh copy, although if you’ve started up from a bootable installer you should be spared that.
Note that Catalina can encounter errors here, typically when trying to remove the read-only System volume. If you then try to re-install macOS, that may well fail. The only workaround for these errors is to reboot in Recovery mode, select Disk Utility, and try again. Once you’re successful in completely removing the System volume, the macOS installer should then be able to run properly, and install a new copy of Catalina on your Mac’s internal storage. As there’s no way of checking whether it has, without completely configuring that installation, it’s important to get this step right, or your Mac’s new user could end up with multiple Data volumes.
Keep a watch on the installation as it progresses. When it reaches the first splash screen for user configuration, press Command-Q to quit the installation and shut the Mac down. When its new owner starts it up, it will then present them with that screen so that they can configure the Mac as if it was new. Finally let your Mac cool down properly, and box it up in its original packaging ready to pass on.
If your Mac is going for recycling, you obviously don’t want to mess around re-installing macOS. Shut it down, let it cool, and then work out whether you can physically destroy its internal storage. If you can’t, then provided that you have sanitised it properly, it shouldn’t present any risk. If your Mac has a T2 chip, then a good way of rendering its internal storage inaccessible is to physically destroy the T2 chip on its logic board, perhaps using a hot soldering iron.
If you can extract any hard disk or SSD without too much trouble, a heavy hammer and sharp metal objects like thick nails or punches are ideal for penetrating the case of disks and smashing their contents too. If you’d prefer to be a driller killer, then use an electric drill to put several holes through the case and its contents. Think of all the hassle that you have had with that Mac, and now have one last chance to express your feelings physically. But be very careful not to injure yourself: wear protective glasses and suitable gloves when necessary.
If your Mac’s storage has contained very sensitive data, then you should really send its storage (or a whole laptop) off for secure disposal, but that is costly.
Product listing

Once you know that your Mac is gone for good, remove it from the list of products which you own. Open the Apple ID pane on another Mac, and you should see the old Mac listed at the foot of the items on the left. Locate that old Mac in that list, check carefully that it’s the correct one, and make a note of its serial number in case you ever need that. Then tap the button to Remove from account…. You can also perform this in the Settings app on an iOS device.
All you have left now are the memories.
Thanks to @jgordonshare for pointing out the need to repeat steps for multiple user accounts, and to Bob for the electric drill tip.
