

Sometimes having an external drive that can boot one version of macOS isn’t enough: you want it to boot two (or even more). Once you have got past the confusing terms and tripwires in Disk Utility, this should prove fairly simple to set up.
Background
Before we get started, it’s important to synchronise terminology, particularly if you’re still more used to using the old Mac Extended file system, HFS+. In HFS+, a disk consists of one of more fixed-size volumes, which were often referred to as partitions. Forget that now: APFS is different, as it divides disks first into fixed-size containers (unfortunately referred to in Disk Utility as partitions), each of which then contains one or more volumes. In this article, I will only consider working with APFS, and because of the confusing usage of terms, I will stick to the following:
- a disk is the top level, the whole storage device, such as your 1 TB SSD,
- a container/partition is a fixed-size division of the disk,
- a volume shares the space allocated within a single container/partition with any other volumes within it, thus normally has variable size up to the maximum of its enclosing container/partition.
The structure and layout of bootable disks has become more complicated with recent versions of macOS and with APFS. What used to be a ‘blessed volume’ in HFS+ has now grown to four separate volumes in Mojave, and five in Catalina with the addition of its read-only system volume. Although it’s possible to squeeze more than one bootable version of macOS onto a single APFS container/partition, it’s normally preferable to keep them in separate containers/partitions, and that may prove to be essential in Catalina.
If you want one disk to contain two or more bootable copies of macOS, it is therefore best to separate them into individual containers/partitions, as that allows them to have as many volumes as they wish, for recovery, VM, etc.
Initial preparation
When supplied, most SSDs come pre-formatted in a cross-platform (read: PC) format. Your first task, once you have rescued any software supplied on the SSD and saved it to your Mac, is to format the disk in APFS. Select the disk at the left, and check again that it’s the correct one. Then click on the Erase tool.
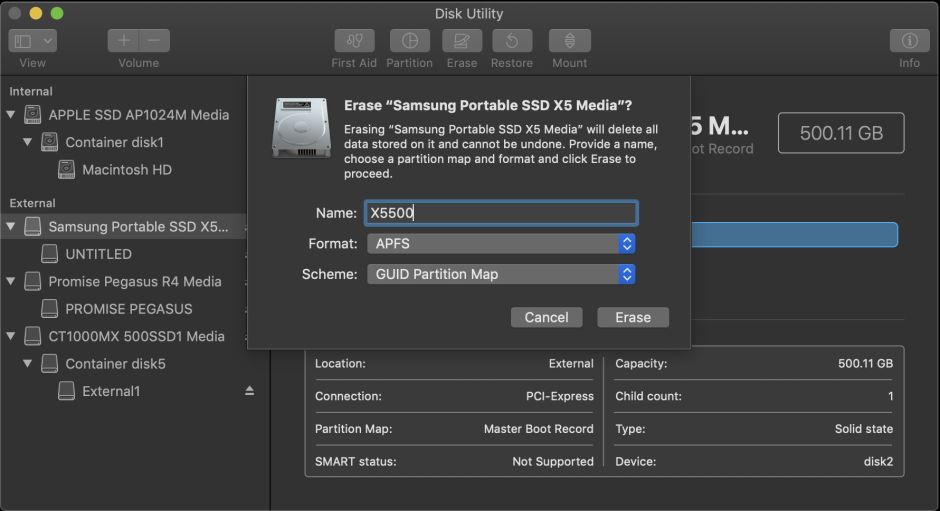
Set the Scheme to GUID Partition Map, which allows you to choose APFS as the Format, and enter a Name before clicking on Erase.
Creating the second container
When that completes, your external SSD should now have a single container/partition, with a single volume inside it. The next step is to create a second container/partition. Select your disk at the left, and check again that it’s the correct disk. Then click on the Partition tool. This drops a sheet down which asks you to confirm whether you want to add a new container/partition or volume: click on the Partition button.

Another panel drops down for you to adjust the container/partition sizes, starting with the default first container/partition. Select the Size box and type in half the size of the original (or whatever you want) and press the Tab key.
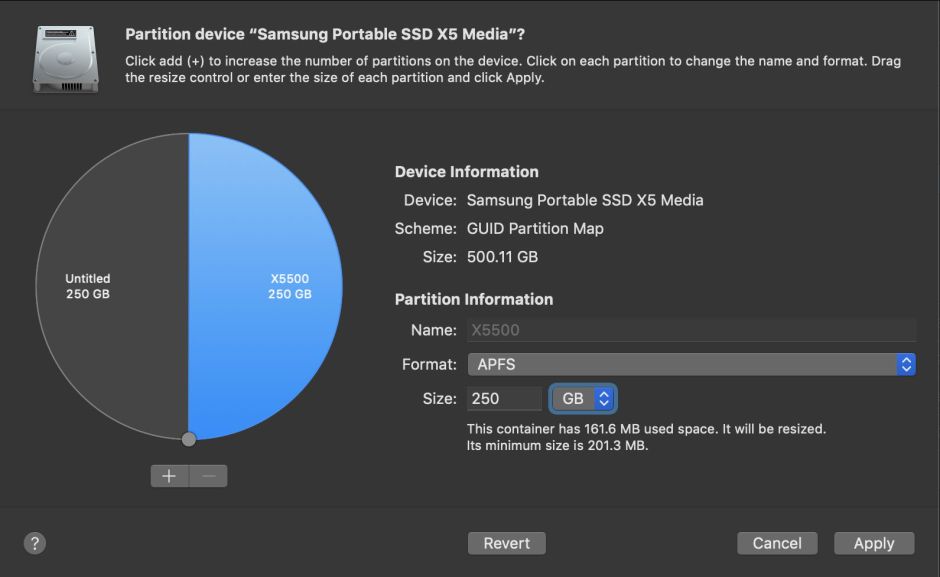
The first container/partition will then be shown as occupying half the disk. Select the Untitled item in the left half of the circle, check that its Size is the remaining half, and give it a distinct Name. When you’re happy with the two containers/partitions, click on the Apply button.

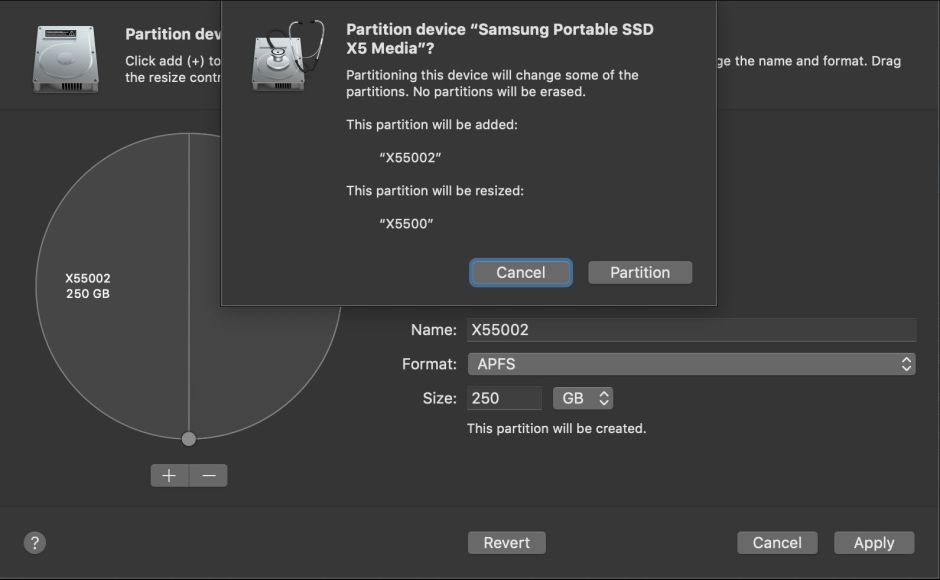
Another sheet will drop down to ask you to confirm the intended split of the single container/partition into two. Click on Partition. Disk Utility then creates the second partition, and once that’s complete, click on the Done button.
Checking
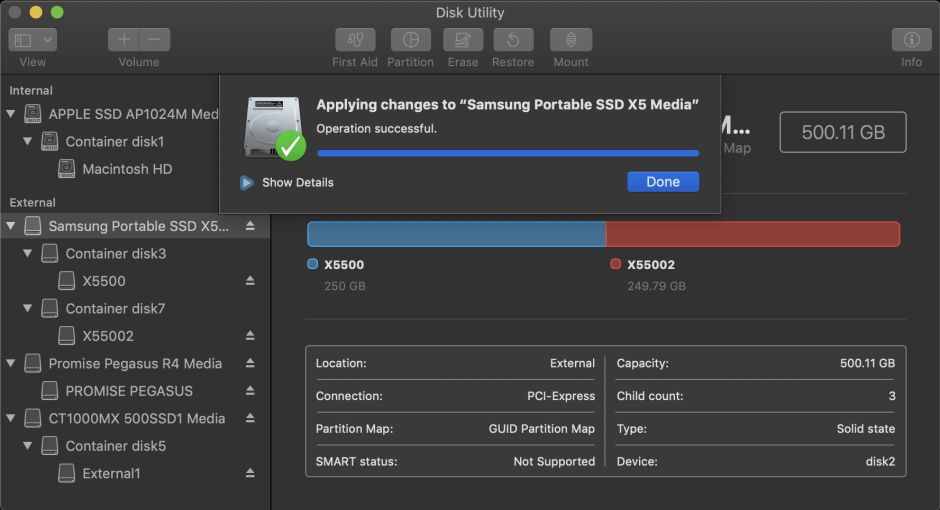
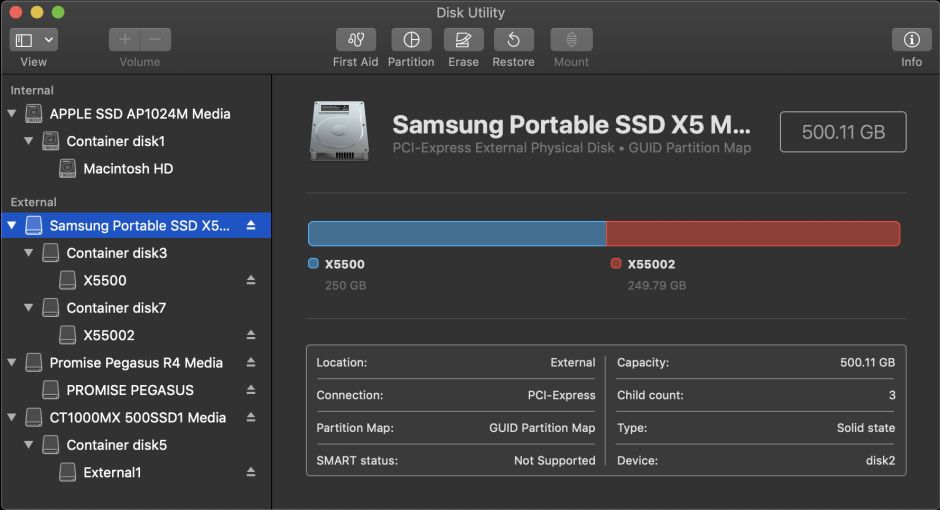
Your external drive should now have two containers/partitions, each containing a single named volume. Note how the containers/partitions are named with odd numbers, from 1 upwards.
If you now open Terminal and type in the command
diskutil list external
you should see your external disk divided into two APFS containers, each with its own APFS volume on it.

You’ll notice that your disk actually contains two APFS containers and an EFI ‘container’, and the two APFS volumes are listed in separate ‘synthesized’ disks.
Now you run your macOS installers, setting each to install that version of macOS onto the correct containers/partitions. Then you can select either in the Startup Disk pane and restart into each as you want.
